Importing Music
Accounts with the role of "Admin" will also be able to import a CSV of all their music library information - such as the song title, composer and arranger information, and stock information.
All attached files - such as sheet music and learning tracks - will still need to be attached and uploaded on the individual music pages.
To import your music library information, go to:
Admin Settings & Tools > Import and Export
Select the "import" ink across from "music".

This will bring you to the Import page for Music where you can upload a file, or download an example spreadsheet from the site if needed.
Here is an example (click to view a larger version of the image)

The only two required fields for importing are:
- a unique ID
- a title
A unique ID is required as it will help differentiate any pieces that may have the same title, but different arranger information.
There is a list on the bottom half of the import page that explains all the available fields, their character limitations, and what the fields are used for. The example file you can download (located just under the file upload field) can also be used to see "real-life" example formatting of the columns.
The file you wish to import must be in CSV format. You can convert any excel file to CSV y choosing "save as" in excel, and selecting "csv".
Select your file and then click the "proceed to file test" button.
The next page will show you your columns and the first few rows of your imported file so that you can check for any formatting errors.
In the example below, there were some new terms that were needed for Tags, so the system has added them automatically.
Below that, it shows the already mapped fields that the system was able to match base don the column headings, and the ones left that will need to be manually mapped.
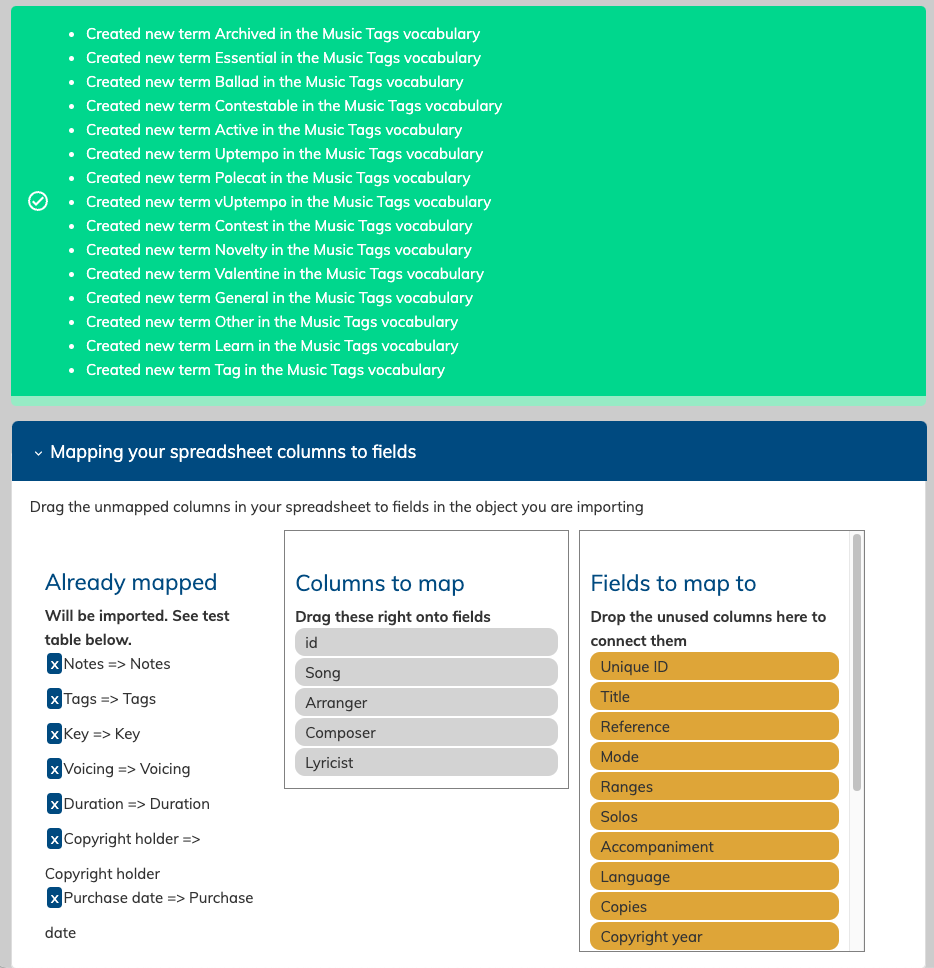
To match a column to a field, grab the grey bar and drag it over to the golden yellow bar you want to match it to. It will then be listed in the list on the left. If you make a mistake, click the blue X next to the item on the left to "un-map" it.
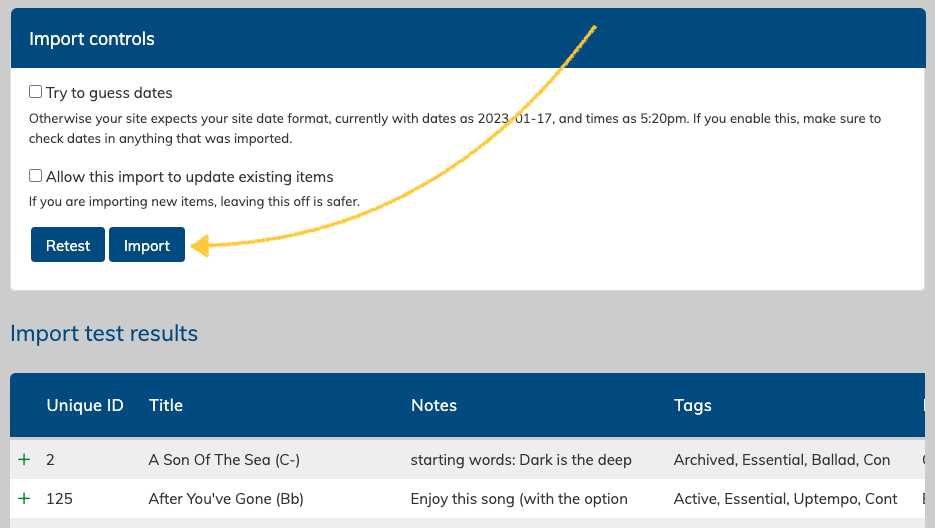
Once your fields are mapped, scroll down to check the first 10 or so rows of your spreadsheet. Be sure to scroll to the right when looking at the table to look for any columns that have red errors.
You can also use the options above the table to auto-format dates, and choose if you will allow updates. (pictured below)
If you need to make changes to your file, click the "back" button on the window to go back to the field to upload a new CSV.
When you're ready to begin importing, click the blue "import" button above the table.
Leaving "update" off is considered safer to avoid overwriting items unintentionally. Look for a pencil icon next to items in the "import test results" to spot where edits might be happening if you have this option check-marked.
But remember, the import test results only shows the first few rows, not the whole document!
UPDATE: The system will now always try to guess the best dates, and this step is no longer necessary. The checkbox for "try to guess dates" has been removed as of Dec 10th 2025
After clicking "Import" your site will proceed with importing the file. If the file is large, it will do this in batches, and it may take a few moments to complete.
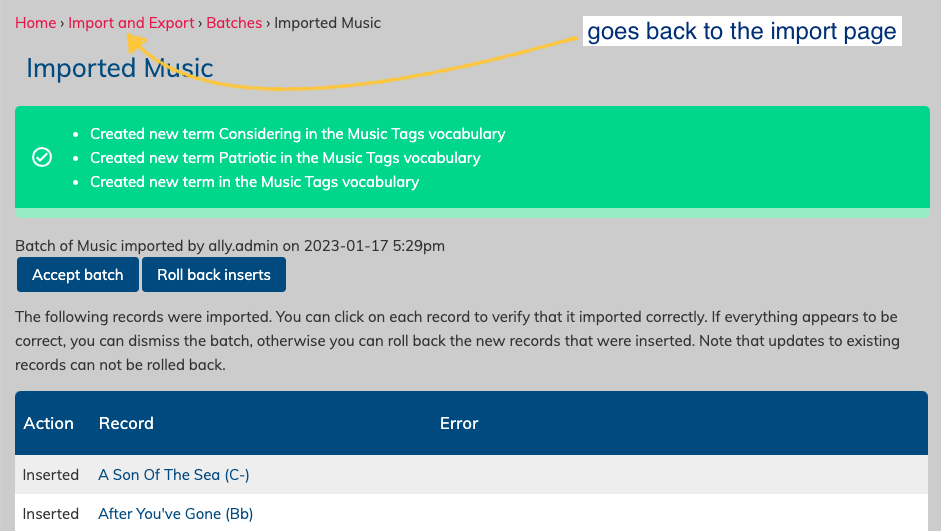
Once complete, you will be brought to a page where it will list all of the items that have been inserted (added), edited, or were not imported due to an error.
An error might look like this:
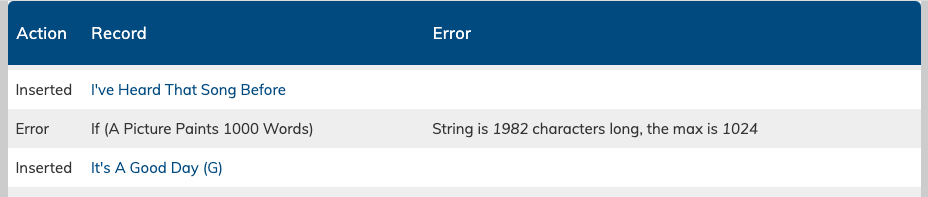
In this case, the song "If (A Picture Paints 1000 Words) was not imported because one of the field contents was too long. Looking at my spreadsheet, I can see this error was in the "notes" field - this is sometimes a common error if your notes field contains links to other websites (like a youtube video). It's recommended to put links in the "Links" section fo a music page for easy access.
After importing, you will also be given the option to "Accept batch" or "rollback inserts"
If your import was generally correct with a few skipped entries, make note of those entries and then click "accept batch".
If there were lots of issues and you'd rather start fresh, click "rollback inserts" to undo all the newly added songs.
Note: "rollback inserts" cannot undo edits to content, this is why it is safer to leave the "update" option uncheck if you are new to csv importing.
You can also choose to leave the batch for the moment, and click on the "import and export" breadcrumb link.
You may decide to do this if you want to navigate to the music section first and check out some of the imported song information in more detail before accepting the batch.
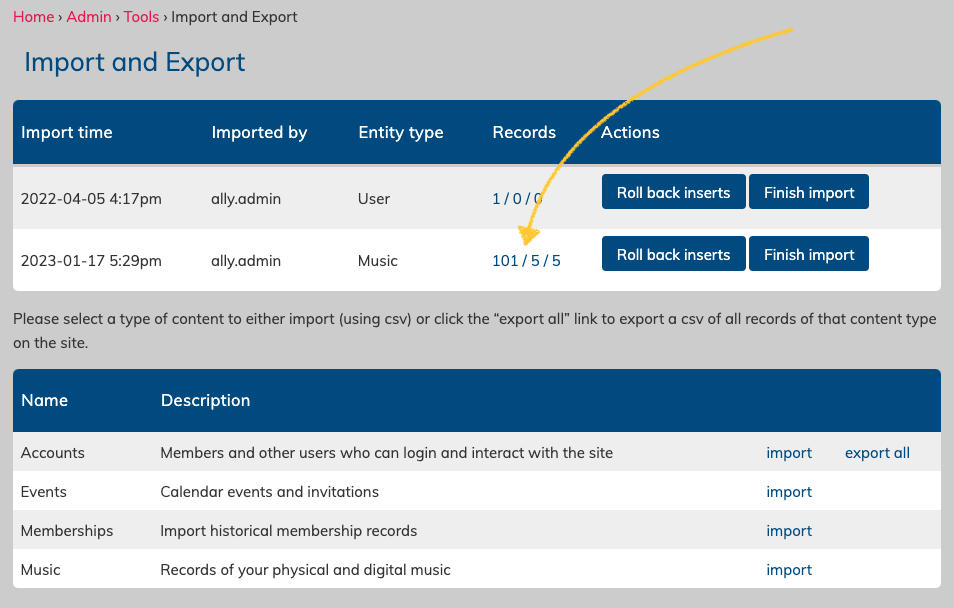
If you do not accept the batch at this time, it will appear at the top of the "Import and Export" page, and can be reviewed and accepted at any time.
If you wish to review the error list again, click on the "records" number (which indicates the records inserted / updated / errored ) to view the details.
It's recommended to accept the batches when your import is complete to make sure nothing in unintentionally rolled back, but it as not absolutely required to do so.
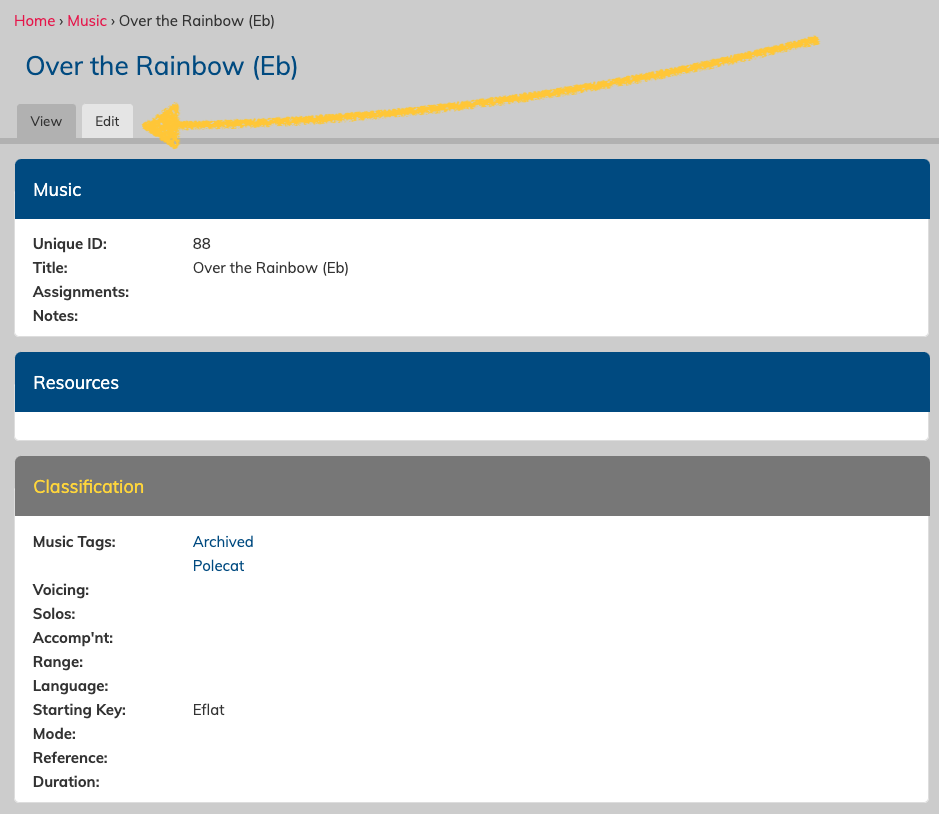
After importing your music library information, you will want to then go to each song and upload the necessary files, such as sheet music and learning tracks. This is done via the "attachments" section on the an individual "music" page.
To do this, go the the "Manage Music" page, and then click on the song title. Then at the top of that page, click the "edit" tab.
Then, upload your files to the "attachments" section. You can drag and drop files into the lighter grey area, or search for files on your computer using the "choose file" button.
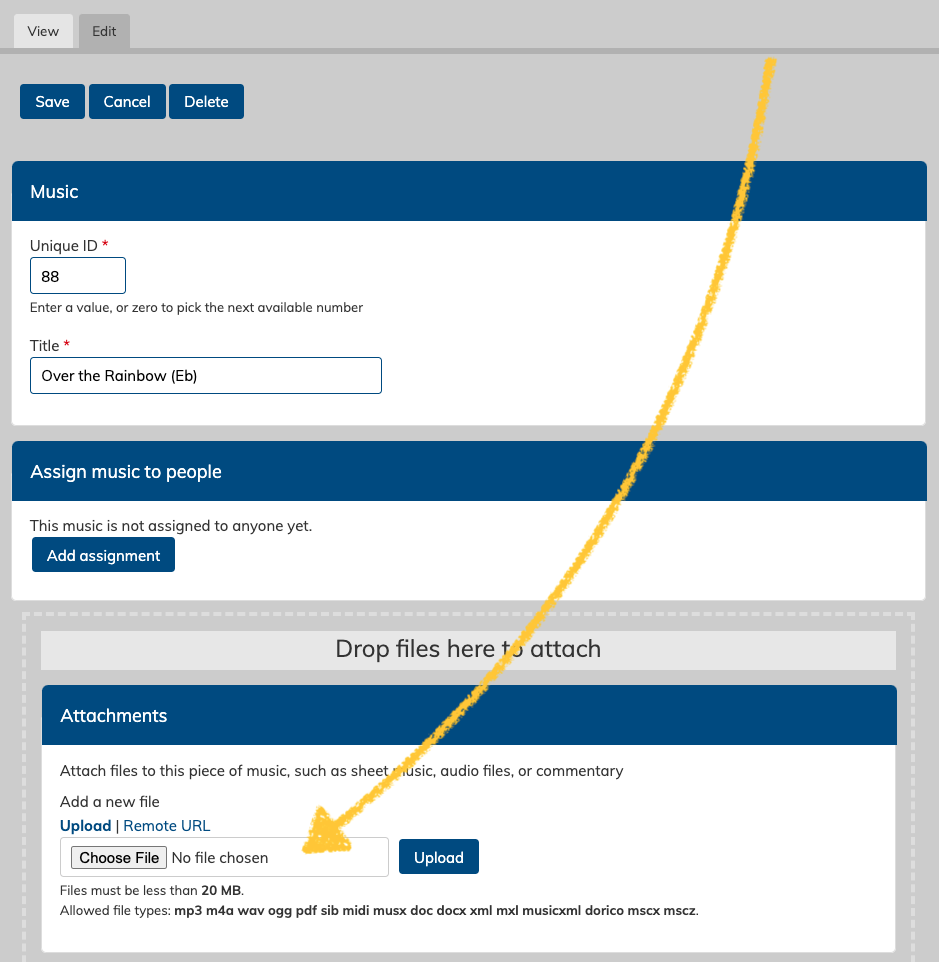
Click "upload" to upload the files, and then save the page using the save button located at the top or bottom of the page.