RECENT CHANGES TO PLACES
These changes are rolling out March 6 2026
- Custom fields can be set to be displayed within the riser placements. You can select the custom fields that can be displayed in the places settings under Admin settings and tools.
- There is a download button to save a high-quality jpg of your placement
- Risers are now large, with more options for riser rows and segments.
What are "Places"?
Places are your riser placements, standing arrangements, seating charts, standing charts, etc. They have many names in the musical world, so we decided to just refer to them as your "places".
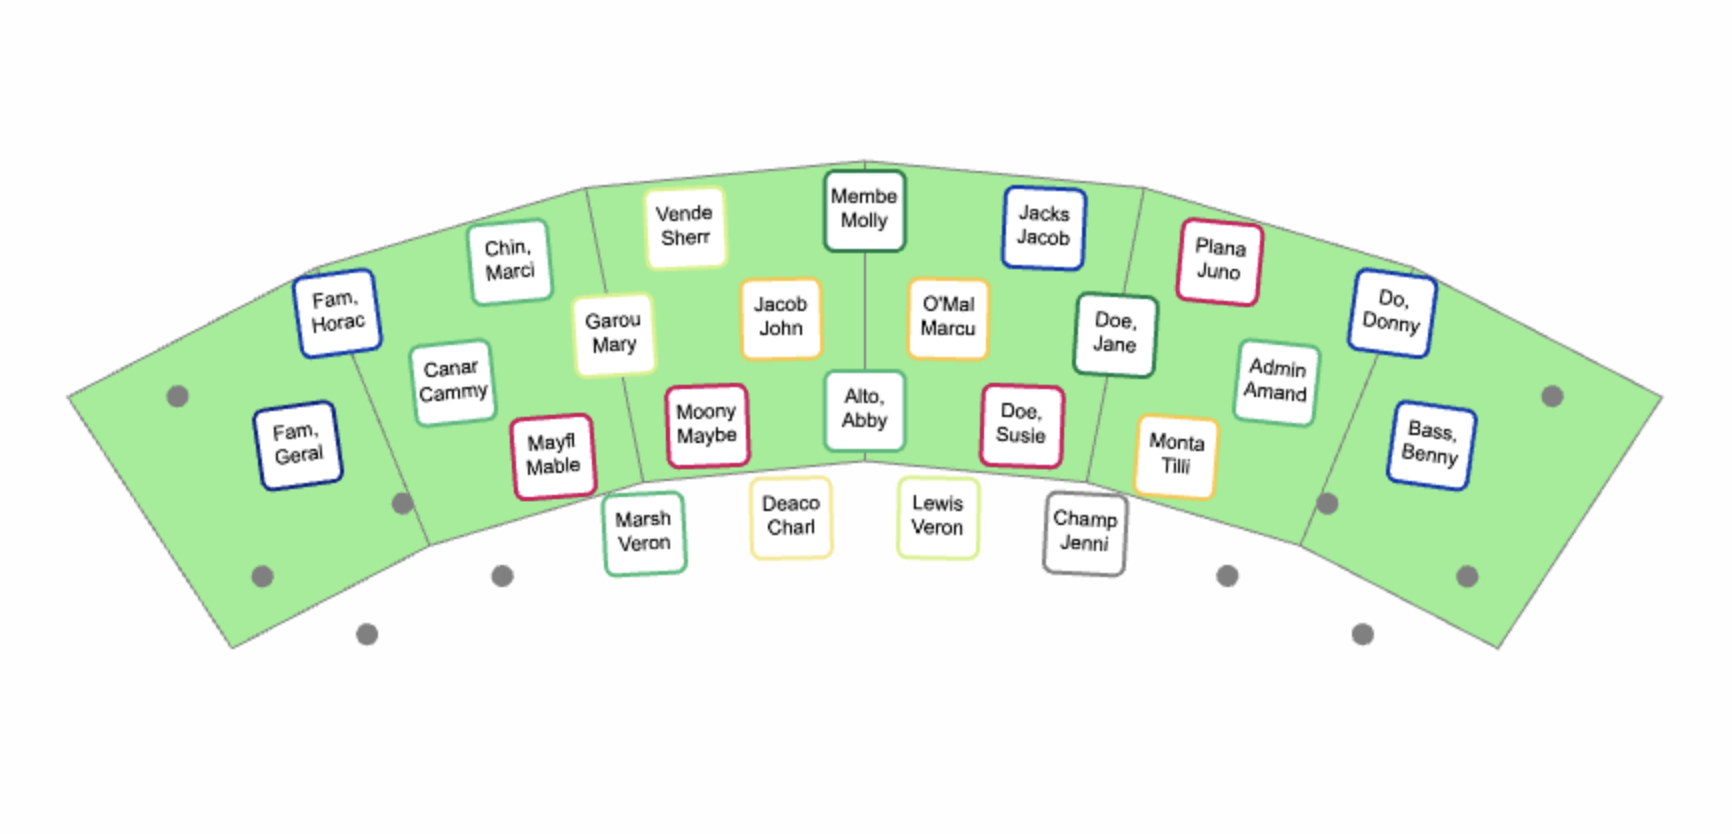
Places can have many configurations, including risers wth 3 or 4 steps, up to 11 sections, and a curved or inverted center. But, not every group in arranges on risers, so we also offer "platform" squares that can be arranged and pivoted around the available floor space to best match your setup.
Demo Video
Configuration options
Places can be configured in several ways
-
One set of risers
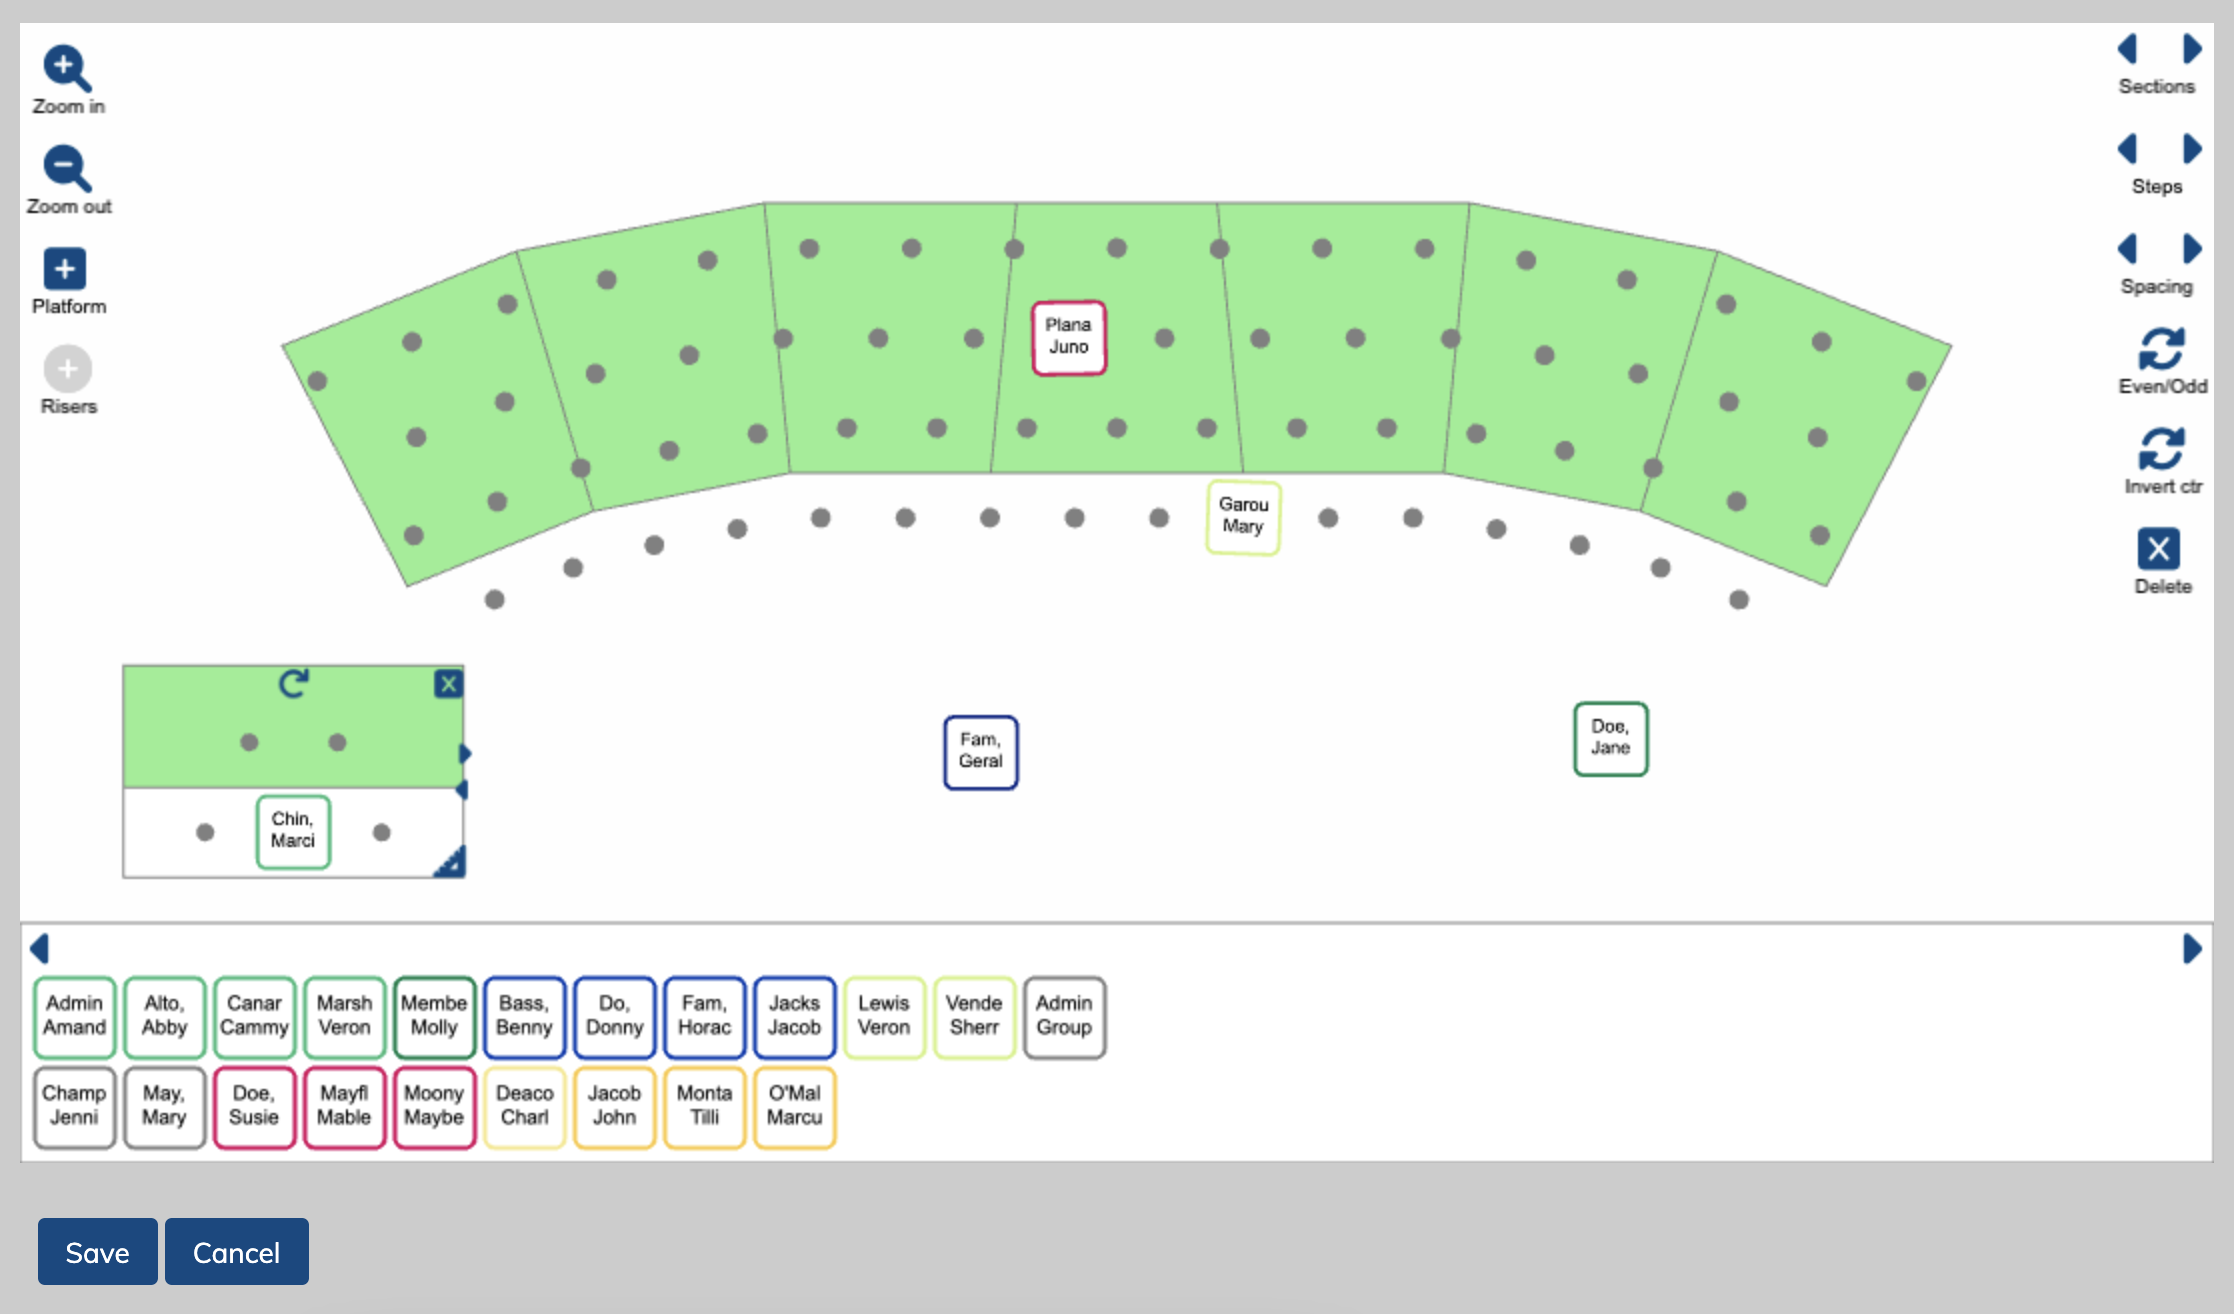
- The configuration settings for risers are on the right hand side when in edit mode. These risers can have up to 11 sections across, and can be 3 or 4 "steps" up. You can expand and contract the dot spacing You can also choose if the spacing is even or odd in the front row. And when the number of sections used is odd numbered, you can choose if the middle section is inverted.
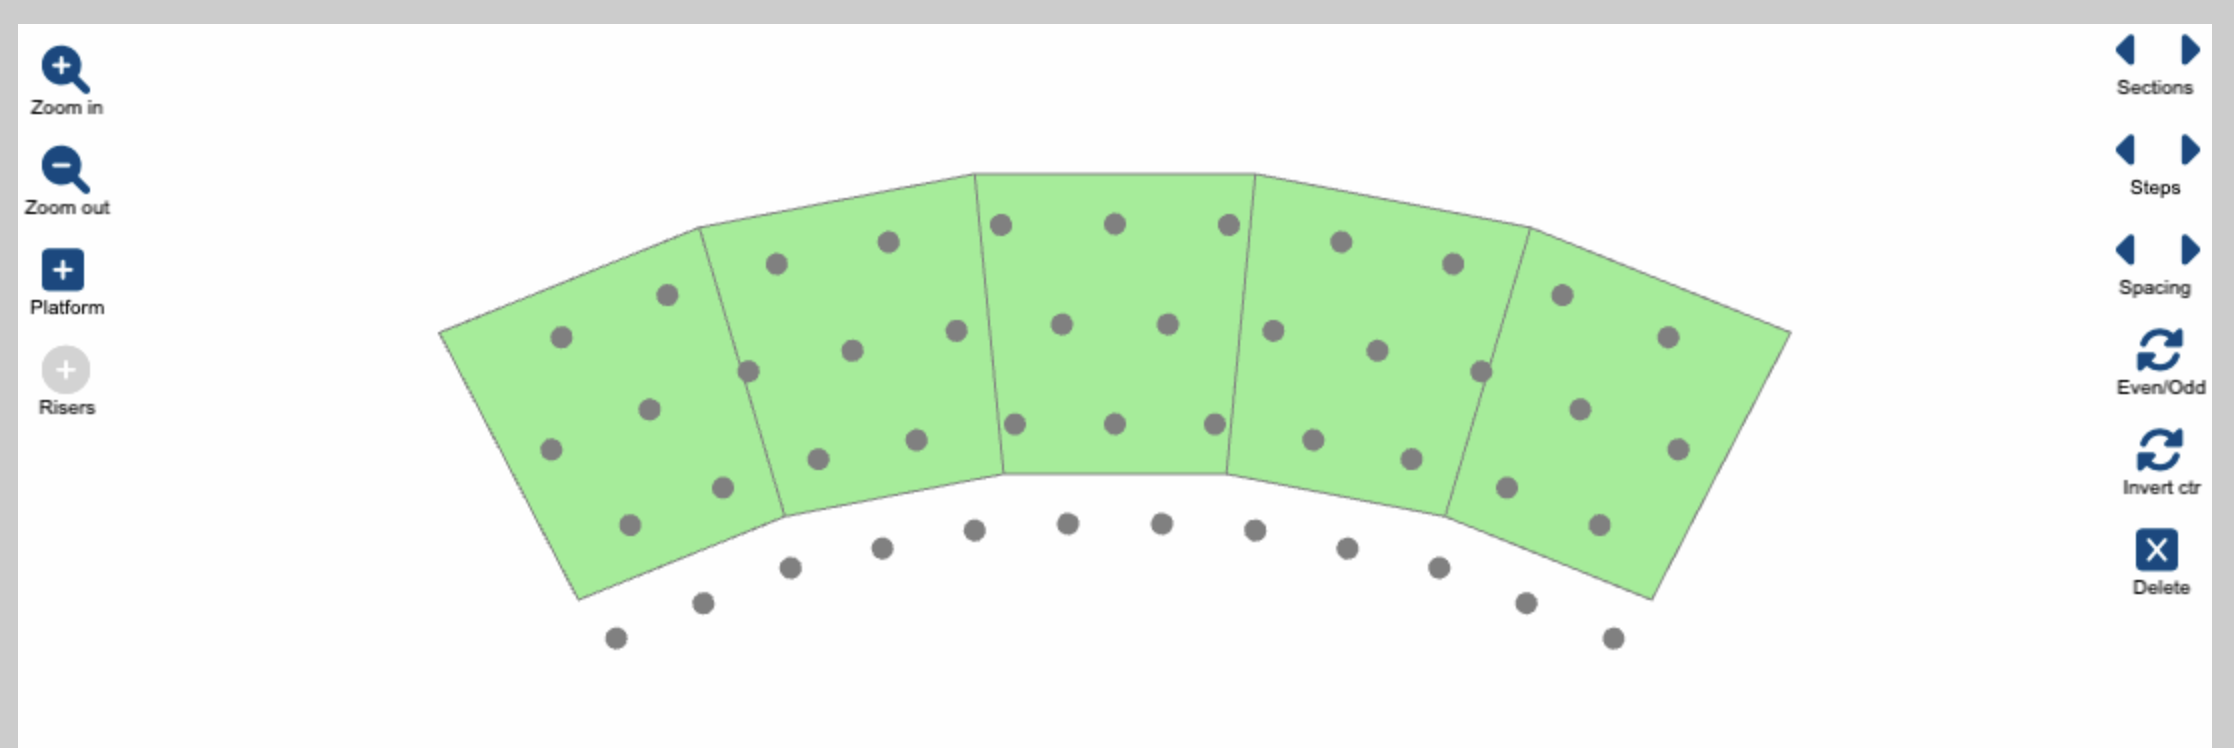
- The configuration settings for risers are on the right hand side when in edit mode. These risers can have up to 11 sections across, and can be 3 or 4 "steps" up. You can expand and contract the dot spacing You can also choose if the spacing is even or odd in the front row. And when the number of sections used is odd numbered, you can choose if the middle section is inverted.
-
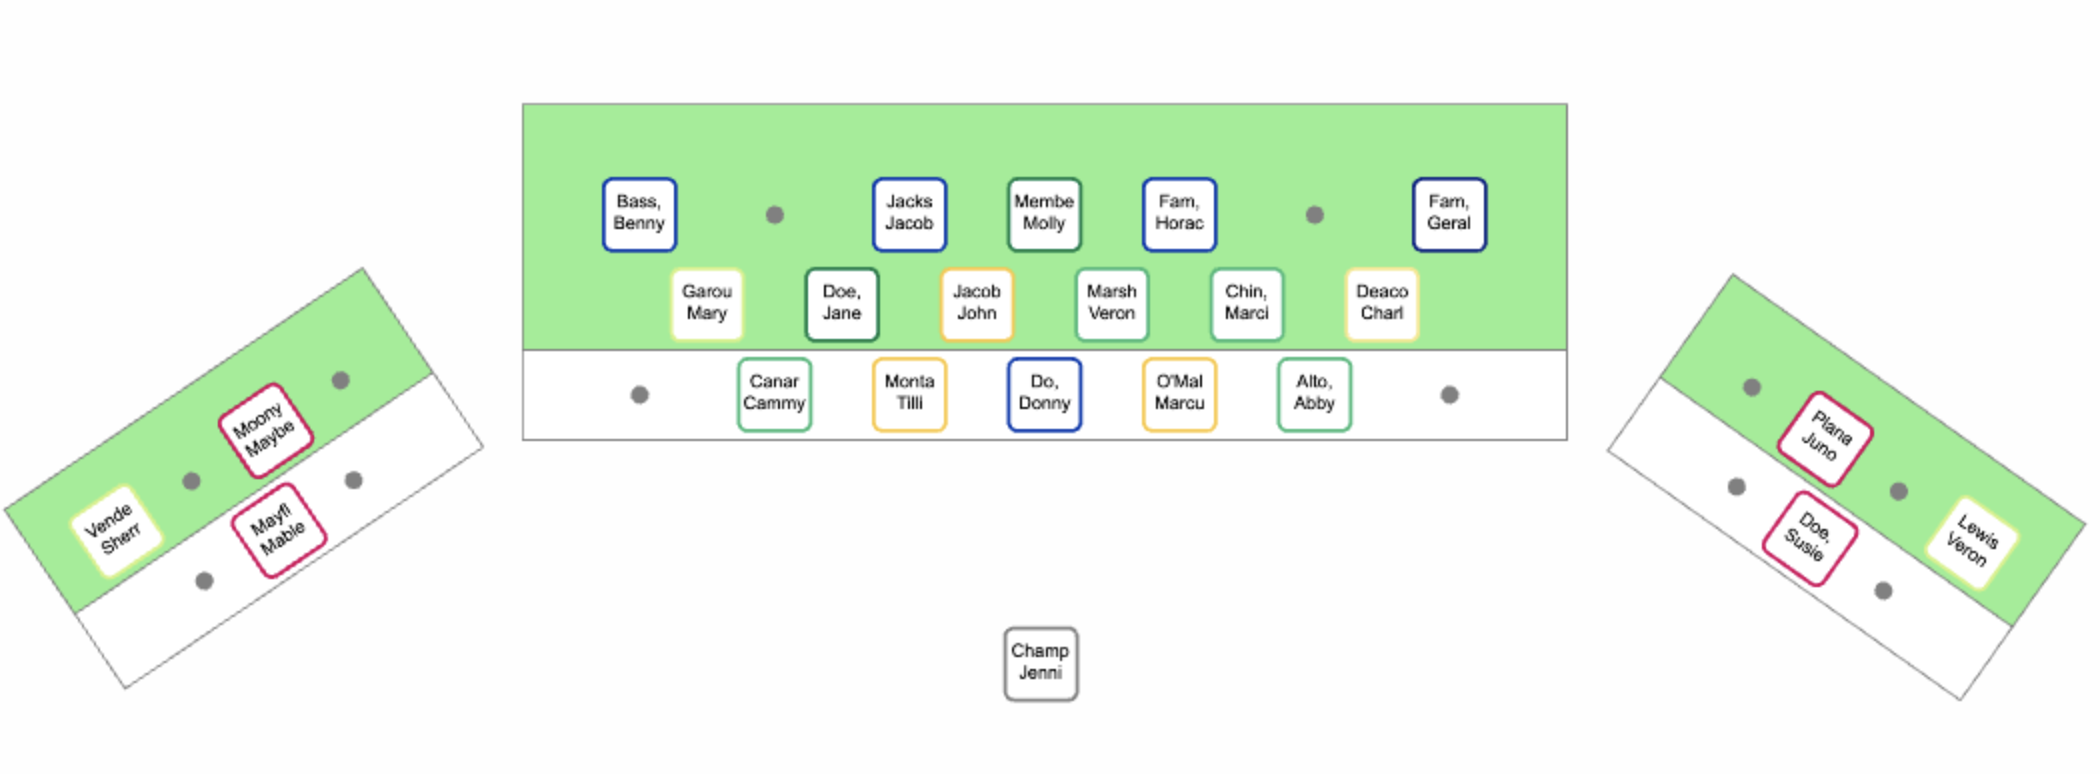
Multiple platforms
- You can add several platforms using the +Platform button on the left. Platforms can be dragged around by clicking anywhere on the green background. They can be deleted using the small x in the top right corner. Their size and shape can be changed using the angled blue corner on the bottom right. You can pivot a platform by using the circular arrow in top middle center of the platform. Using the small arrows on the middle right side of a platform, you can expand and contract the dot spacing.
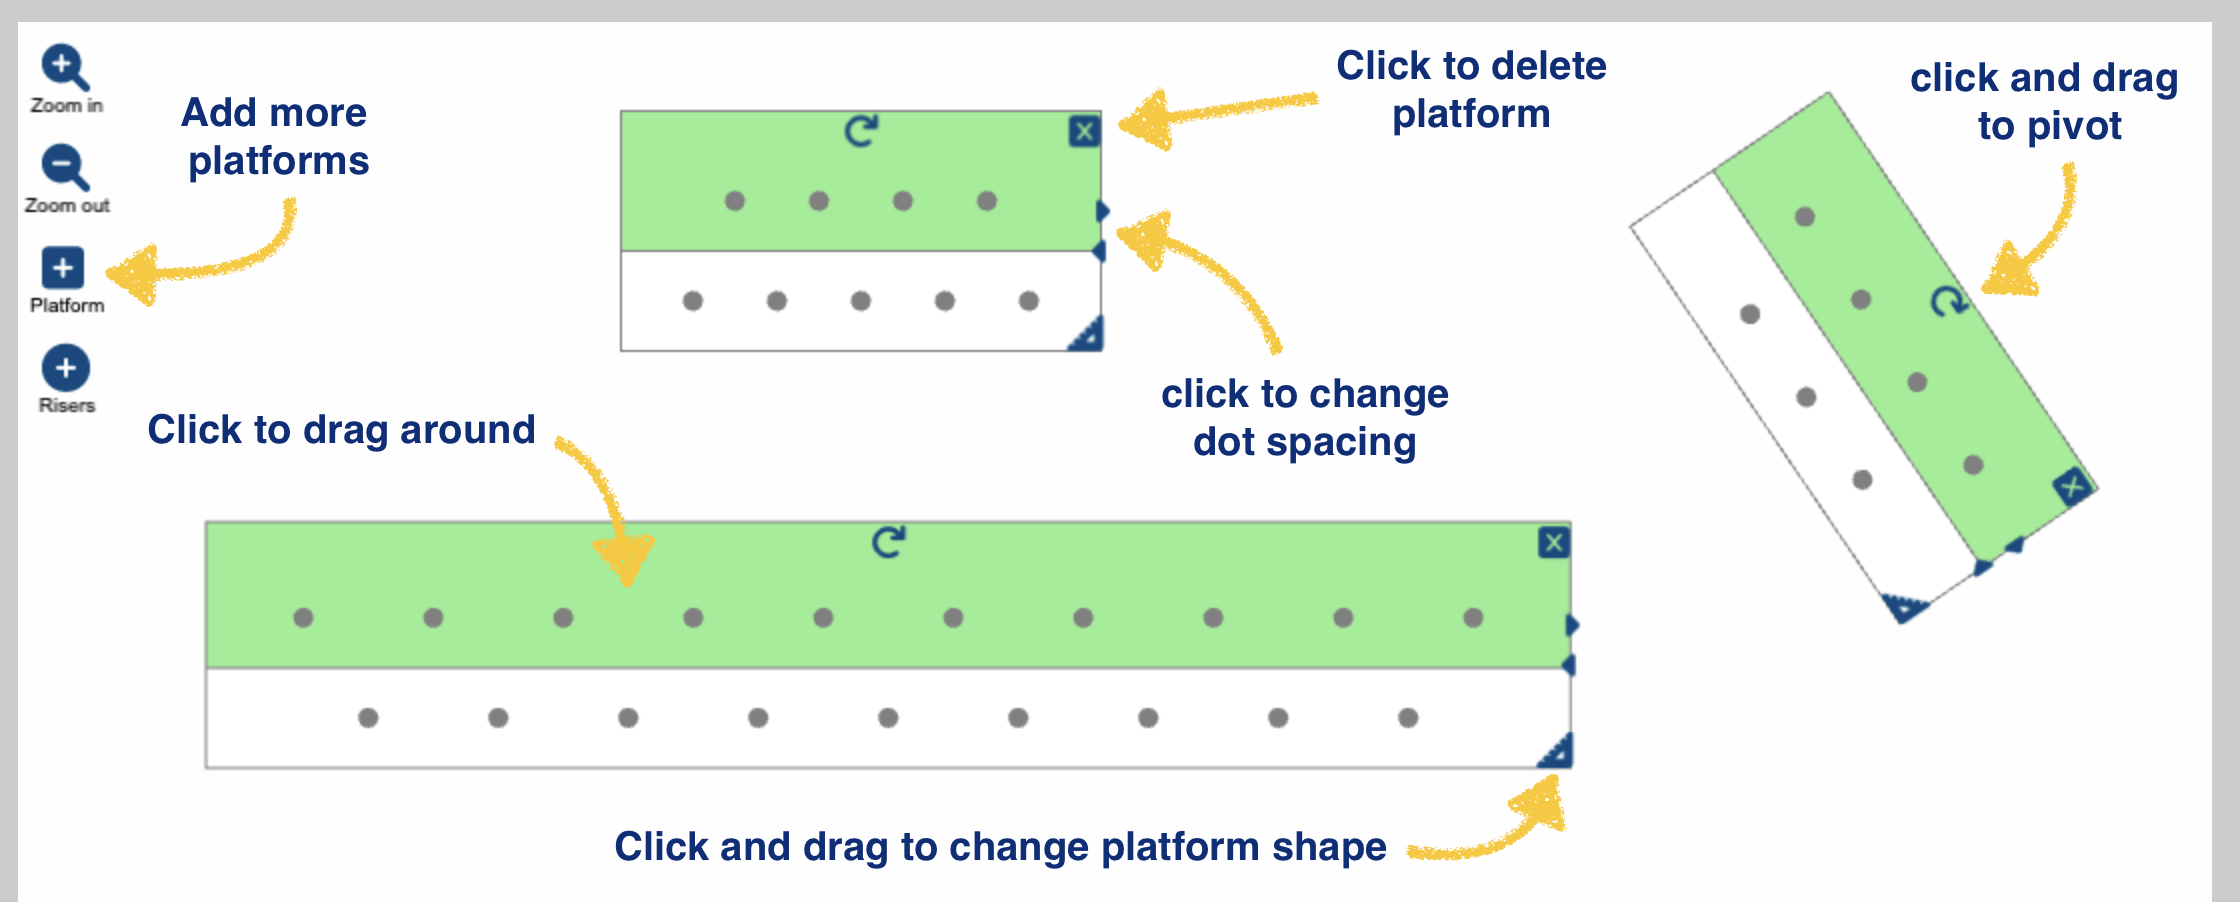
- You can add several platforms using the +Platform button on the left. Platforms can be dragged around by clicking anywhere on the green background. They can be deleted using the small x in the top right corner. Their size and shape can be changed using the angled blue corner on the bottom right. You can pivot a platform by using the circular arrow in top middle center of the platform. Using the small arrows on the middle right side of a platform, you can expand and contract the dot spacing.
-
Floor space
- You can also place people anywhere on the white "floor" space.
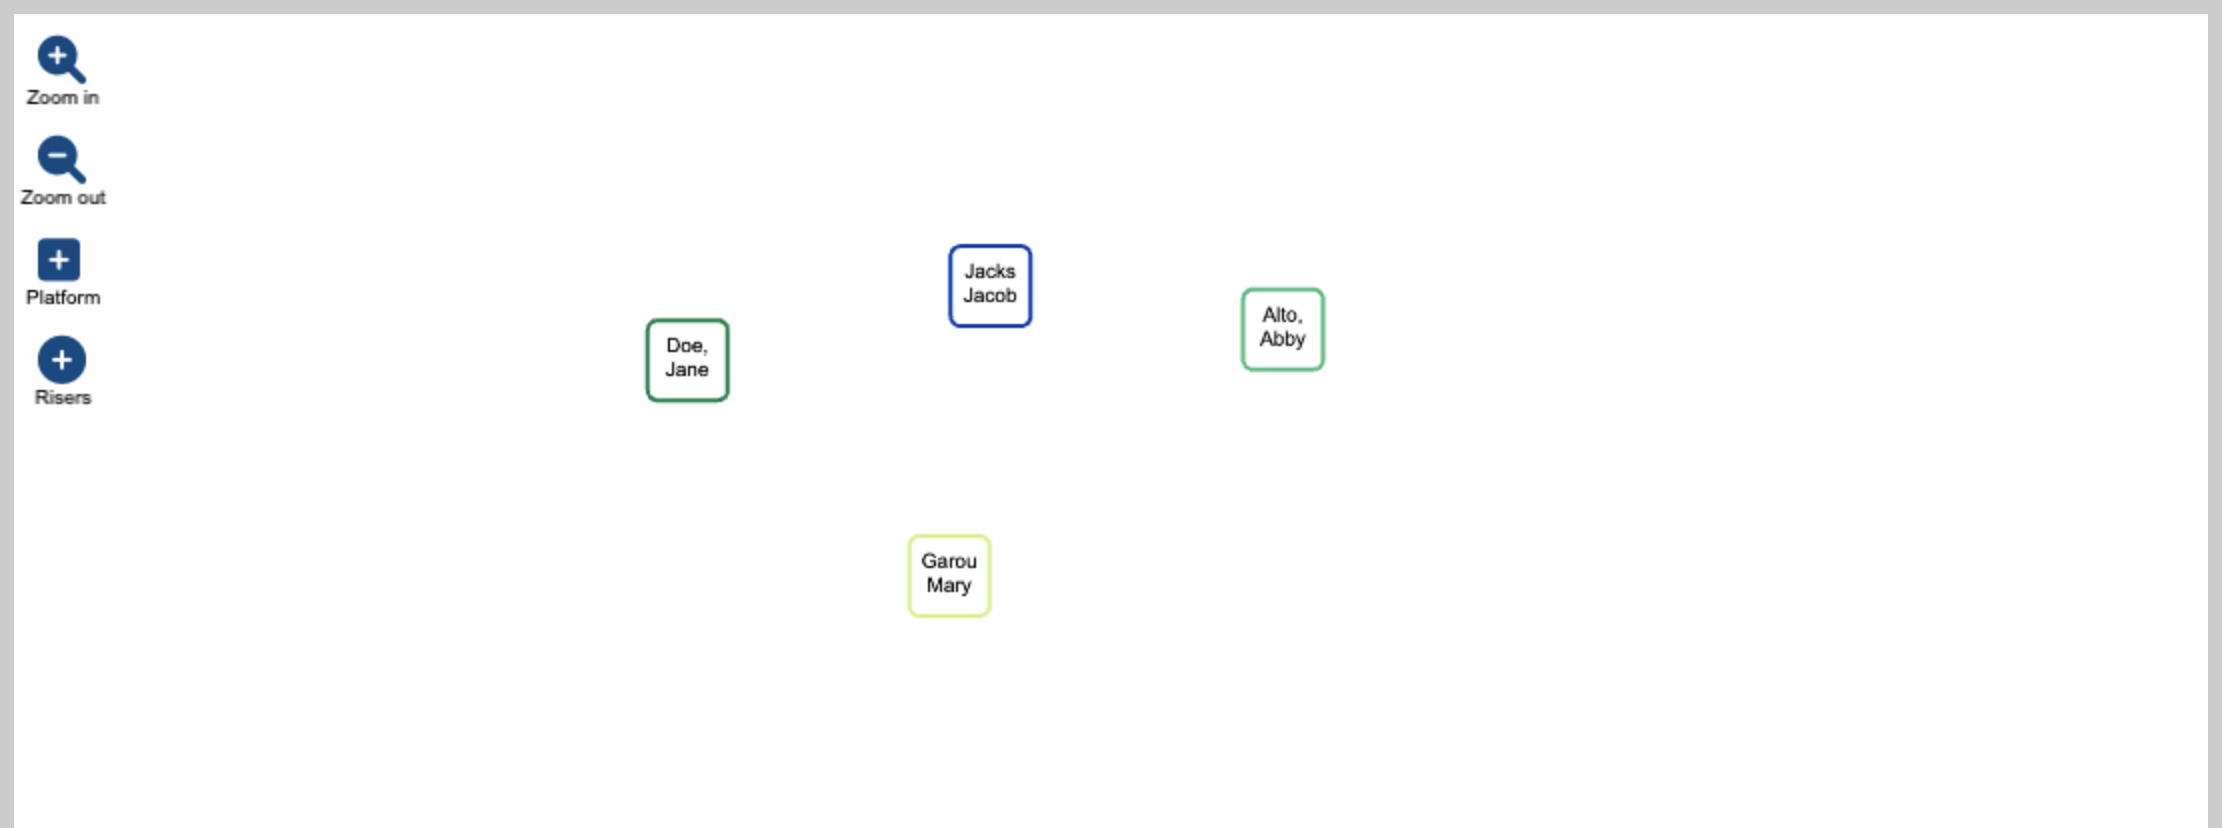
- You can also place people anywhere on the white "floor" space.
Editing Display Default (Admins Only)
Choose the default display setting as either Names or Faces view. A toggle button will always be present to flip back and forth if needed.
To change this setting, navigate to:
Admin Tools & Settings > Places
Editing Voice Part Options - Titles and Colours (Admins Only)
Account voice parts will determine the thin coloured line around their square on their placement. If you need to edit your site's voice parts, you can do by going to:
Admin Tools & Settings > Vocabularies
Click on "manage terms" across from Voice Parts.
Note: You can also access this page from the Admin Tools & Settings > Places using the link available there.
You can also rearrange the order in which the voice parts appear on this page by using the cross-arrows to the left of the voice part names.
Add or edit a voice part name
Add a new voice part term by using the "add term" button above the table. Enter the term, and save. After adding the term, you will be able to select a colour and abbreviation.
You can edit the voice part title by clicking the "edit" link on the far right. From the edit view, you can also delete a voice part.
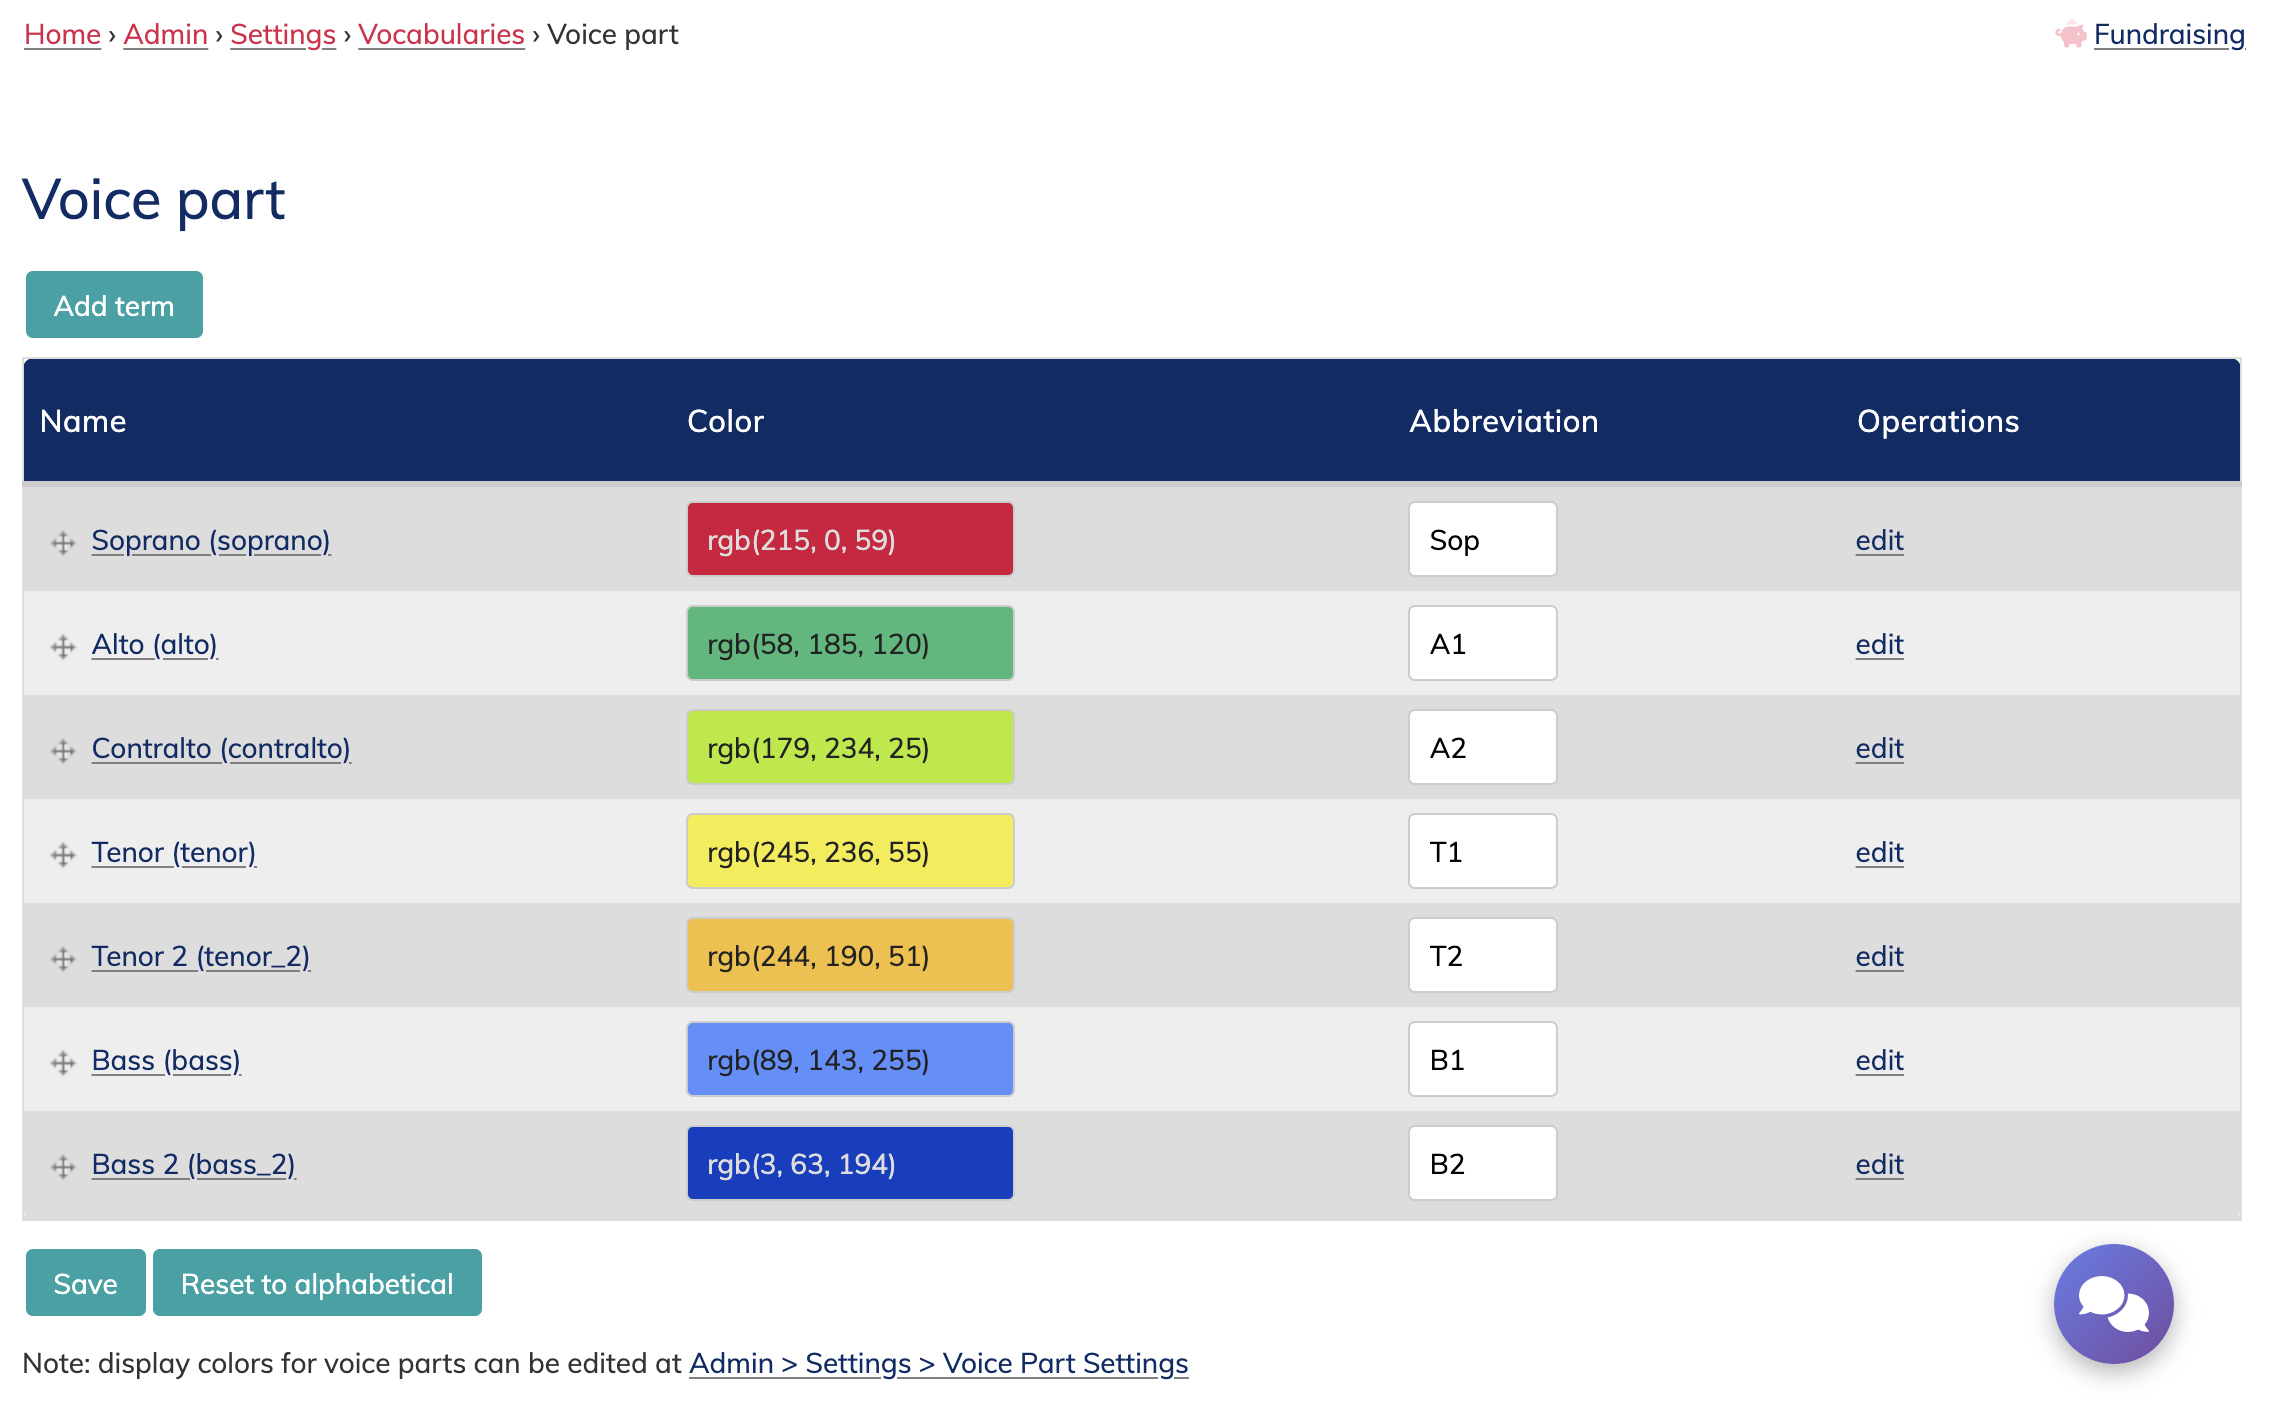
Change voice part colours
If you want to change the colours associated with the voice parts within your site, click into the colour field and use the colour picker to select your colour.
Change voice part abbreviations
You can use any combo of letters and numbers for the abbreviated view of the voice parts. These appear on the places display to assist identification of a singer's voice part if a non-colour printing method is used (or for any colour blind singers/admins!)
Leave the abbreviated field blank if you do not want them to display on Places.
Create Places
To create a new "places", go to:
Music & Performance > Places, and click the yellow plus icon to the right
Admins, Managers and Coordinators can add Places.
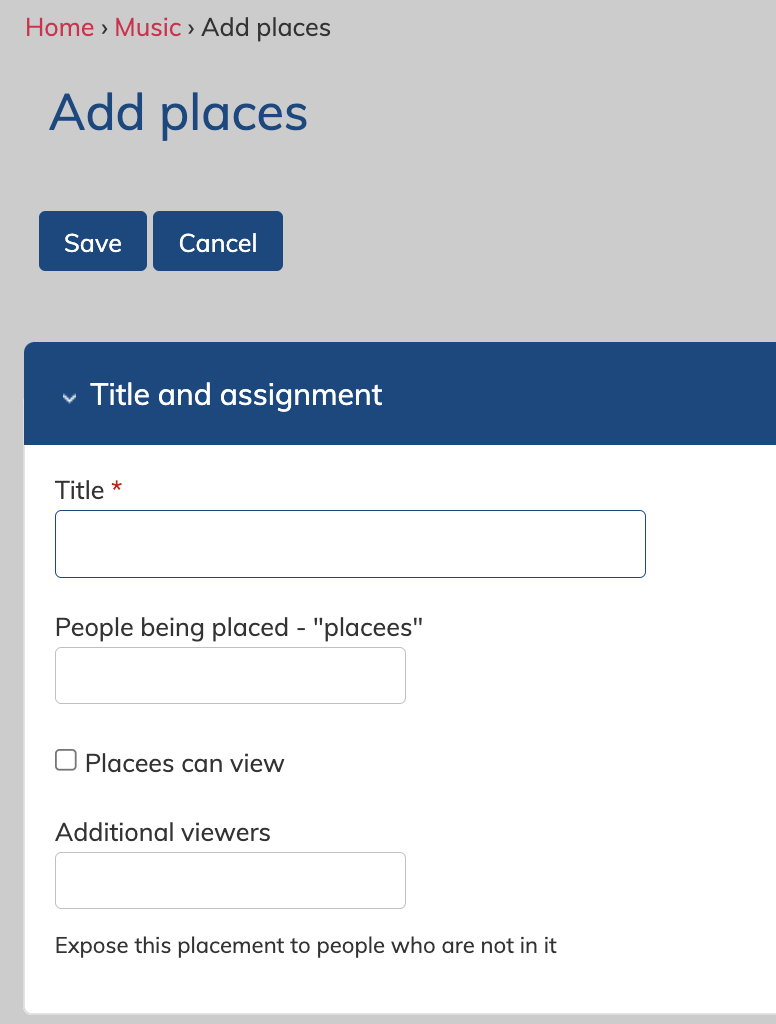 You will need to add a title, and select the account set that is being placed. Usually, this is members, but if you have multiple choirs, you will probably want to select their subgroup.
You can choose if "placees" can view this placement. Leave this unchecked if you're creating a draft and don't want singers to see it yet. Checkmark it when you're ready for them to view the placement.
You can add additional viewers by account set as well. Sometimes this is useful if you want other people/account sets to see the placement before it's accessible to the singers/placees. Or, perhaps people other than just the singers will need access - you can add them here.
Once you select your placees with the settings above, they will appear bellow in the "bullpen" area of your places.

Refer to the configuration settings discussed earlier to begin building your placement. You can add risers or platforms using the buttons on the left. You can also zoom in and out of your placement as necessary.
Be sure to save your placement using the "save" button.
You can copy any Place you already created by going to the edit tab of that Place, and clicking the "copy" button.
You can delete any Place you've created by going to the edit tab of that Place and clicking the "delete" button.
Manage Places
Admins, Managers and Coordinators can access all Places via the "Places" menu item.
Music & Performance > Places
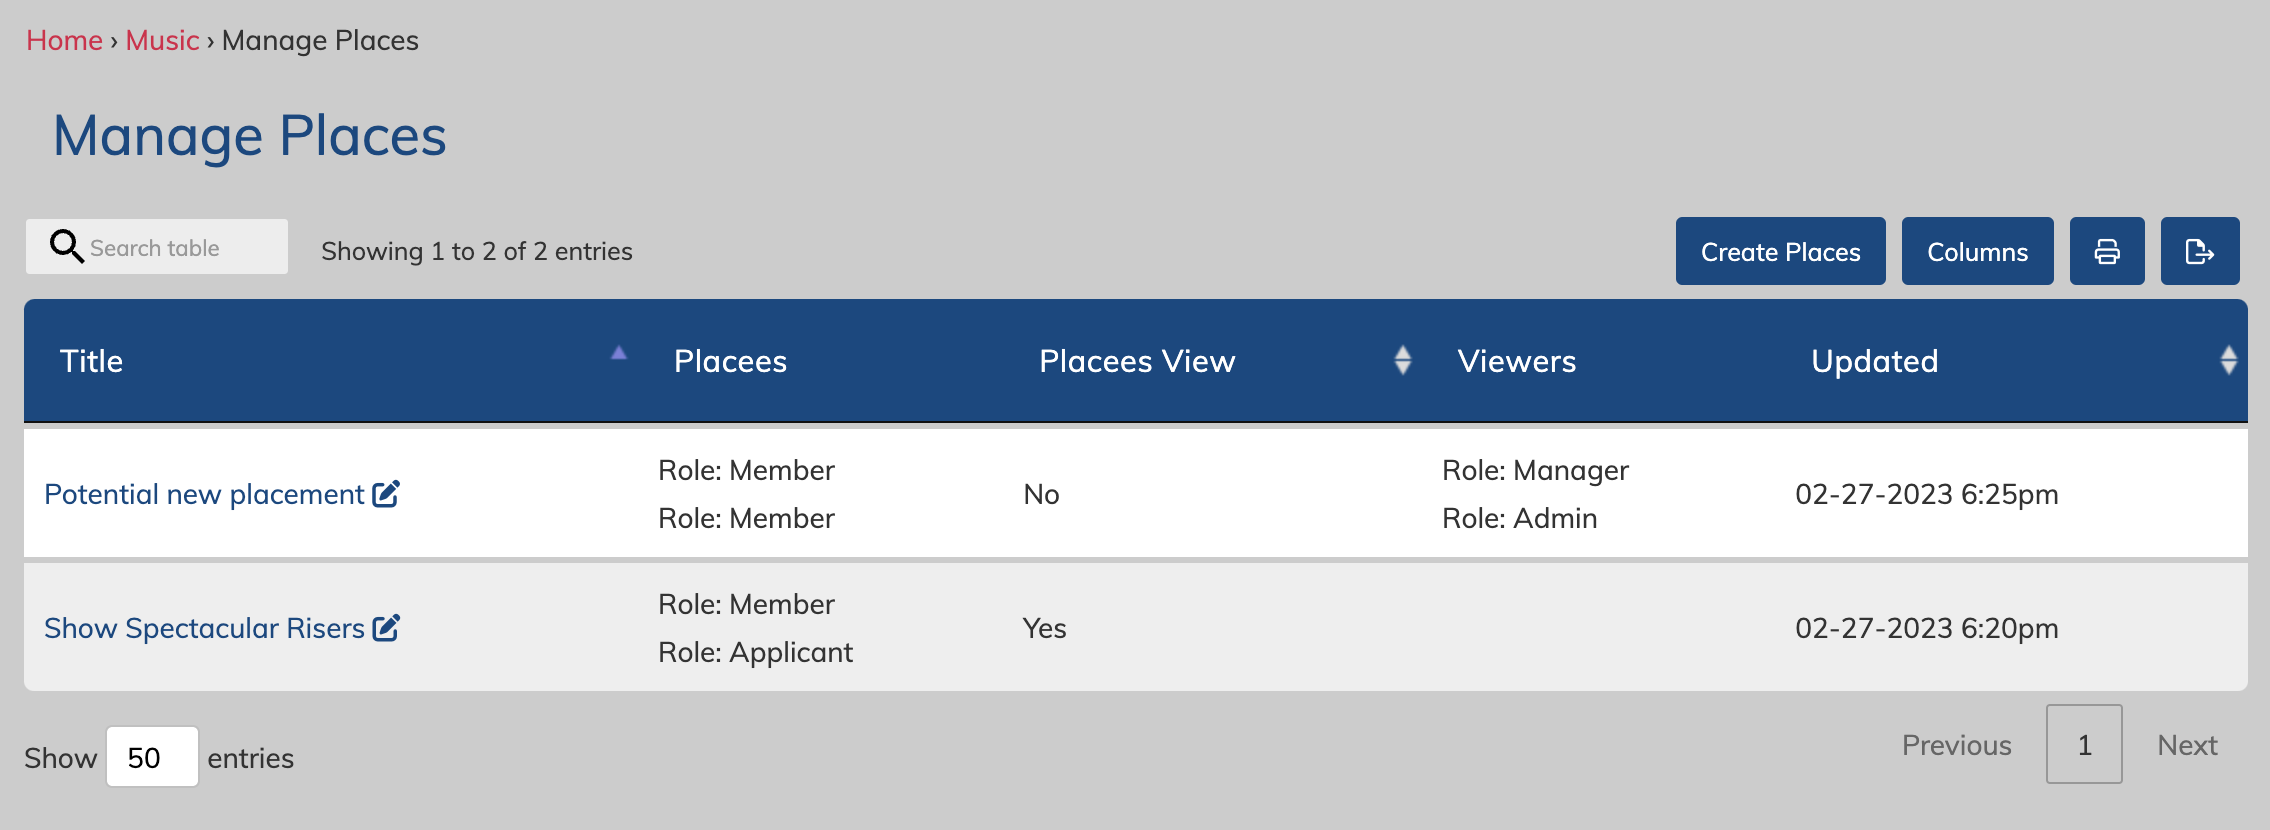
Click the Places name to view it, or click the edit pencil to edit it.
From the edit view, you can also delete a Places.
For Members
Members and other users will only be able to view places that they have been given access to view, either as a placee with permission to view, or as an "additional viewer".
Viewing Places
To view the places you have been given access, go to:
Music & Performance > My Places
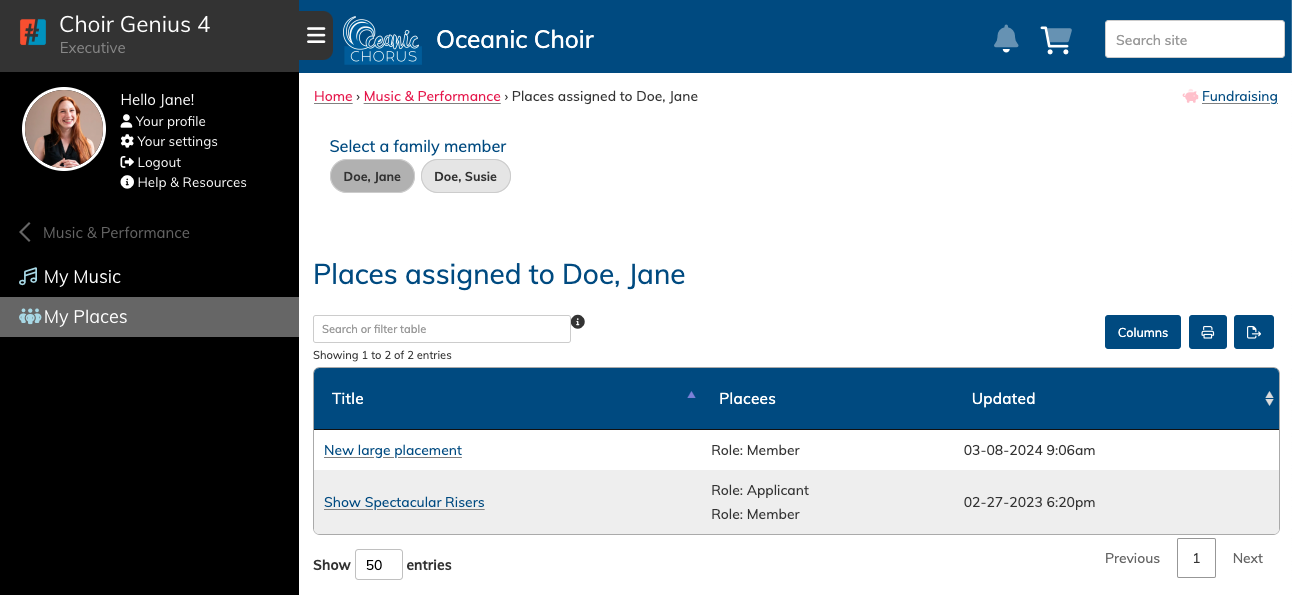
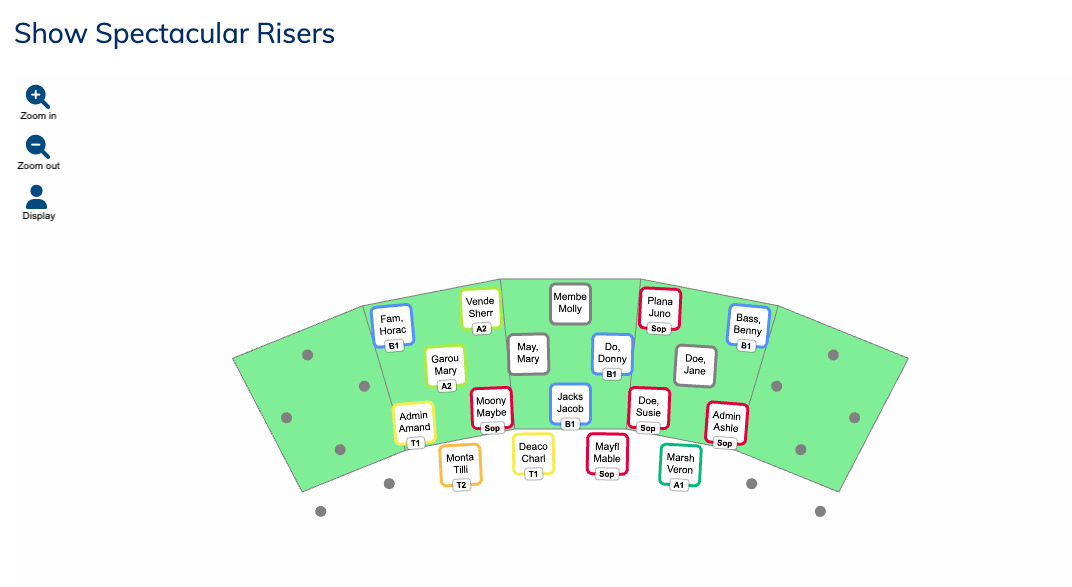
Click the title to view your Place.
When viewing a Place, you can use the zoom icons to zoom in and out to find your name. If you need to, you can click and drag the placement to look around.
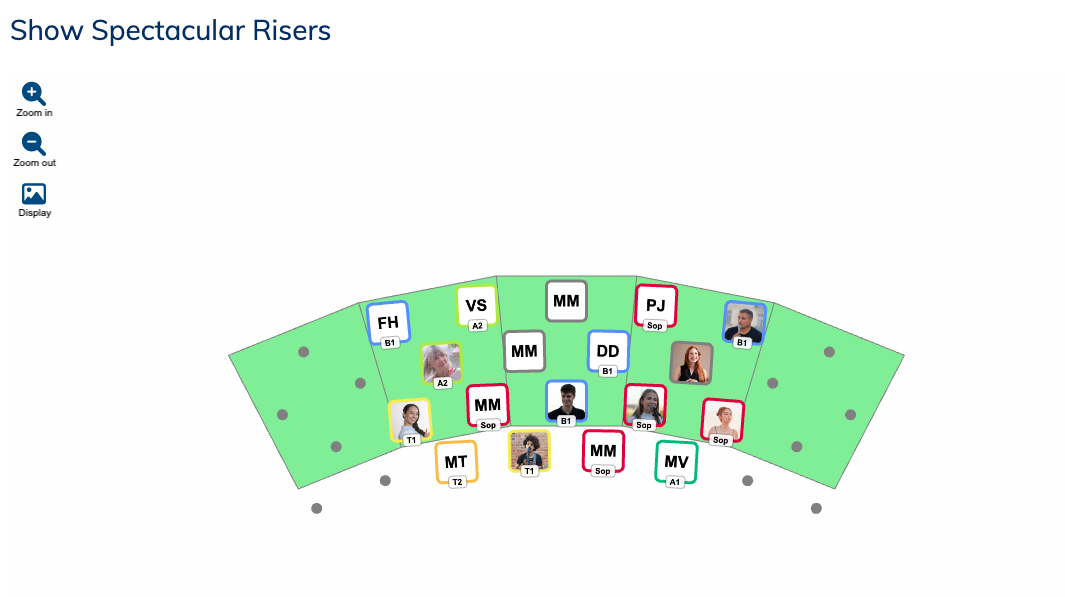
Click the toggle button on the left to flip between names and faces view.
available Tuesday October 14 2025
If viewing the placement on a smaller mobile device, turn your phone sideways for a better view.