- Overview
- Enable & disable payment types
- Stripe account setup
- What the payment process looks like for customers
Overview
Your store has several payment methods and currencies available that your store purchasers can use, and you can decide which ones are available through the Store and Payments settings page. This is also where you can set up your Stripe account integration to collect payment online.
This is located under:
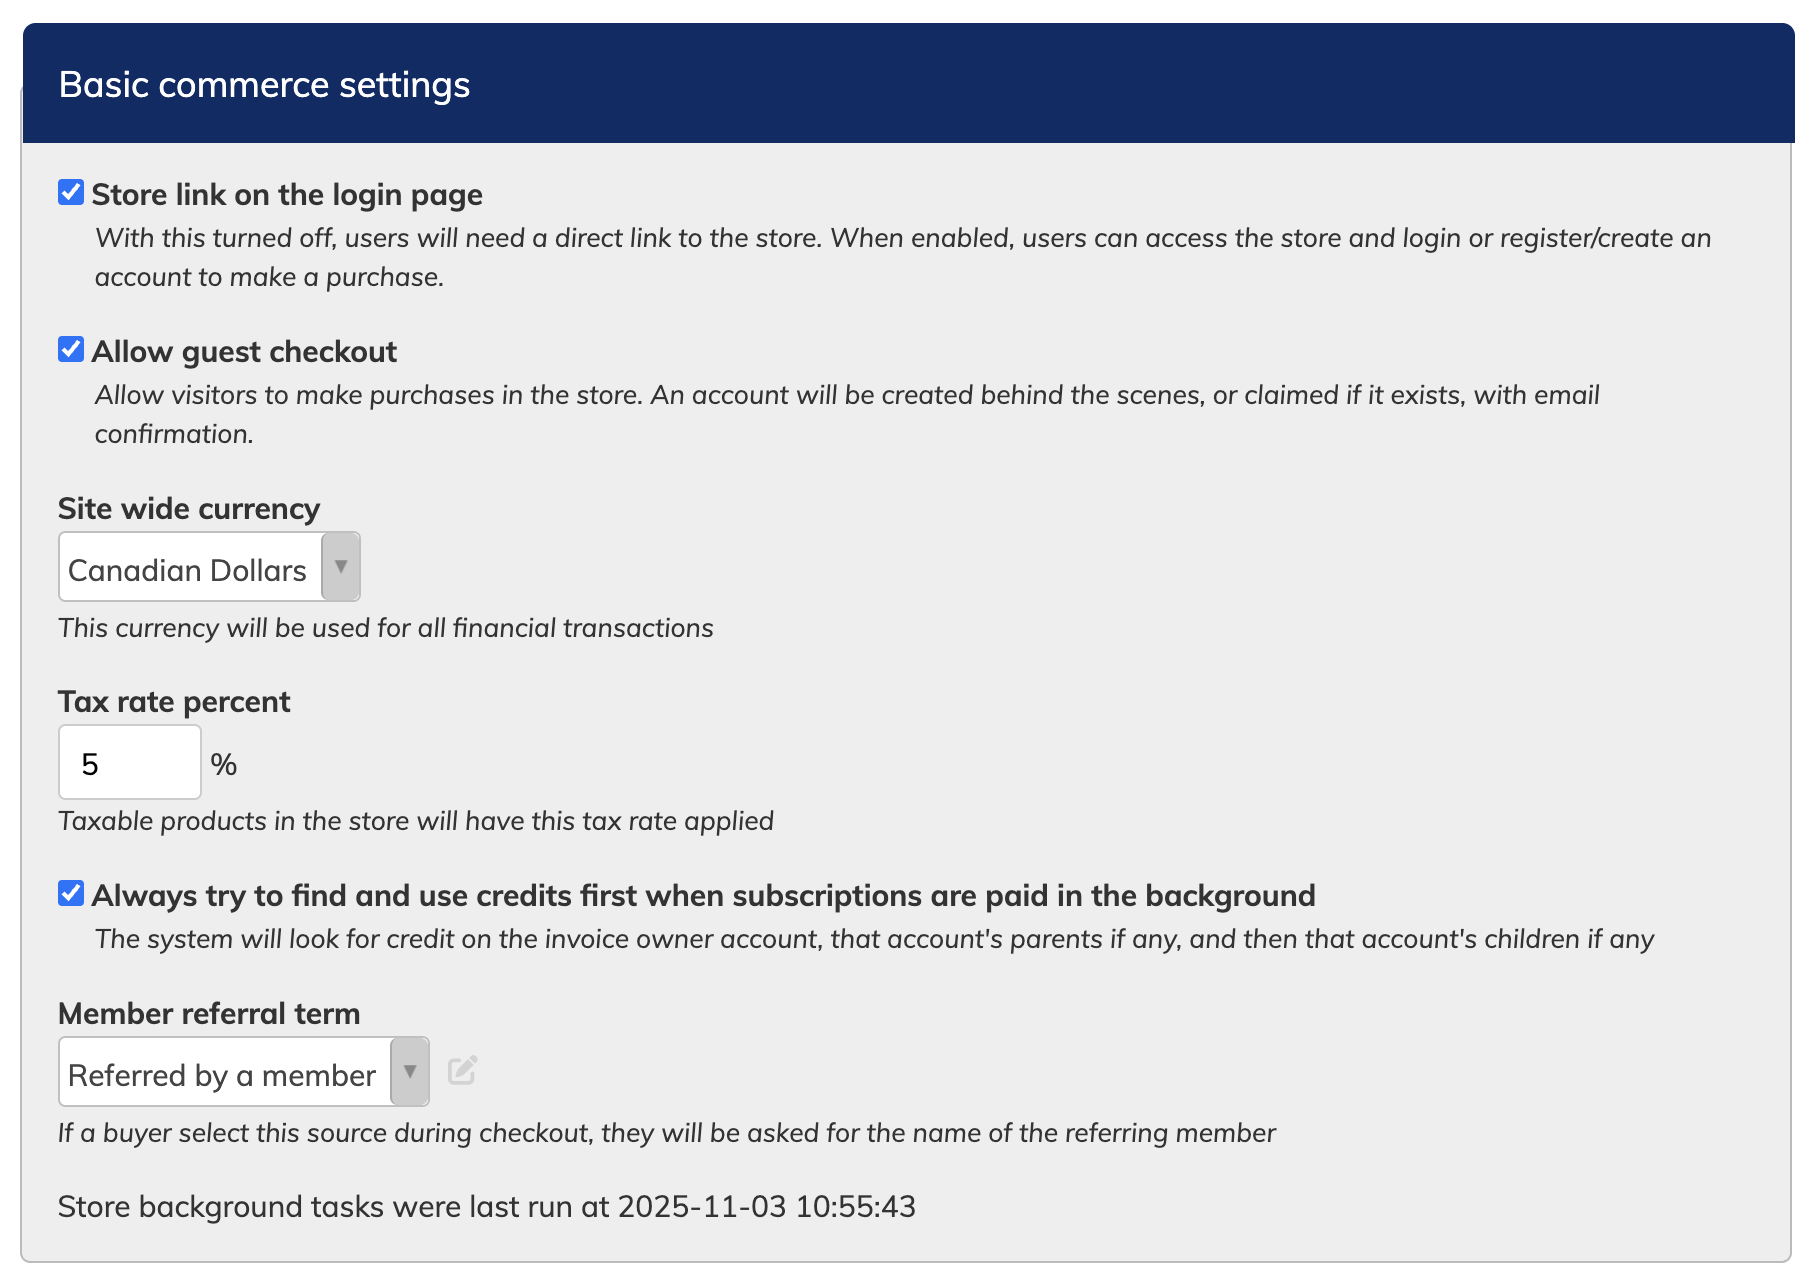
Admin Settings & Tools > Store and Payment
- Store link on login page
- Allow guest checkout
- Site wide currency
- Tax rate currency (configured here, applied via product settings)
- Credit use setting
- member referral term during checkout
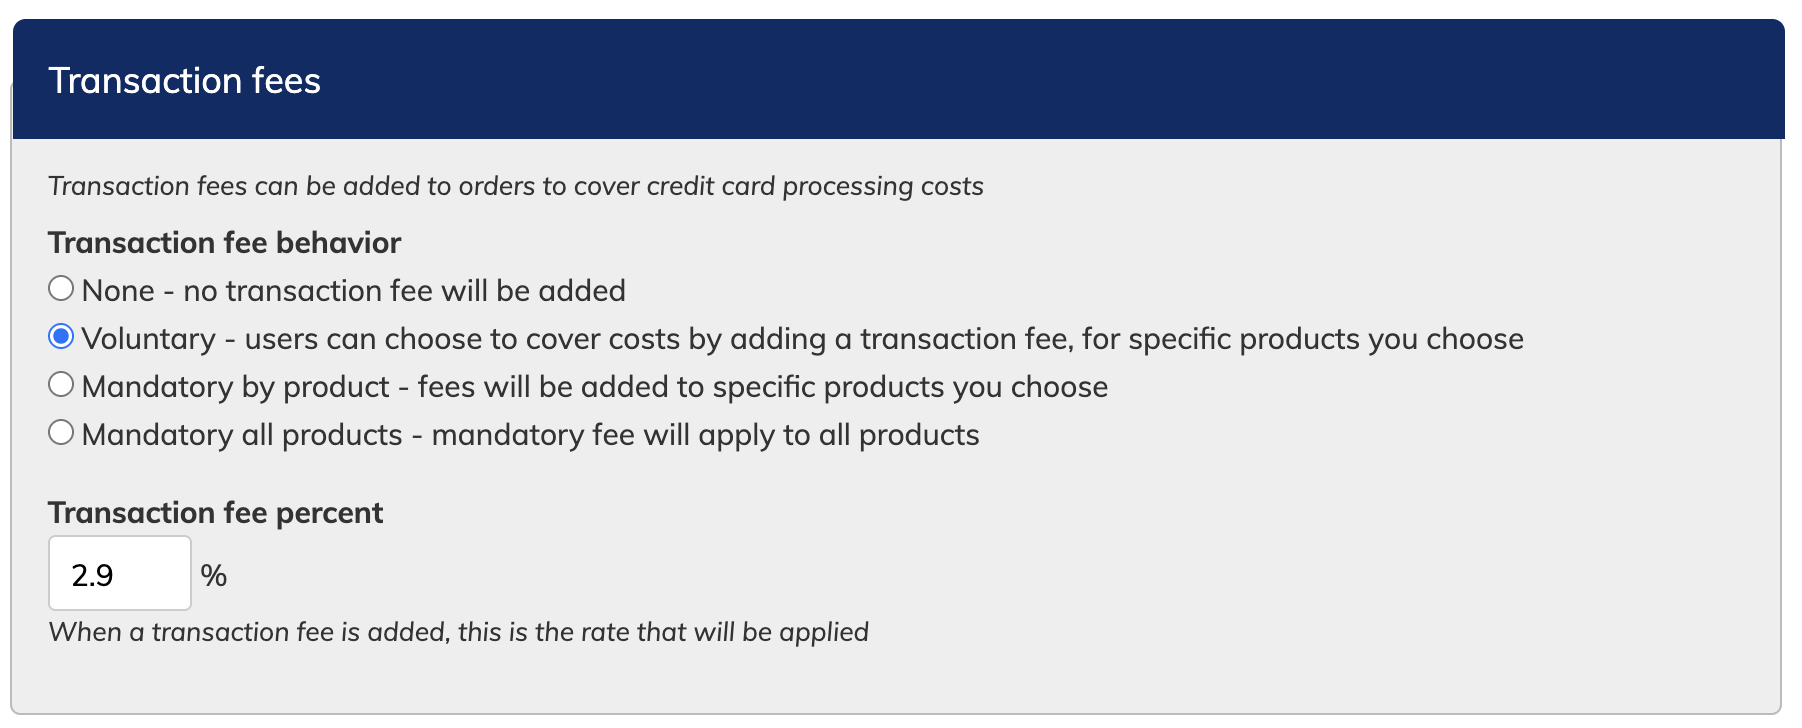
- Payment types settings
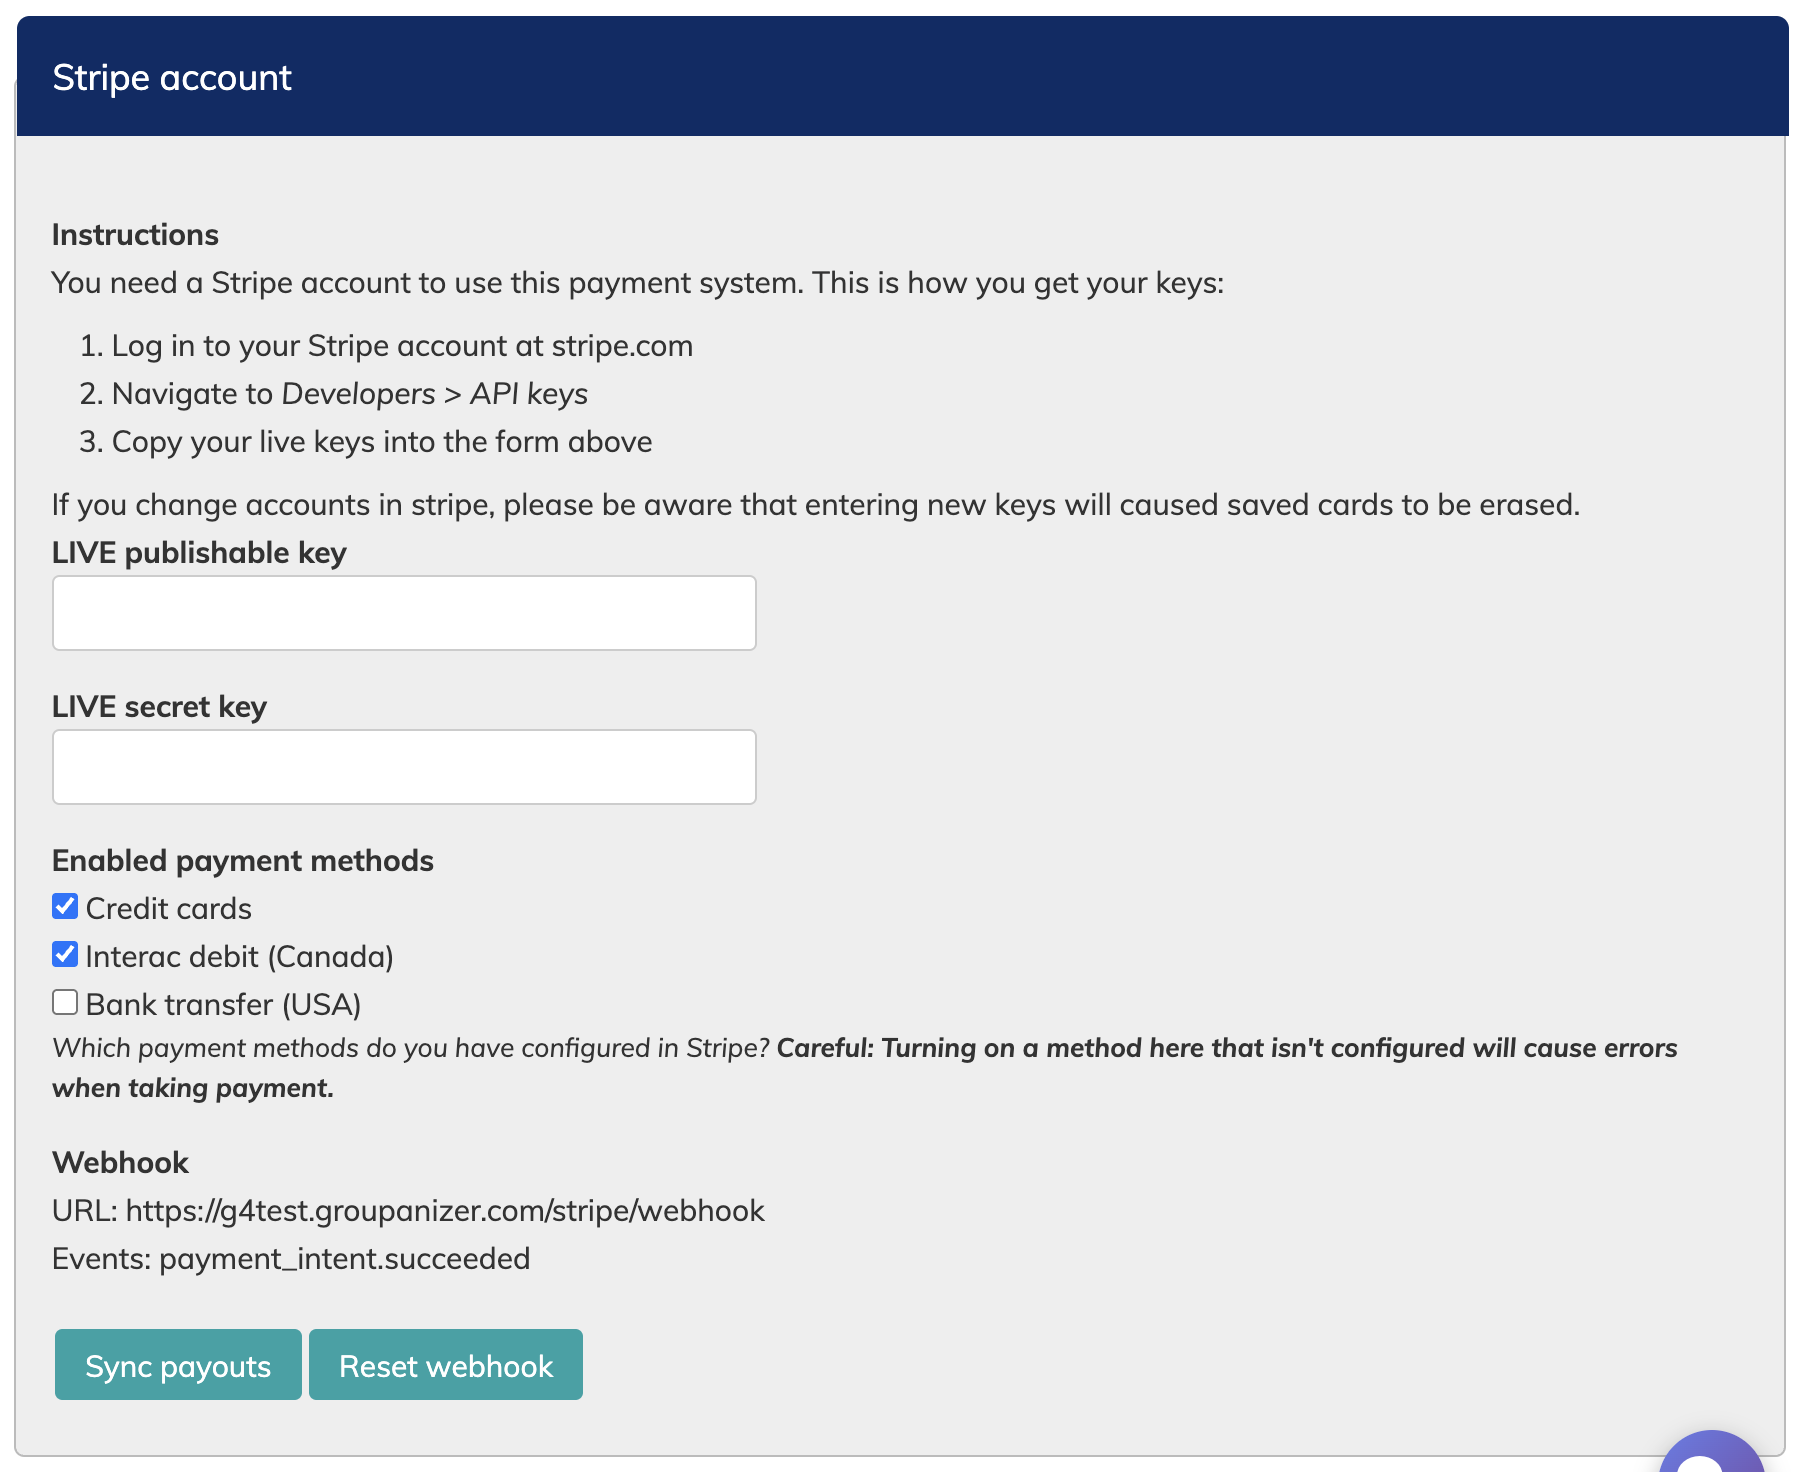
- Stripe account integration
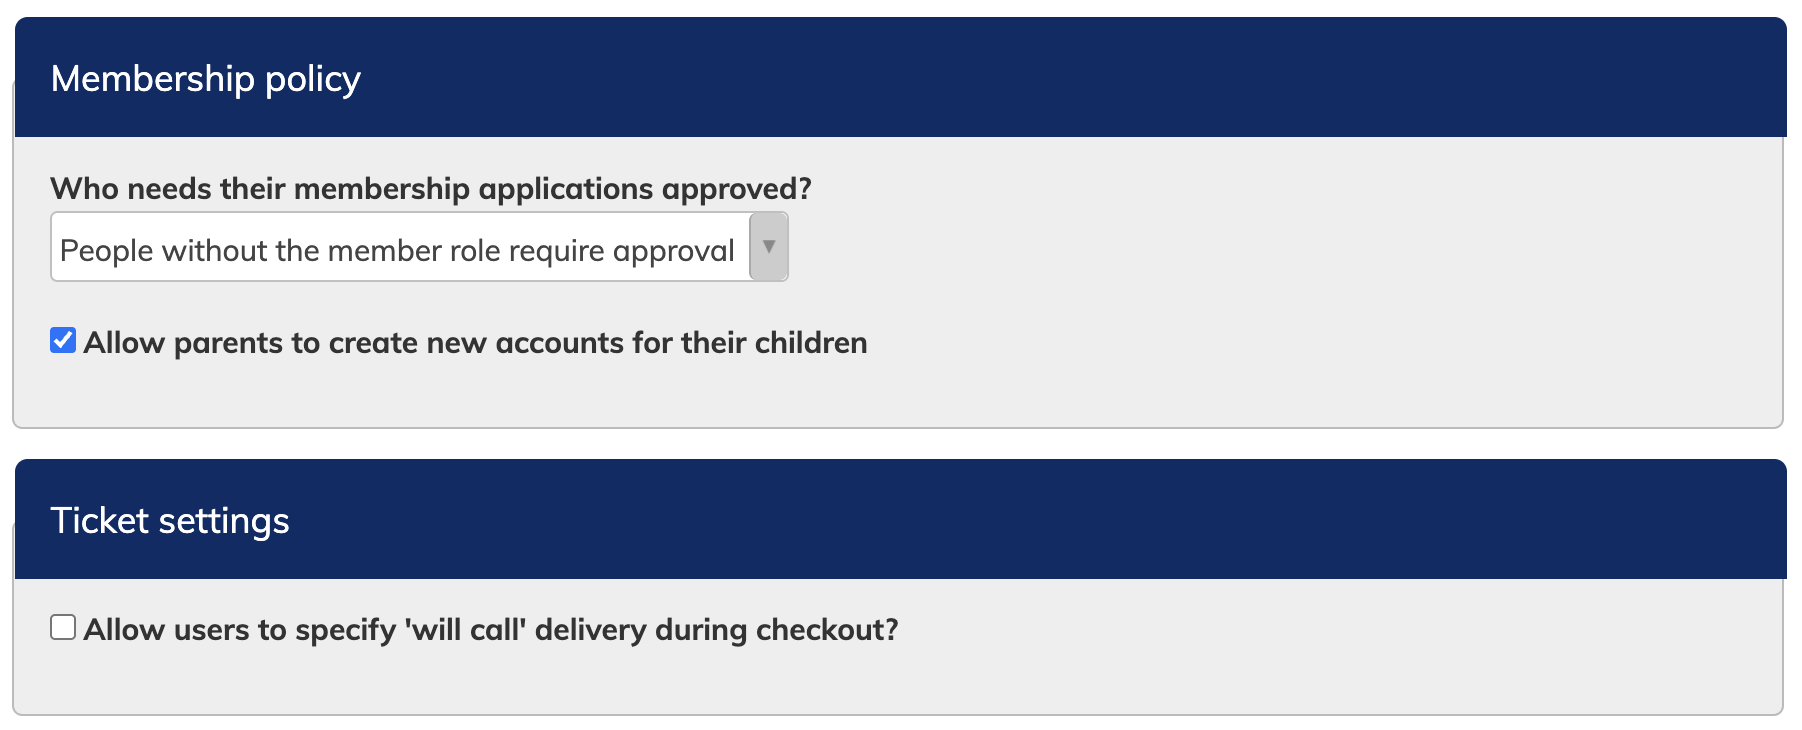
- Membership product approval policy
- Will-call ticket settings
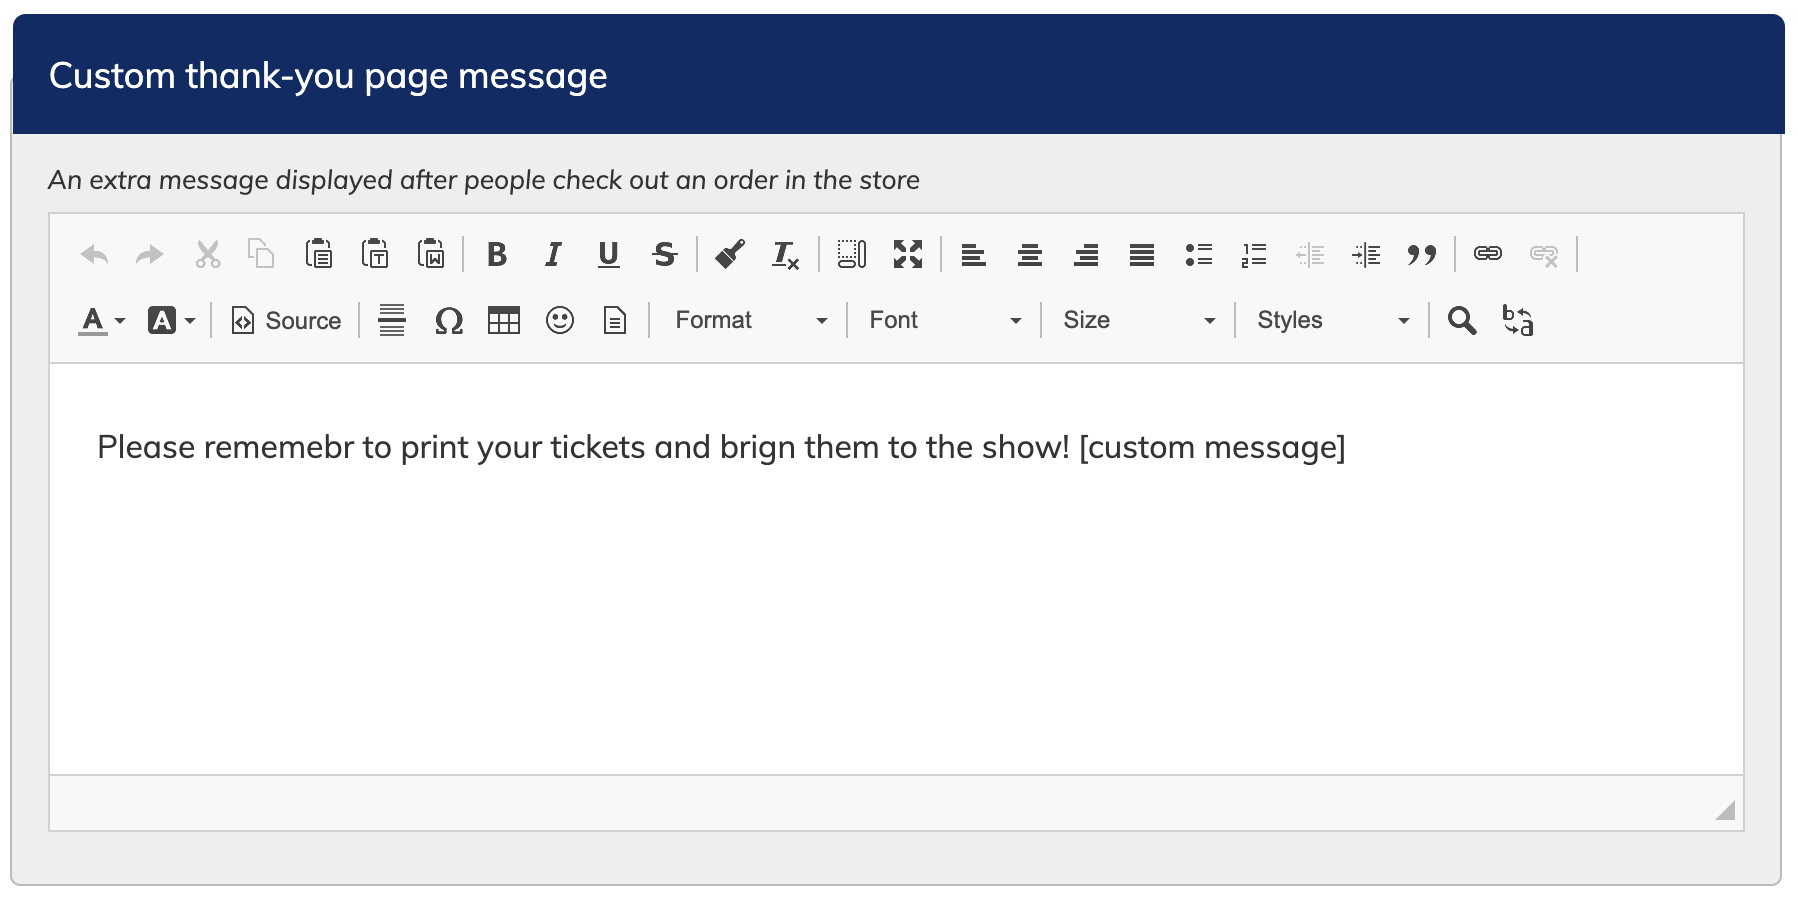
- Customer thank-you page message customization
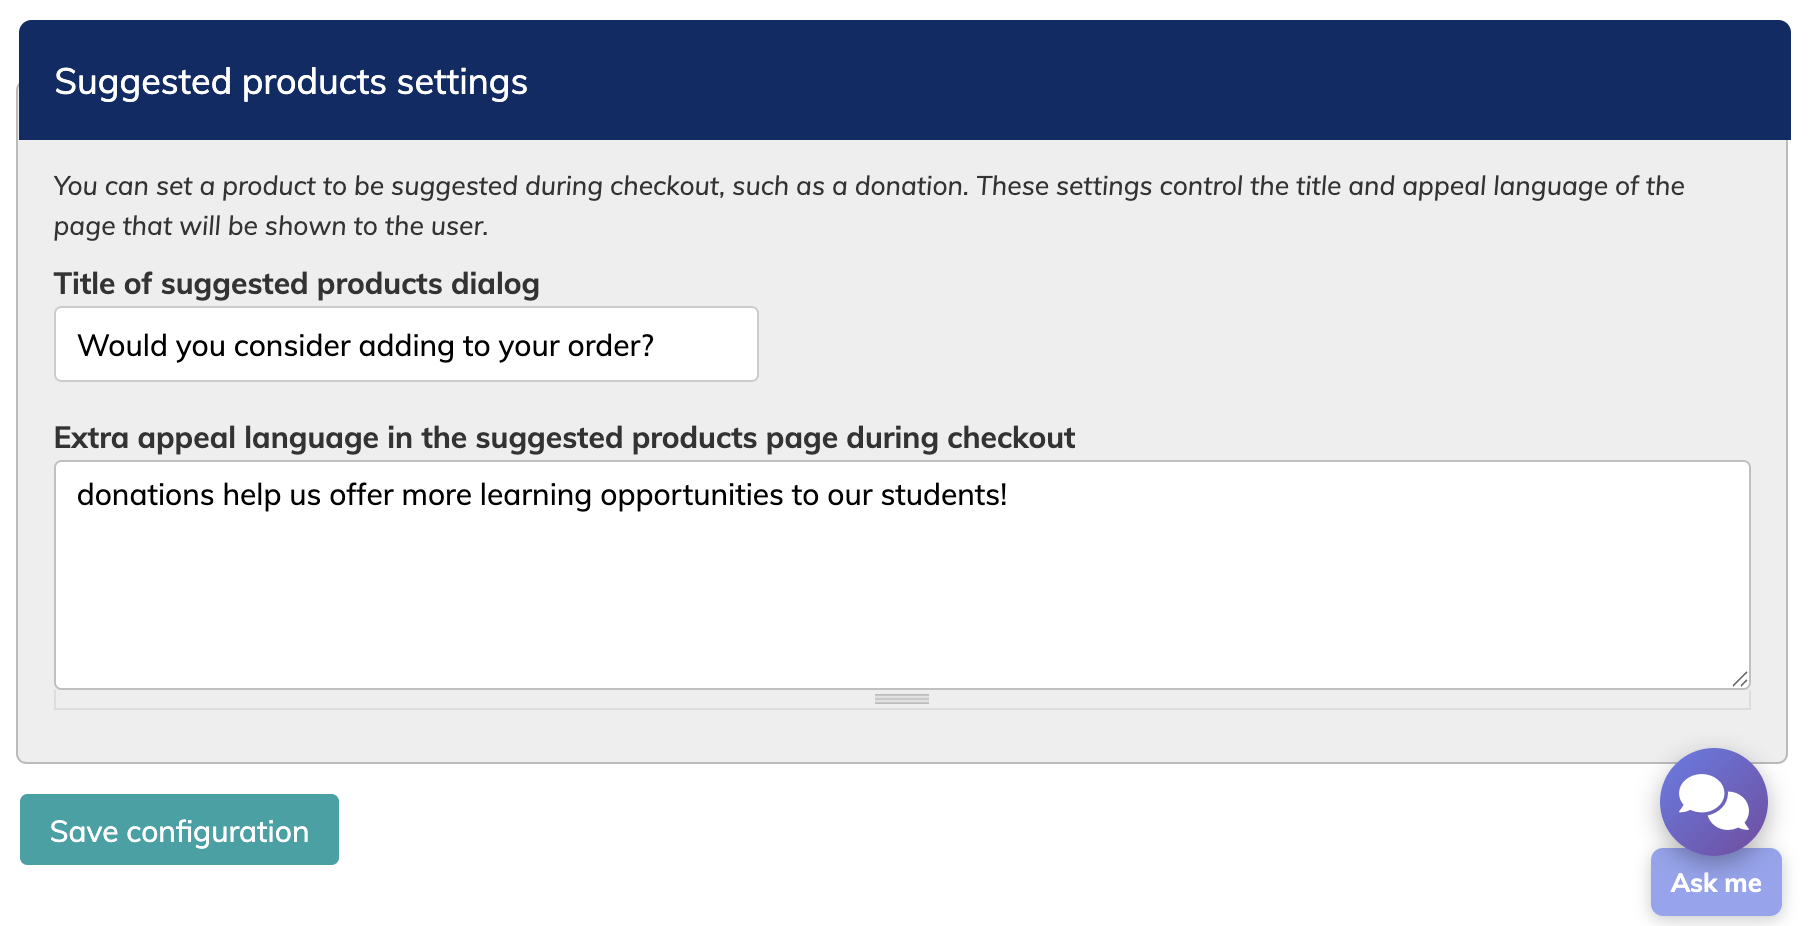
- Suggested products during checkout messaging customization

Enable and disable payment types
There are 3 payment systems that can be used:
- Cash, check, COD - this option allows people to check out store items and "purchase" them without paying their invoice with an online payment method. Once an Admin/Manager has received payment, they can mark the invoice as paid manually (including adding a note with info on the payment received, such as a check number, or that it was cash).
- Stripe - Enabling this payment options allows you to your own Stripe account to process card and Bank Transfer payments. The details of this option are configured in the section below.
- Credit - This allows users to use any credit assigned to their account for a store purchase. More about store credit and how is used can be found here.
These are the global settings for the site. You will notice that individual products also have an option to enable cash payments. It needs to be check-marked in both places to accept a cash payment for an item.
Stripe Account Setup
In this section, you can enter and configure your specific Stripe settings.
You will need to use your own Stripe account for this process, so please sign up for and setup a stripe account.
ChoirGenius will not take any processing fees for card or bank transfer payments, but Stripe does have their own fees, which we recommend reviewing on your Stripe account. Generally, bank transfers have a lower processing fees, but they take longer to clear. Credit card purchases clear quickly, but have a higher processing fee taken by Stripe.
To connect your account, you will need your Live publishable key, and Live secret key. To get your keys:
- Log in to your Stripe account at stripe.com
- Navigate to Developers > API keys
- Copy your live keys into the appropriate fields on the screen
If you change accounts in stripe, please be aware that entering new keys will caused saved cards to be erased.
The next step is to enable the payment methods you want to allow Stripe to use. The three options are:
- Card - this allows users to pay using most major credit cards, from various countries.
- Interac debit (Canada) - this option can only be used by Stripe account holders residing in Canada. It will allow customers to set up a bank transfer to pay their invoices/make store purchases.
- Bank Transfer (USA) - this option can only be used by Stripe account holders residing in the USA. It will allow customers to set up a bank transfer to pay their invoices/make store purchases.
Interac debit and bank transfers are both "slow" payment methods, that take 2 to 3 days to clear payment. However, they generally have a lower Stripe processing fee that credit cards - please refer to your Stripe account for the exact percentage. Invoices paid with bank payment will stay in a "processing" state for several days as it waits for payment to clear. During this time, they cannot be canceled or refunded if a mistake was made. Once payment clears, payment can be refunded for up to 180 days. Refunds can take up to 5 days to process.
Credit card purchases will clear almost immediately, unless there is an issue with the card. Credit cards have a higher processing fee with Stripe that bank payments - please refer to your Stripe account for the exact percentage. Refunds can be performed, and display immediately in your the records, although they can take a few days to appear on the purchasers card.
Stripe requires you to choose your accepted payment methods. This is done in the "settings" area of your account. Detailed instructions can be found on Stripe's support site.
If there is a discordance between the two sites settings, there will be failed payments on invoices and orders.
If you switch enabled payment methods and users have saved payment methods of a type that is no longer allowed, this can cause failed payments on invoices created through the recurring billing process.
If an account has a saved payment method that is no longer allowed, it will hide it on the checkout screen, but it cannot automatically remove it from previous orders that may be creating new invoices for an active subscription. Those invoices will fail payment, and notify Admins/Managers (typically - the people notified depends on the setting in Notifications) via email. Admins/Managers can then reach out to the user to switch their default payment method to an allowed type, and update their payment information on the order and the invoice accordingly.
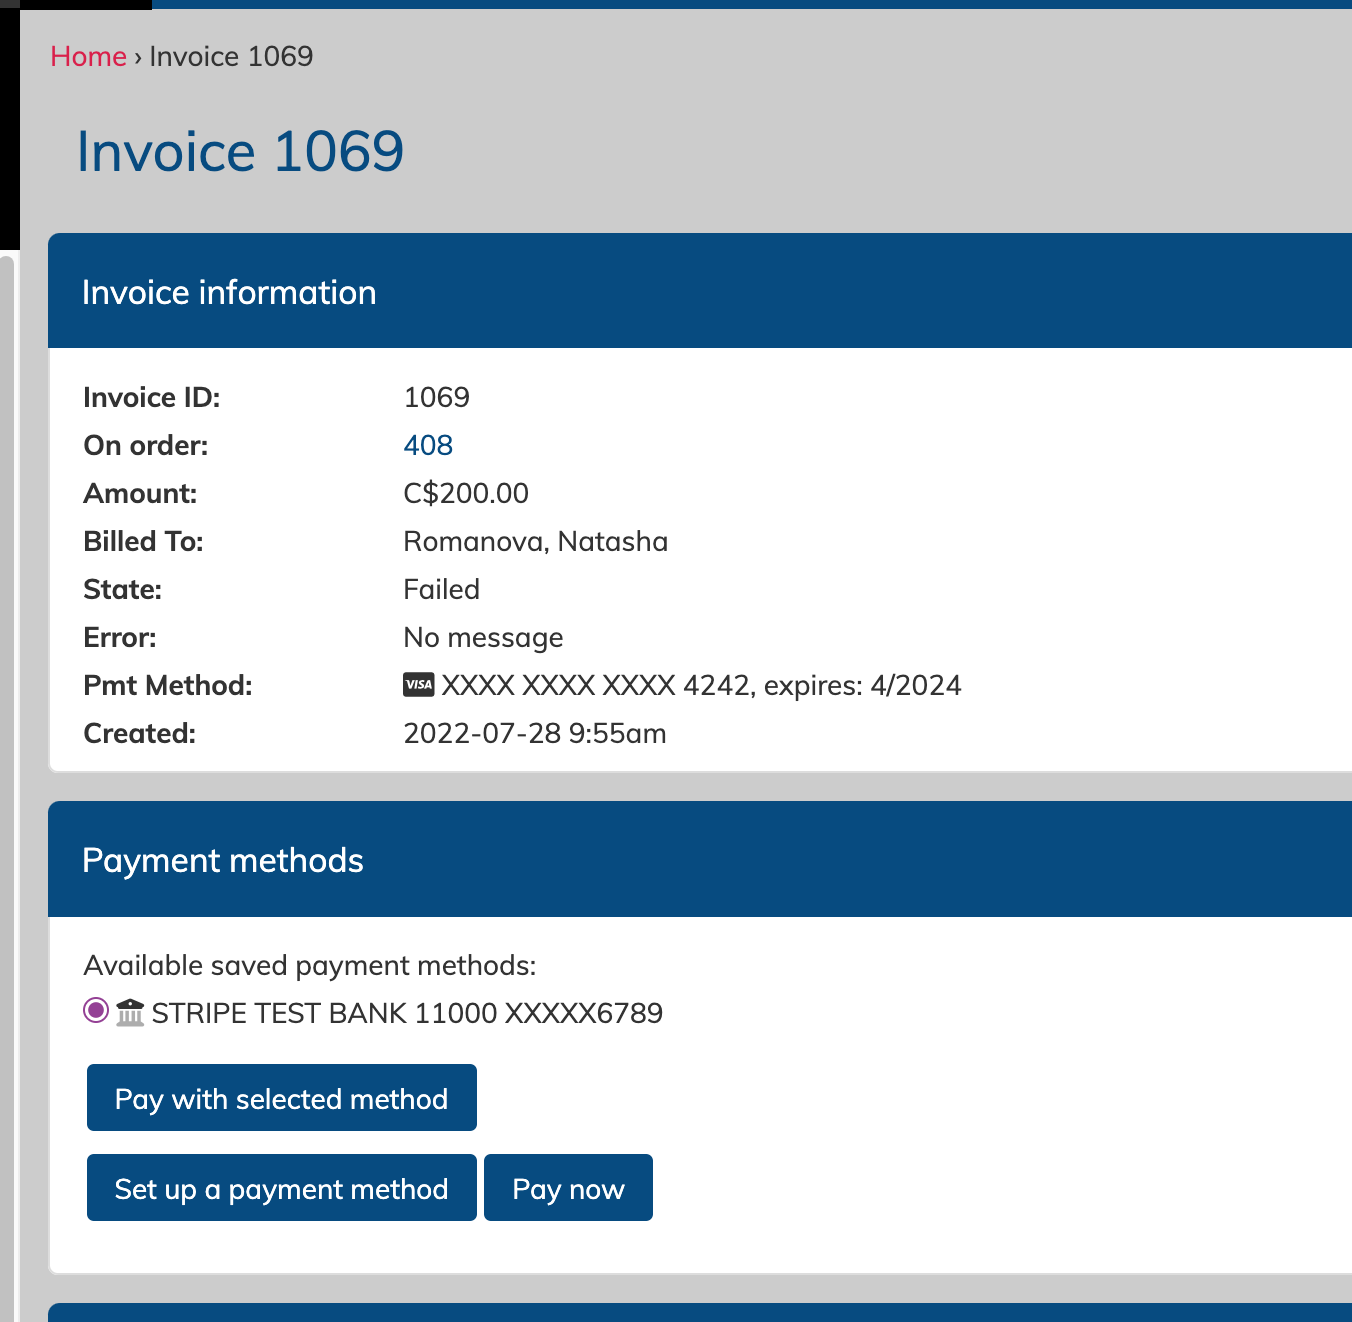
Note that the error given is currently "no message" - this is because the payment method is unrecognized by stripe, so it cannot return an error code. If it was a problem with a card itself, there would be a reason given in the error.
There are also no transactions records below the invoice items, showing payment cannot be processed because the options selected is not recognized.
The "sync payouts" button should be used before pulling reports regarding payout data from your stripe account. The system automatically logs received payments on invoices, but the payout data from stripe need to be pulled into your site using this button.
Payouts are the timing at which you receive your collected money from Stripe. You can configure the timing of your payouts in your Stripe account to receive money more quickly. The default is typically a payout each week.
The "reset webhooks" button is generally not needed, unless you are experiencing issues with the site connecting to your stripe account. If your site has recently changed URLs, this can be needed.
What the payment process looks like for customers
Here are some screenshot examples of what the payment process looks like for your customers, both during checkout, and if they add a saved payment method.
The exact options they see will change depending on the settings you have enabled. The examples below allow for both card and bank transfer payments.
During checkout
If it's a one time purchase only, then the customer will be able to add a saved payment method, or they can click "pay now" to just use their info for this one purchase.
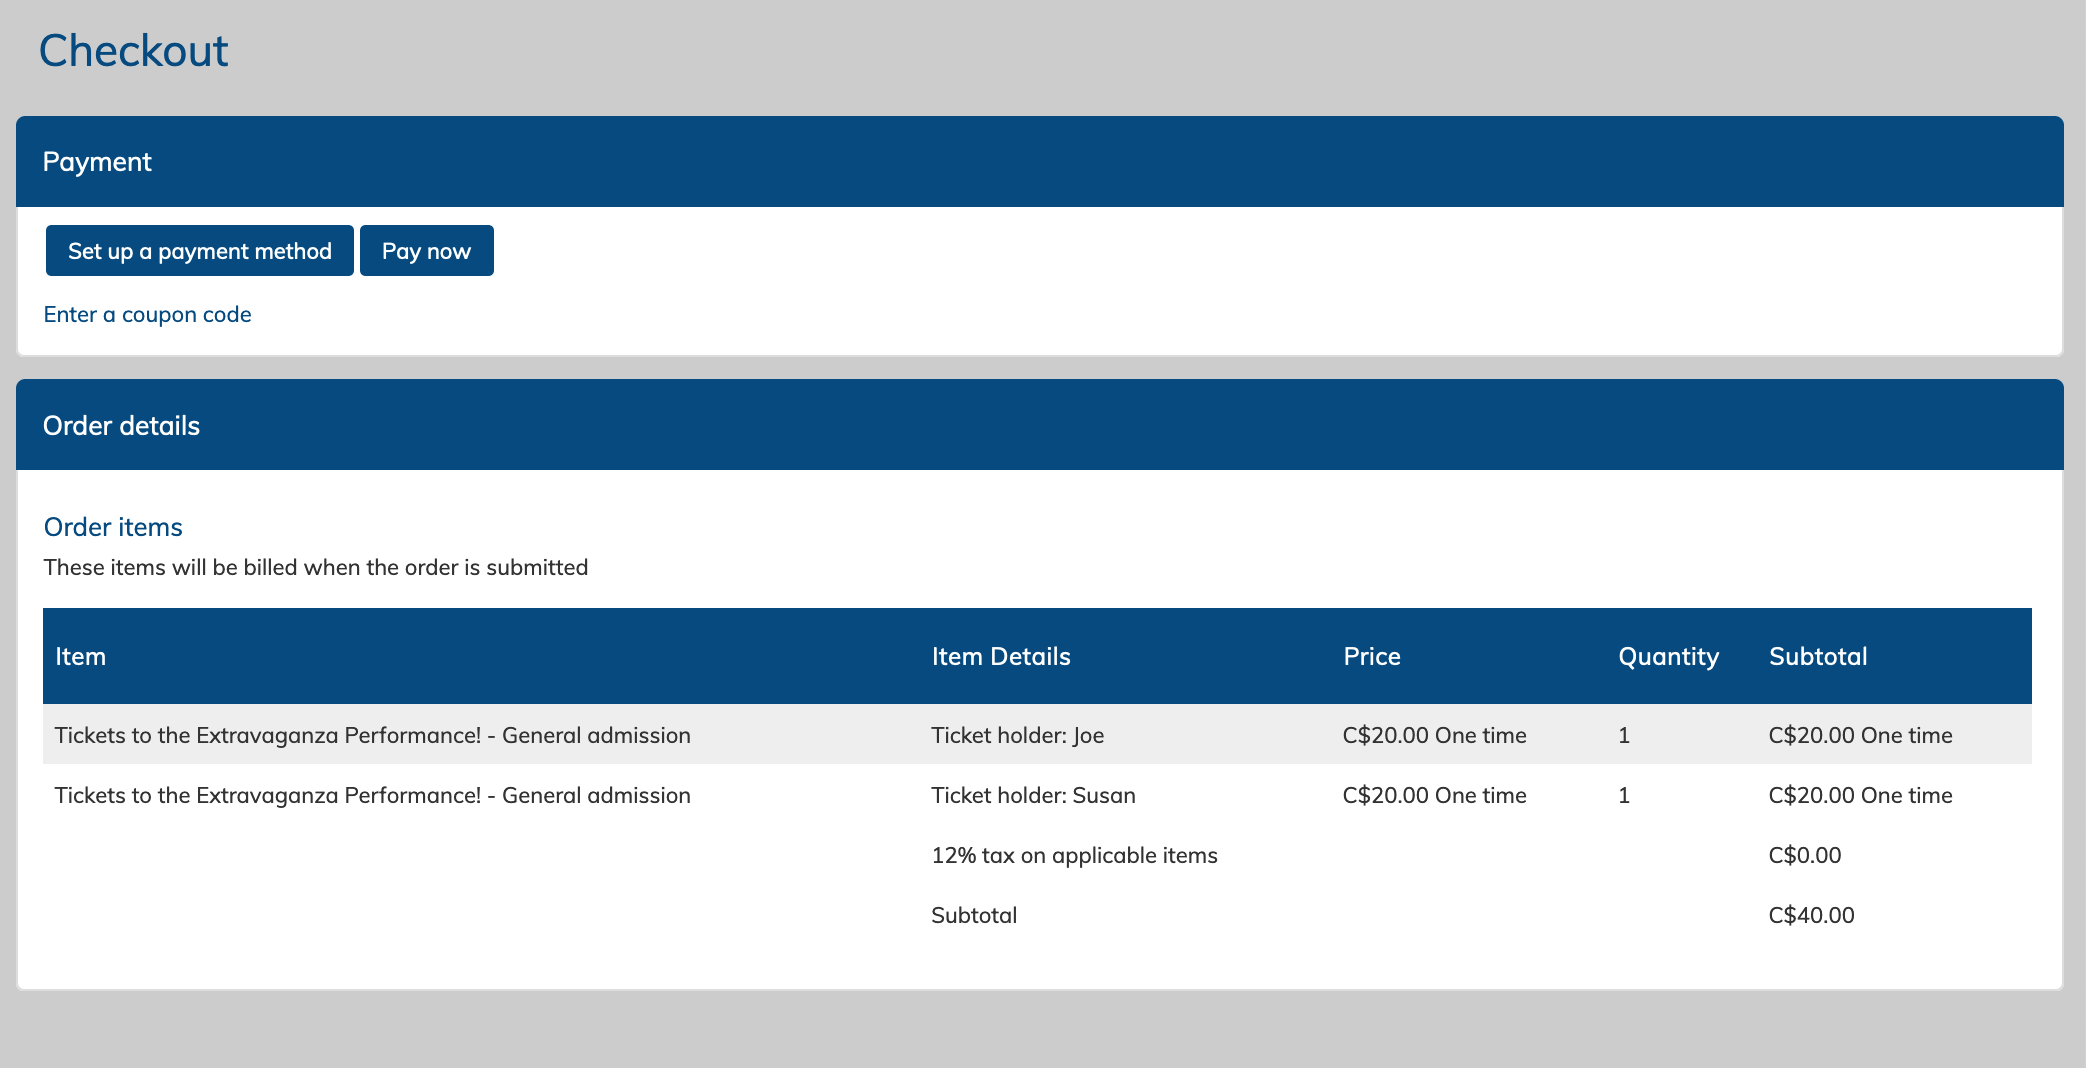
If there is a subscription product in their cart then they will be asked to save a payment method as part of their checkout in order to save a payment for the invoices the subscription will create over time.
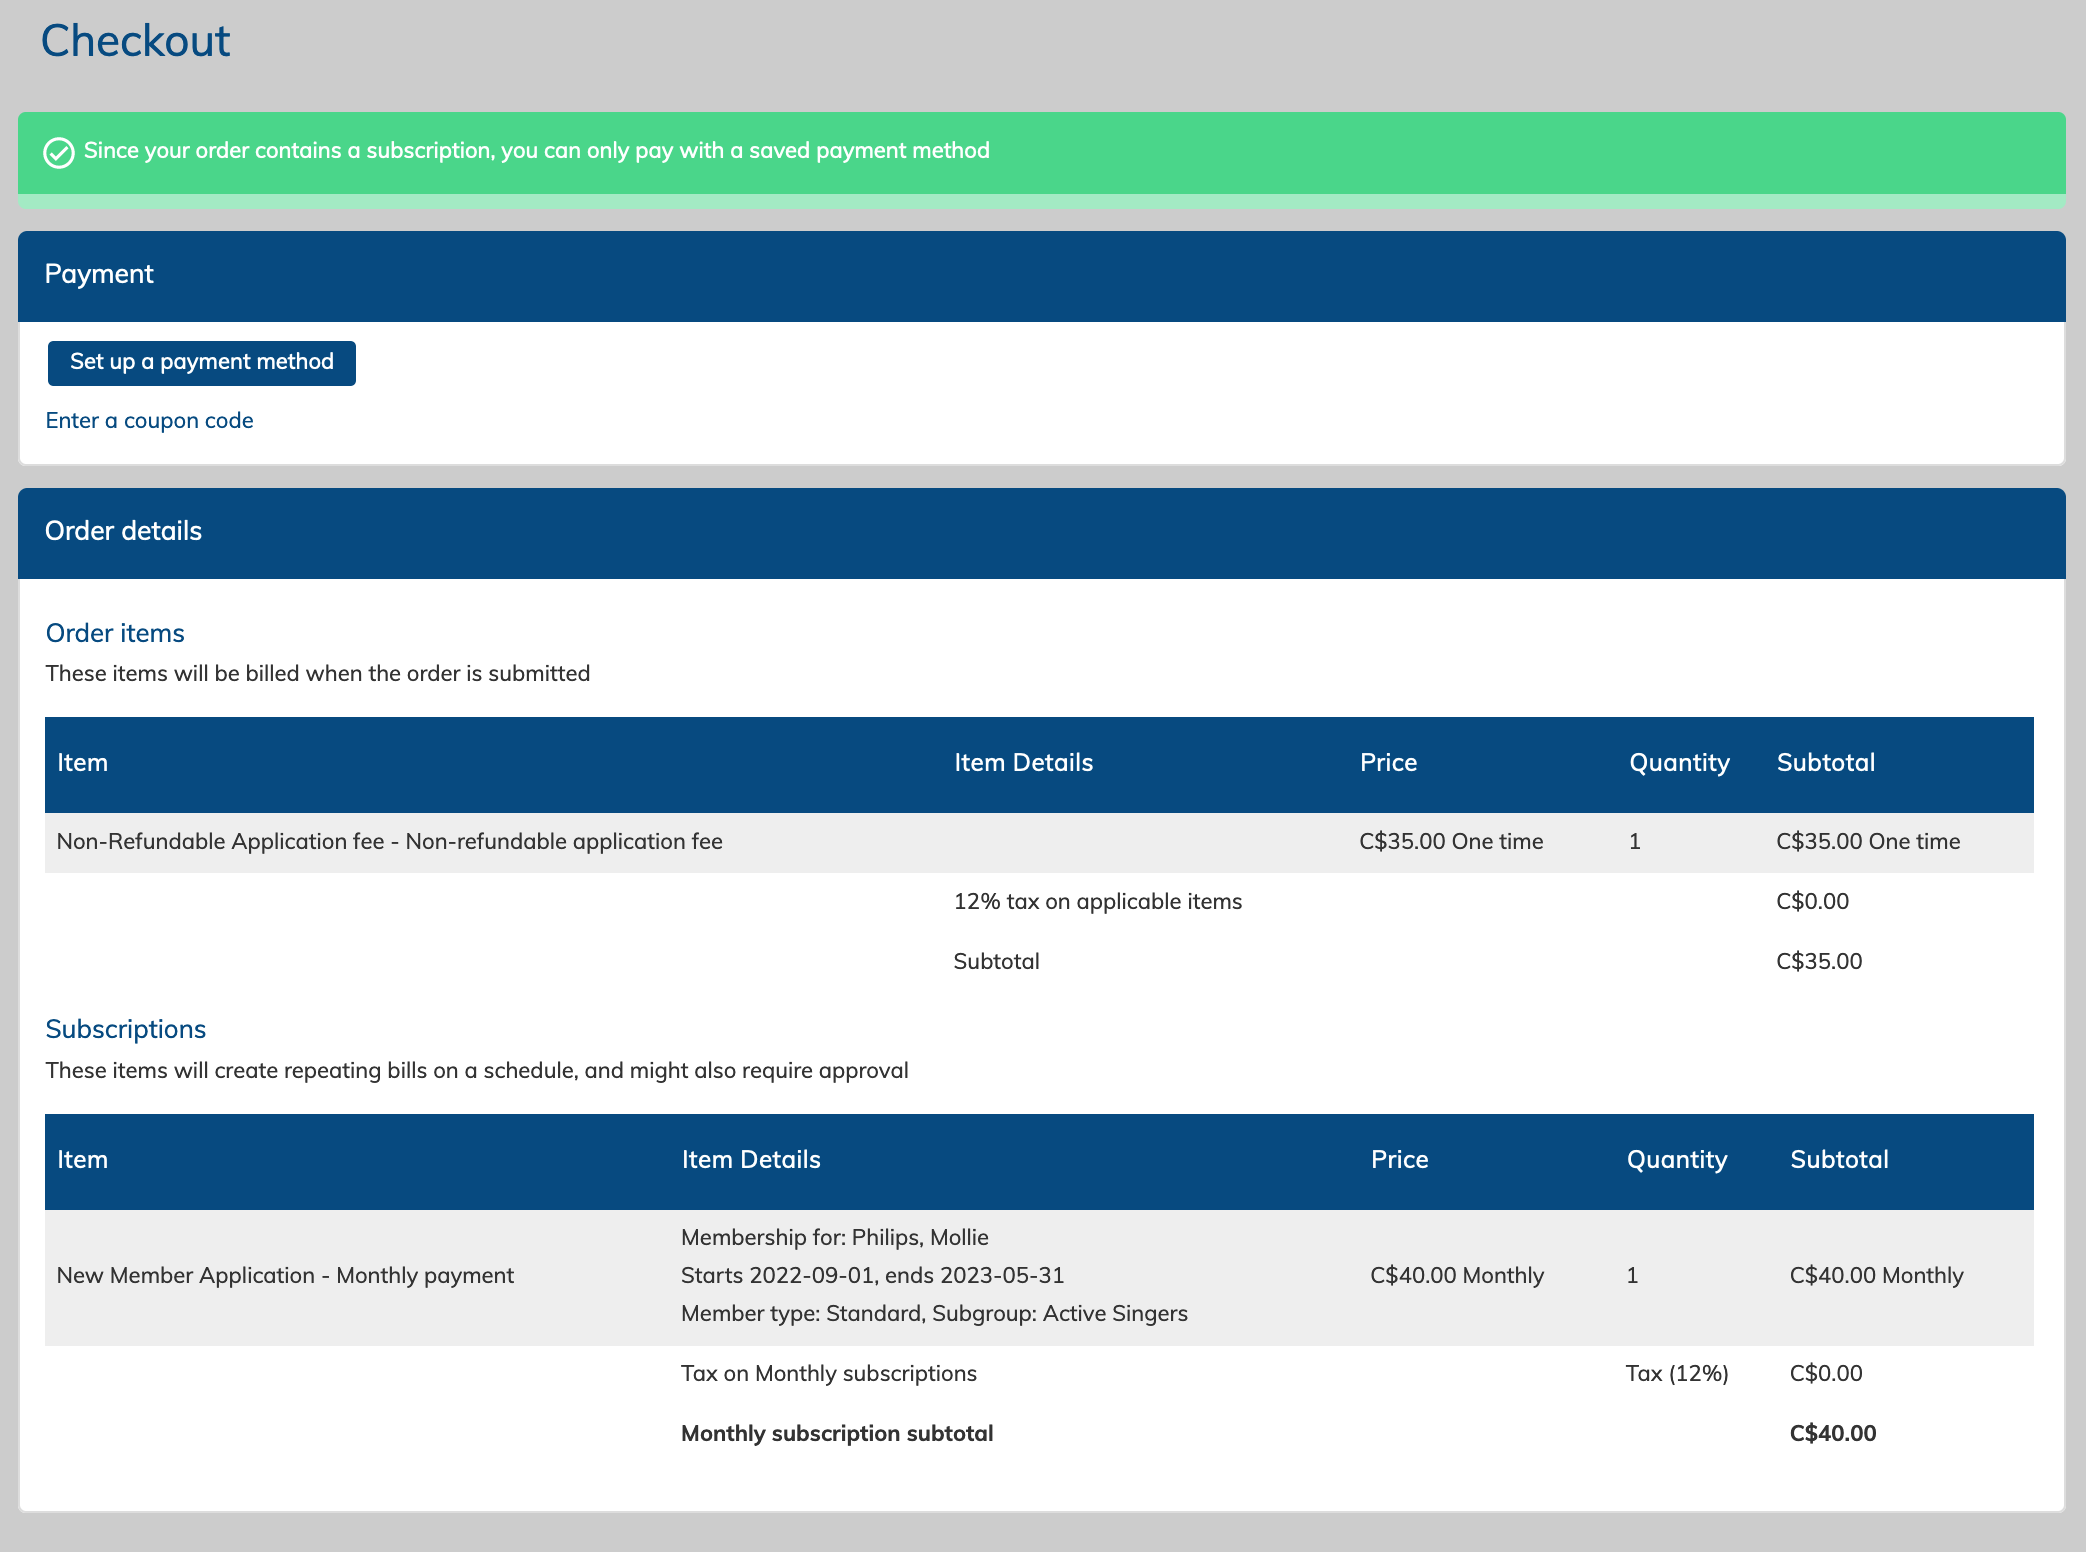
Clicking "Pay now"
Clicking the "Pay now" button will open a Stripe window where your customer can enter their payment details. If you have multiple options enabled, they can click to select a card, or bank transfer.

Adding a saved payment method
Your customer can select to add a saved payment method as part of the checkout process, or, they can add a saved method under the "settings" tab of their profile (there's a link in the top left menu to access your account settings tab).

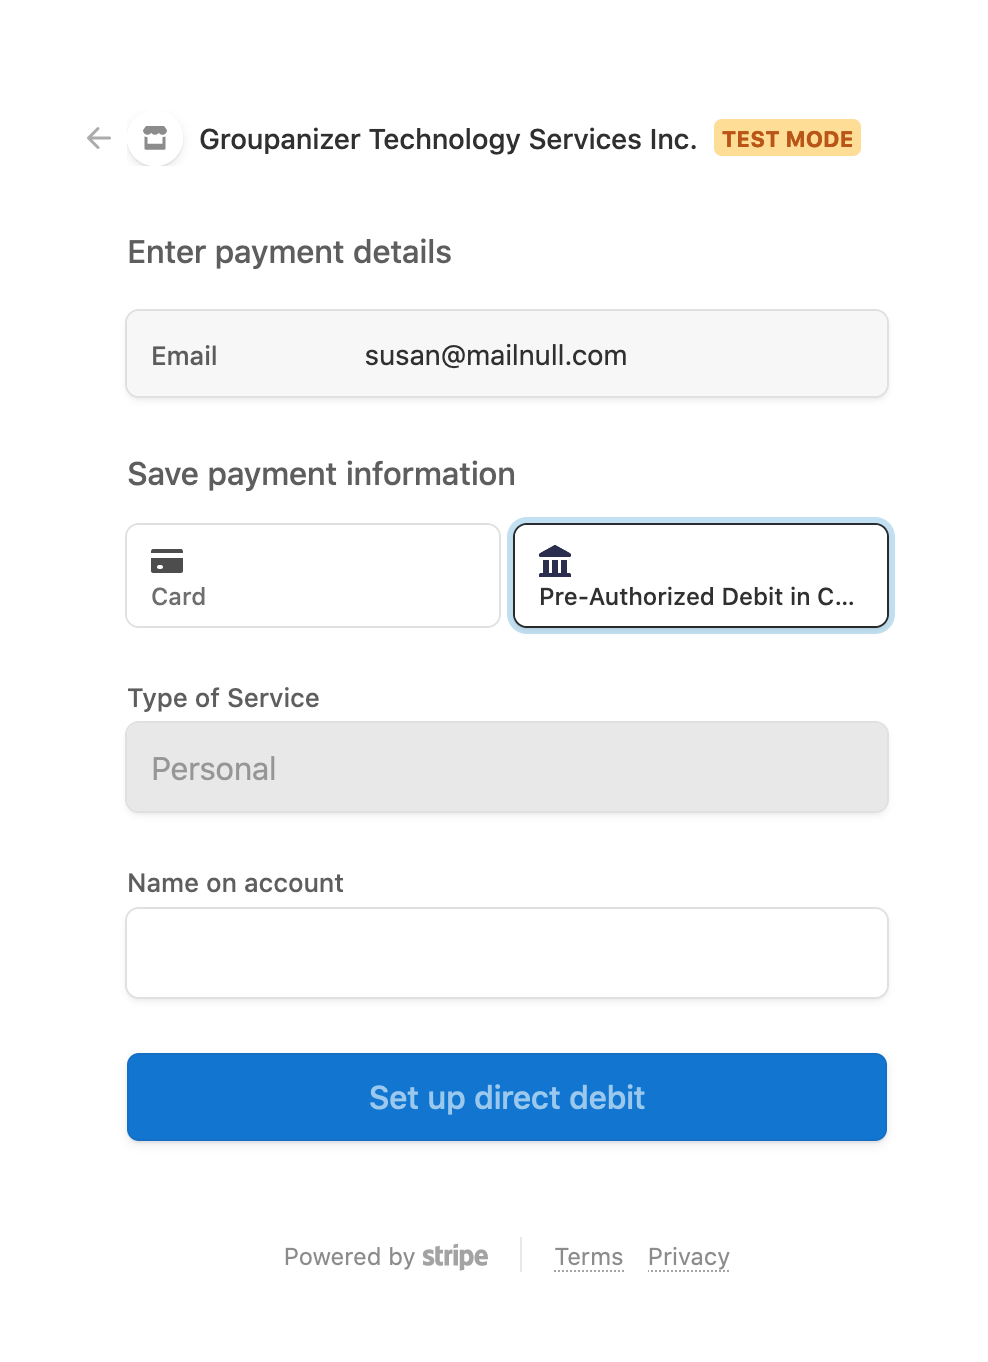
The above examples show the screen for the card entry and the bank transfer settings respectively. If the bank transfer option is selected, there will be separate verification windows that open to collect permissions from the customer.