Table of Contents:
- Events Summary
- Add events
- Repeating events
- Copying an existing event
- Import events
- Viewing & Managing events
- Edit events
- Delete events
- Event customization options
- Notifications
- send an email to invitees
Summary
Events allows you to keep a calendar of rehearsals, meetings, and performances available to a variety of people. You can select if the event is visible to public, if it's on everyone's calendar, or if it's limited only to those invited to attend.
Events can also have connected features, such as volunteer jobs, or time slot sign ups - allowing you to easily keep track of the event details and these other features all in one place.
These features are discussed in more detail below.
Adding Events
Events can be added via the menu:
Calendar & Events > Add Event

On the "Add event" page, you can configure several settings:
Event type - This helps to categorize the type of event. this list of terms is configurable under "vocabularies" on the Admin Tools & Settings page.
Title - This is the title of your event.
Start & End - Choose the start and end date & time of your event. Most events will be on the same day, but have a later end time. Type in the box, or use the date and time selector that will pop up when you click in the field.
All day checkbox - if this event lasts all day and does not have a true start or end time, checkmark this box. Only the date will display on the event.
Set repeat - if you would like to create a series of repeating events based on the event you are creating, click this button. See this section for more details.
Event notes - This notes field can be used to add notes about this event. Anyone invited to view or attend this event will see these notes. if the event is check-marked to be public, these notes will be visible to non-logged in people as well should they view the event.
A new attached files field will be visible beneath the Internal event notes to upload files for your members to access (as long as they are invited to the event). Items can be left as attachments, or embedded into the notes area.
Available Tuesday October 14th 2025
Location details - if your event has a physical location, enter the details here. Change the country first before selecting a state/province if necessary. This appress will have a Google Maps link when viewing the event.
Online link - Pate the url of your zoom, teams, google, etc meeting here. This will be a clickable link when viewing the event.
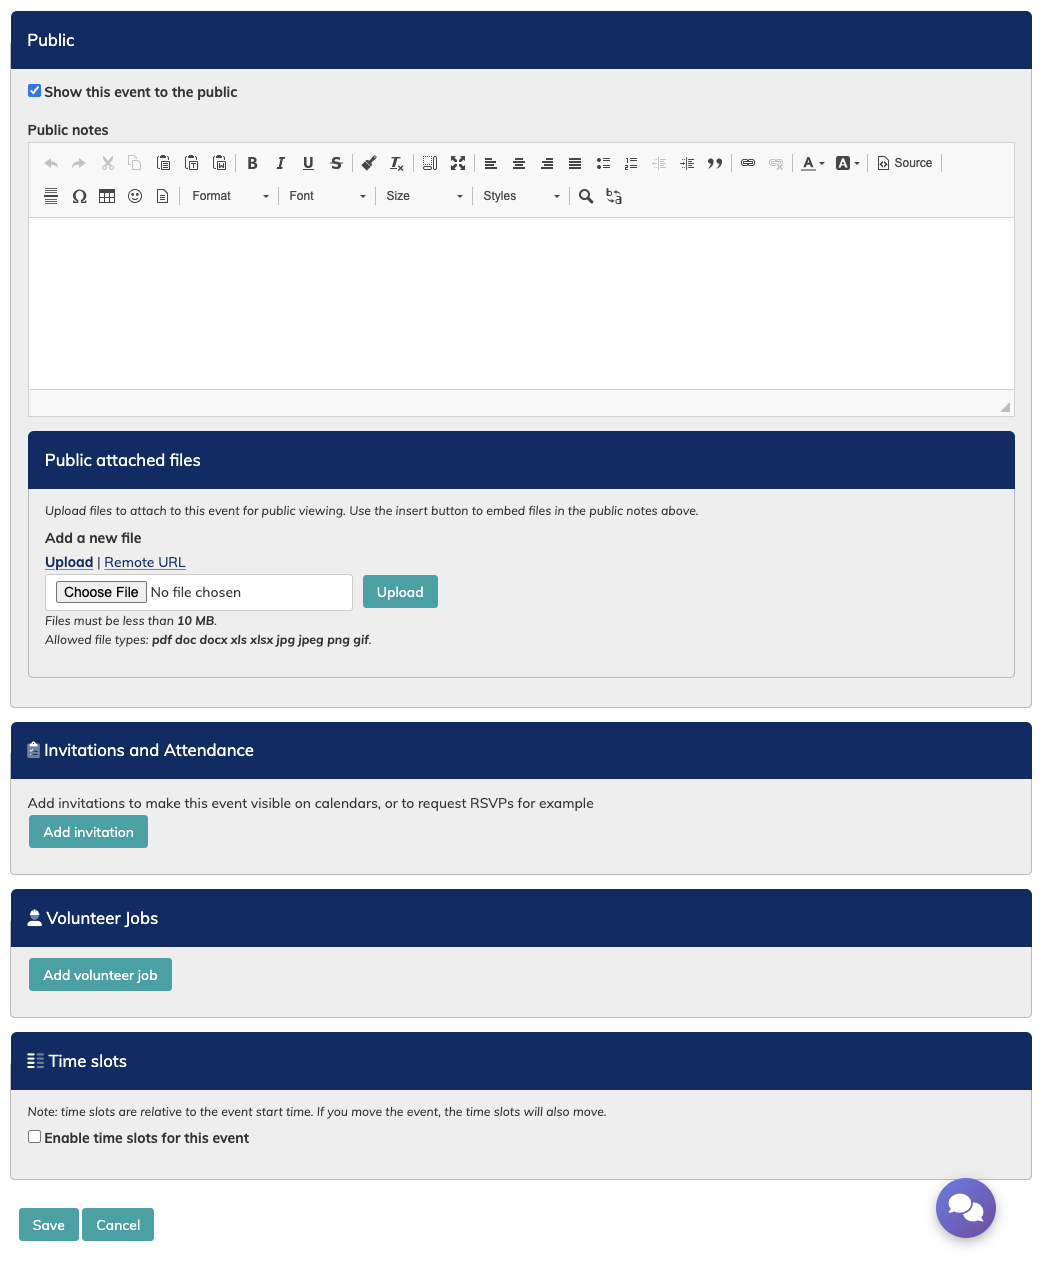
Show this event to the public - checkmark this box to enable non-logged in users to see this event. This is often done for performances and open rehearsals.
A new public attached files field will be visible beneath the Internal event notes to upload files for the public to access. Items can be left as attachments, or embedded into the notes area.
Available Tuesday October 14th 2025
Add invitation - Click the button to add attendance invitations. This is required for your Members to see events on their calendar. You can read more about attendance here.
Add volunteer jobs - Click the button to add your volunteer jobs. You can read more about volunteer jobs here.
Enable time slots for this event - Checkmark the box if you wish to enable time slot sign ups for this event. This will display the settings options. You can read more about time slots here.
Remember to save the event before navigating away.
Do your rehearsals take place on the same day and time each week? Then setting up a set of "repeating" events is likely the best options for you! First, set your start and end time for you first rehearsal, then click the "set repeat" button to choose how often the event will repeat.
Below is an example event for a rehearsal on Tuesday night, starting on September 5th 2023, and ending with the last rehearsal on Tuesday June 25 2024.
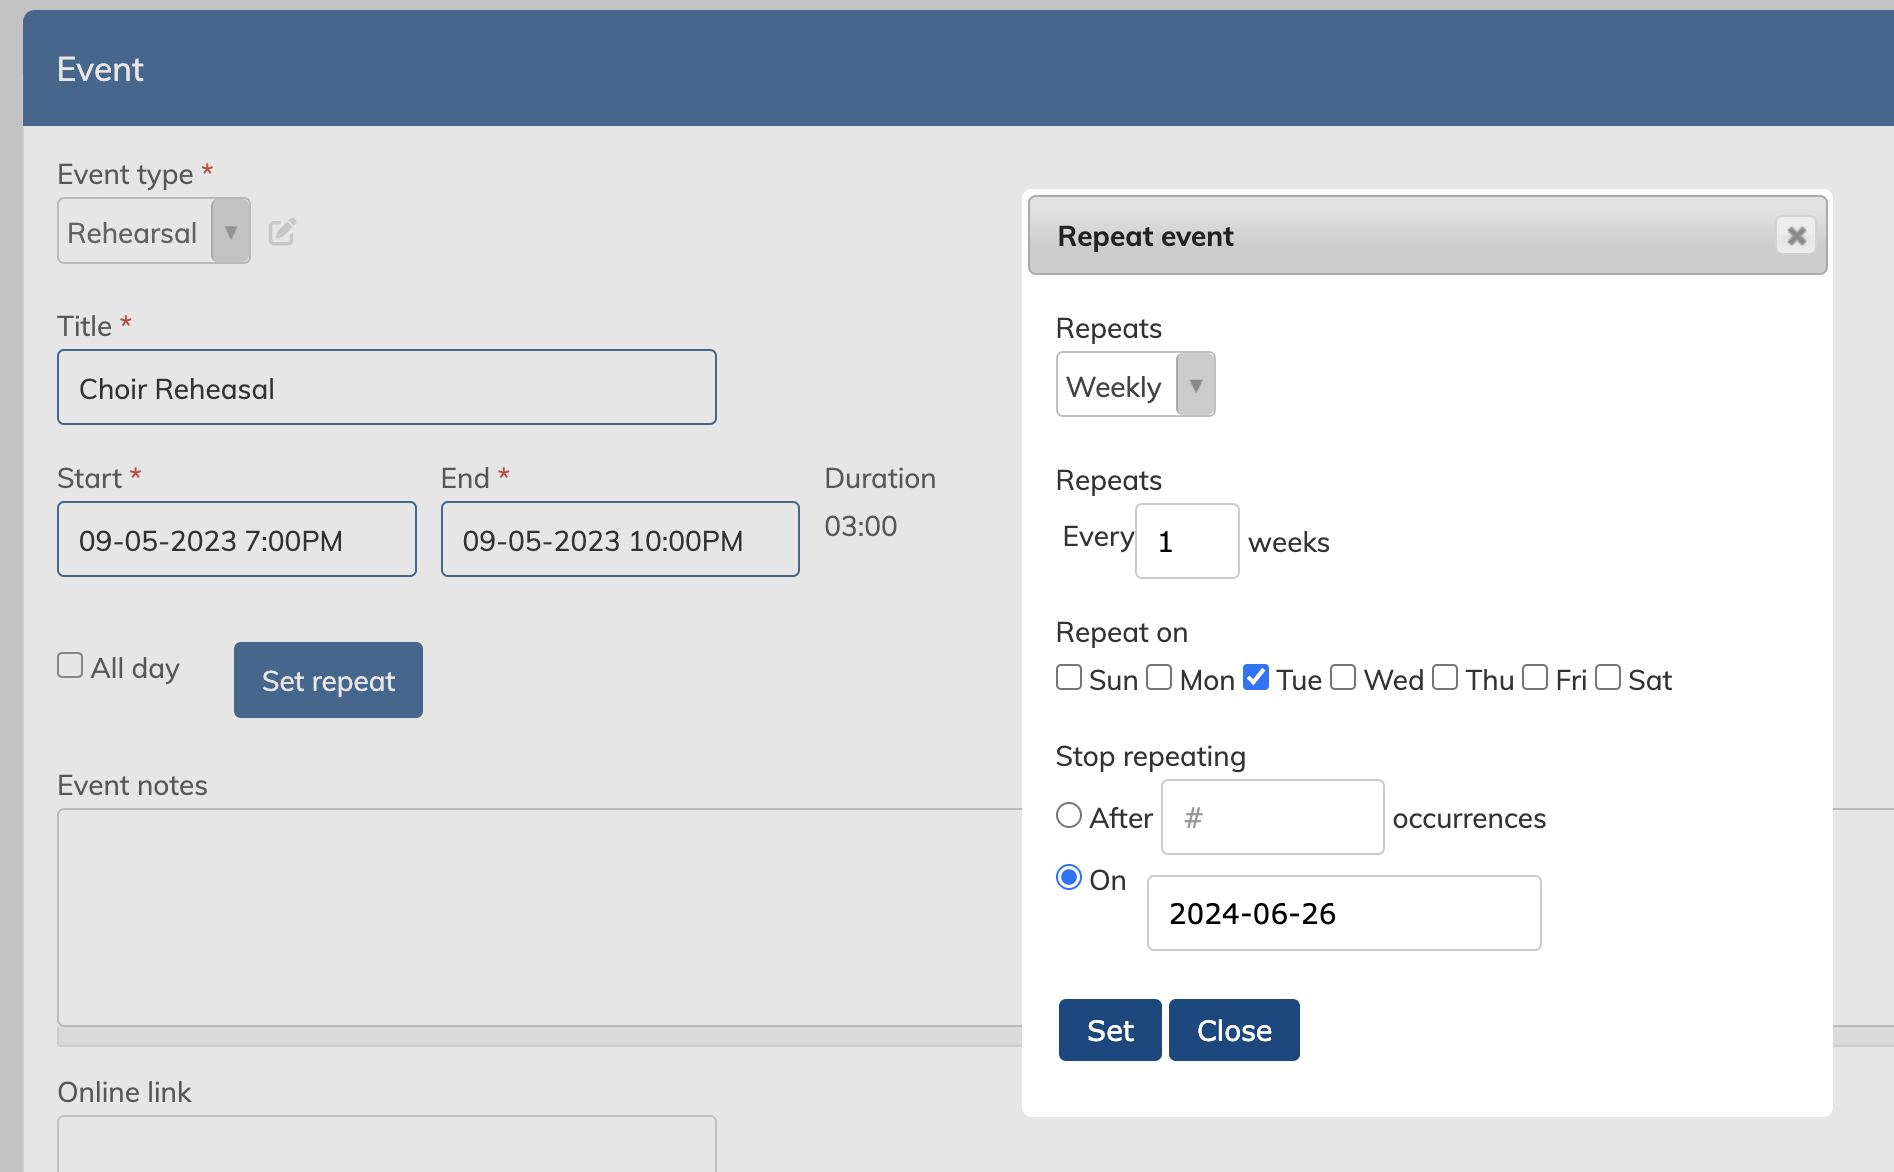
There are a variety of repeat configurations available, such as monthly:
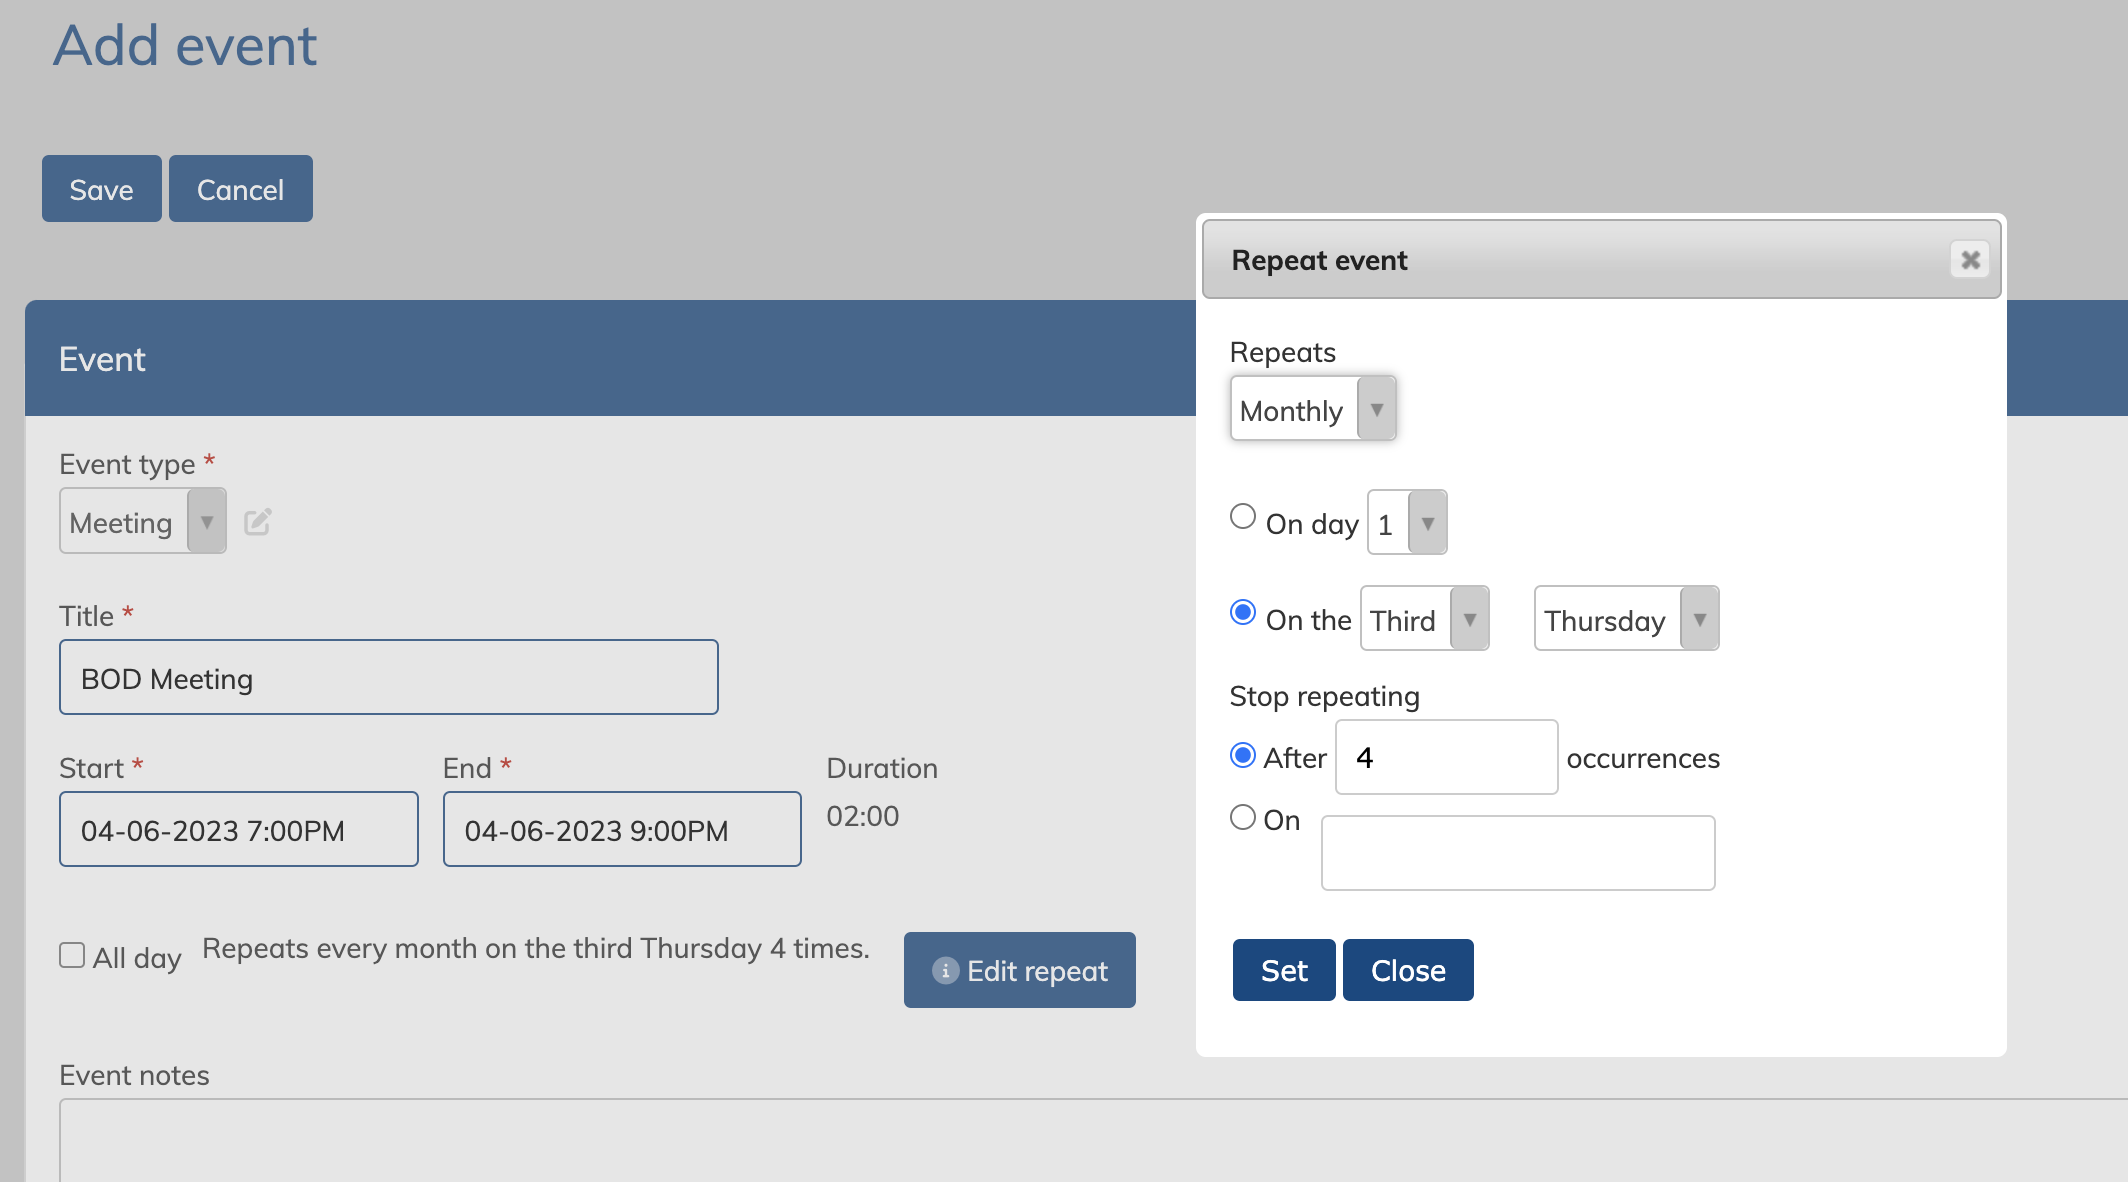
When setting the repeat you cannot skip days, but after creating them, you can simply delete the events you don't need.
Click "set" to create this repeat for this event. Then click "close" to close the dialogue box.
You will then see the repeat setting on the event. You can edit it by clicking the "edit" button to the right.
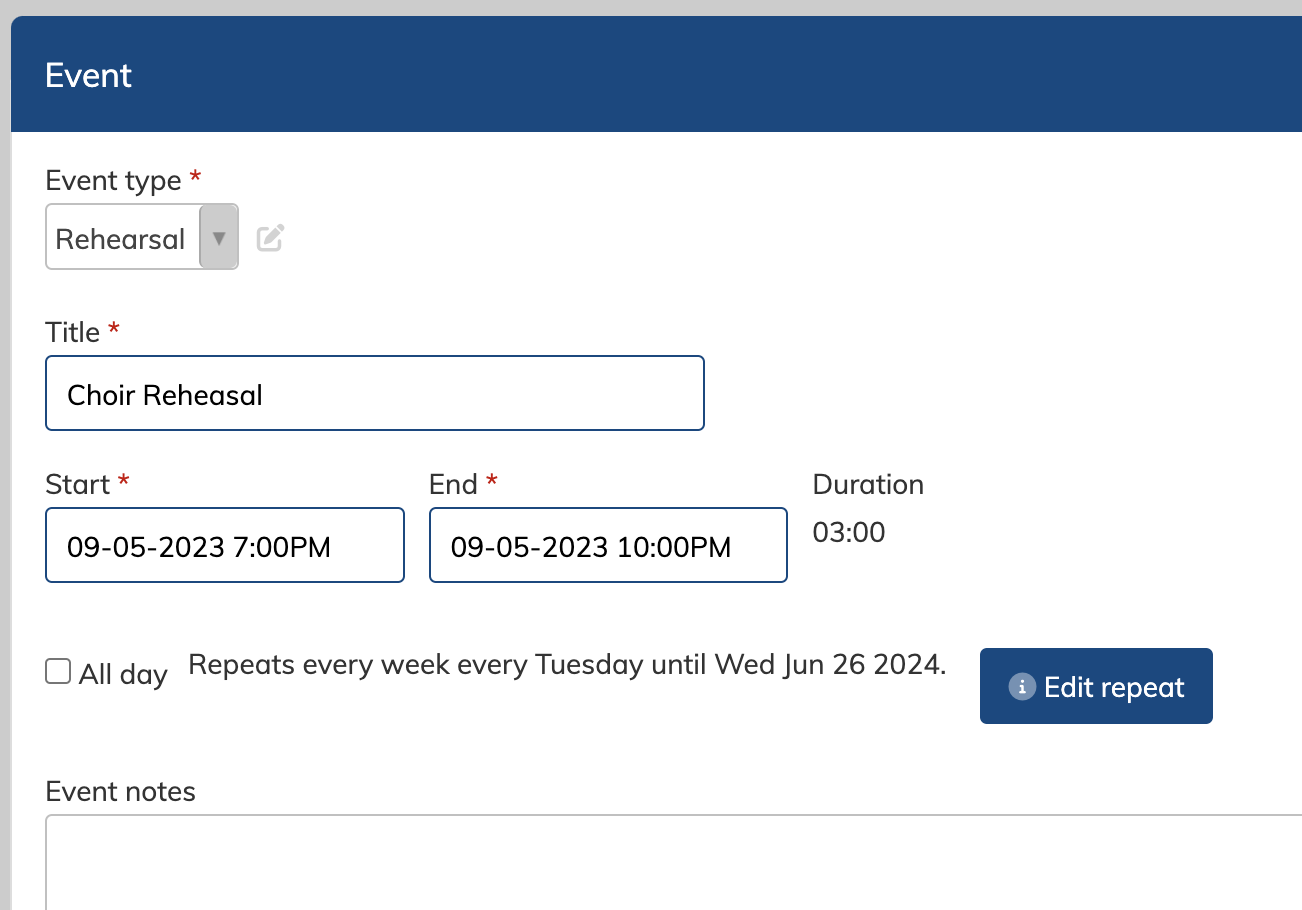 Be sure to save your event to save your changes.
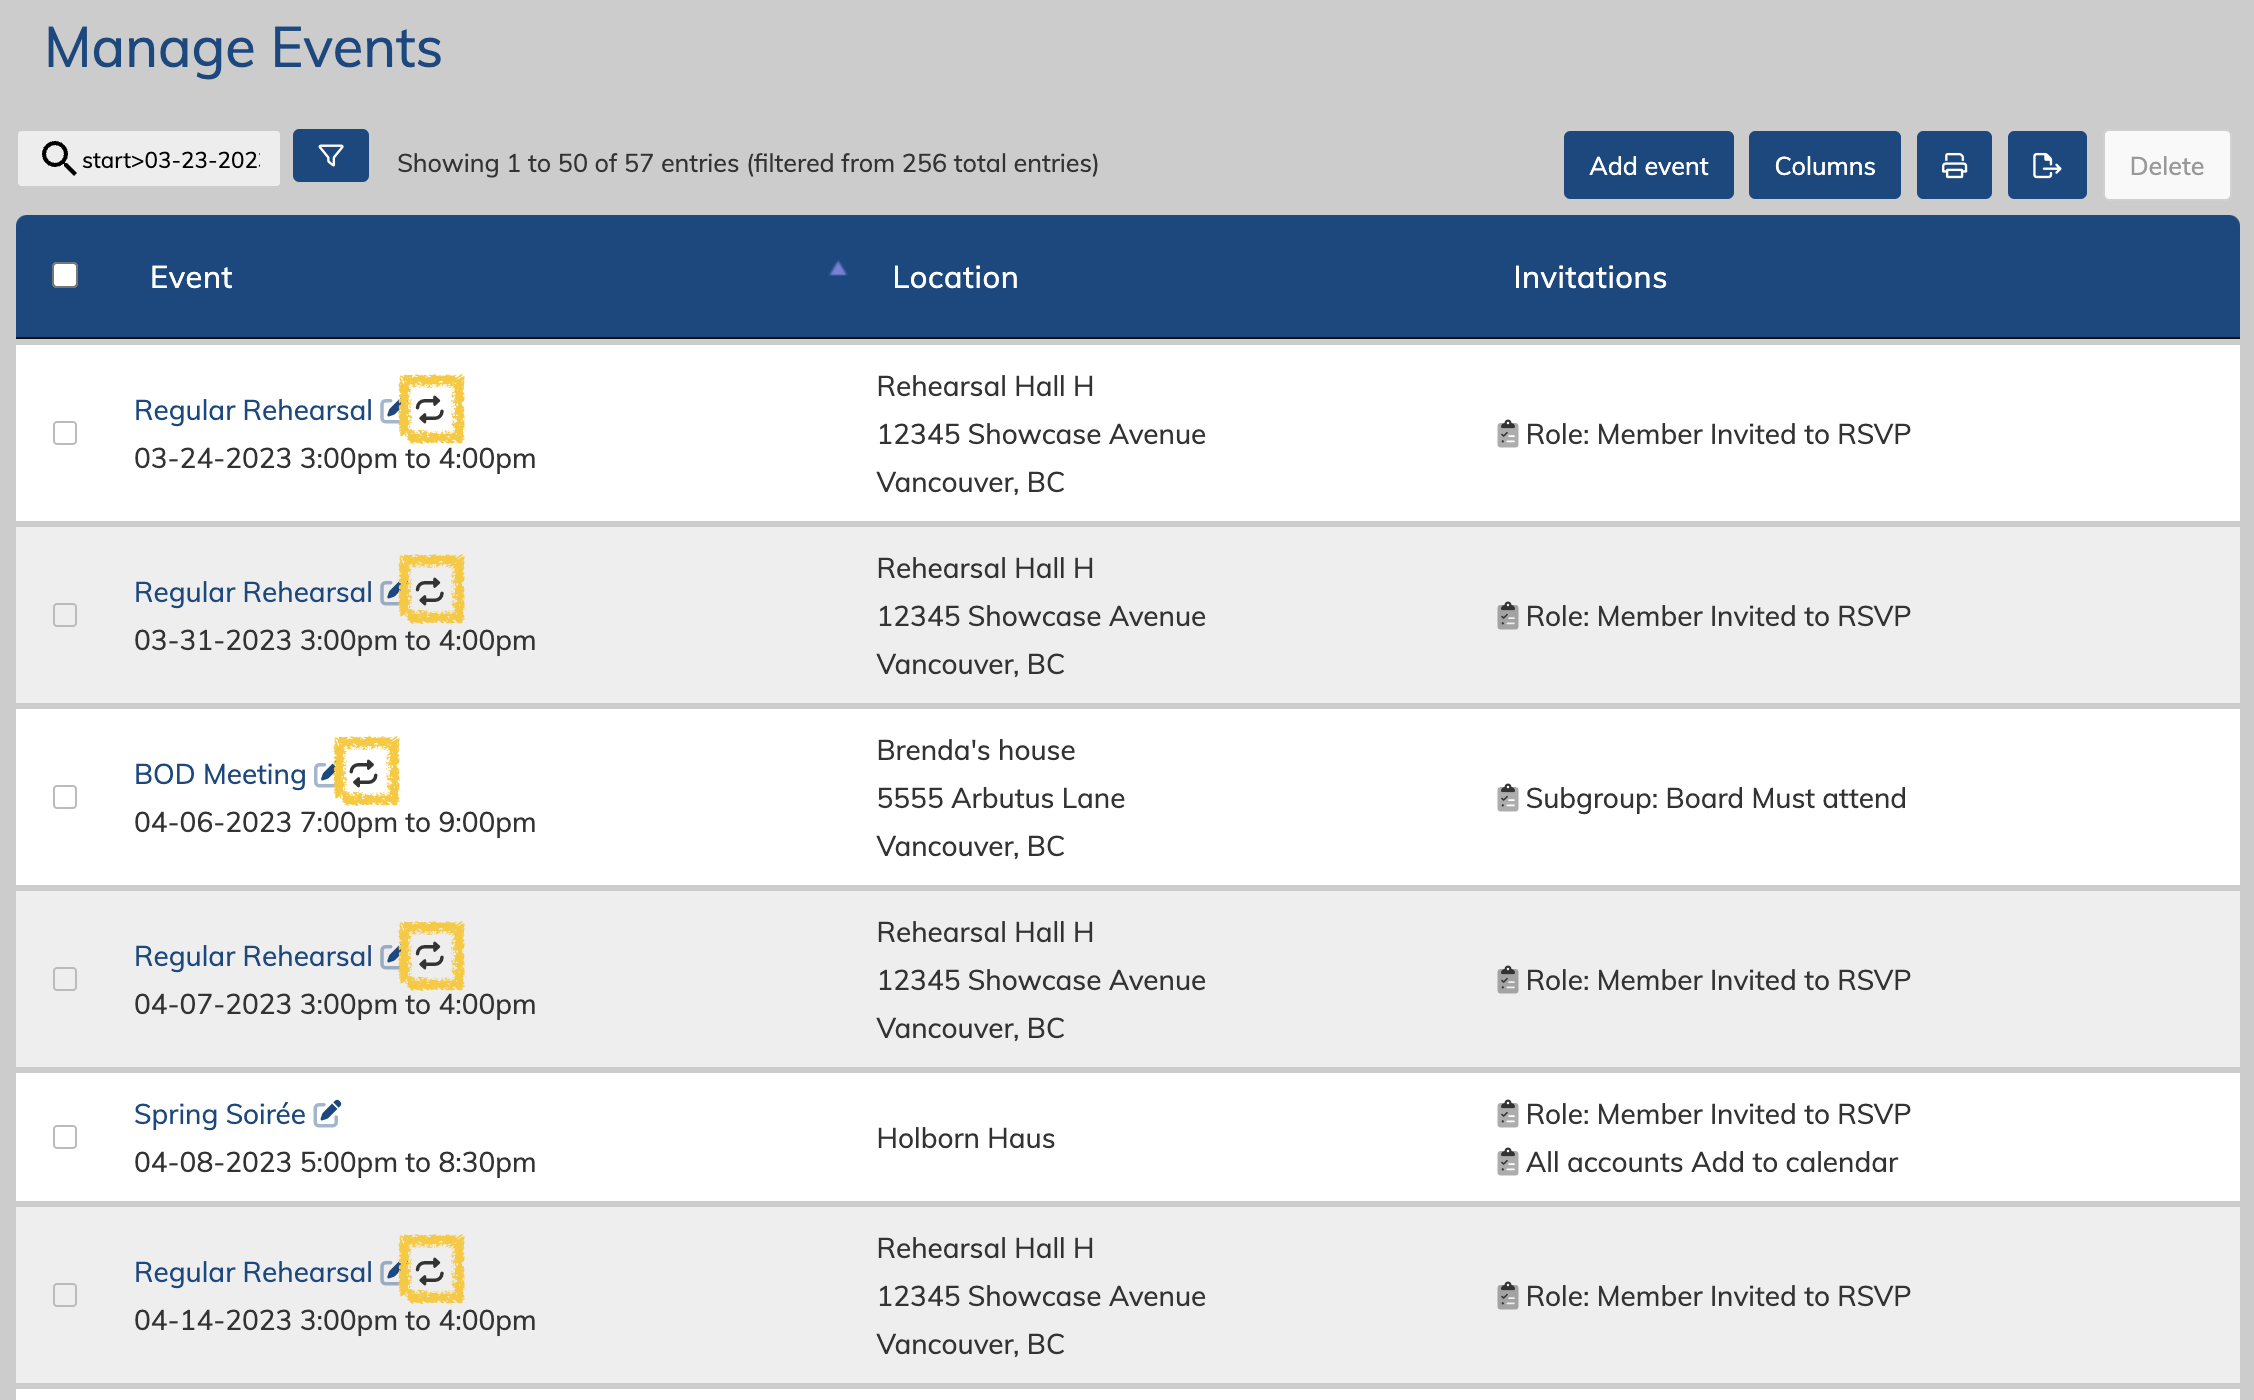
Events that are set to repeat are considered "part of a series". they can be spotted by the arrow symbol next to their title on the "Manage events" page.
You can copy any existing event by editing the event and then clicking the "copy" button on the top of the page.
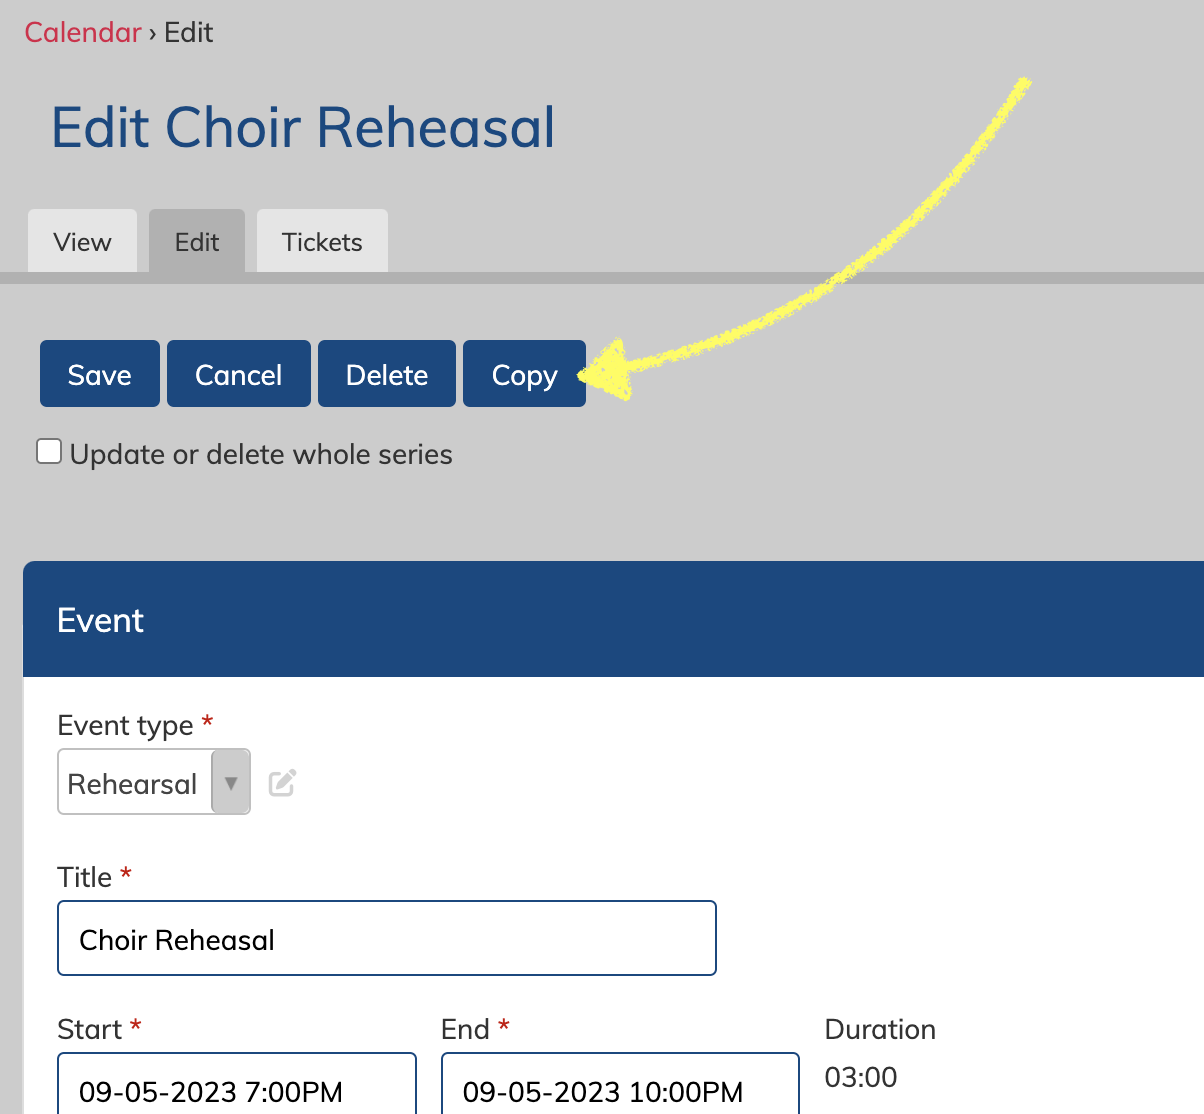
A copied event will be created with the title "Copy of ________" and will be visible on the "Manage Events" page. You can edit the event to adjust the title, date, time, invites, etc.
Events can be imported via CSV spreadsheet using the available import tools. These tools can only be accessed by Admins. Importing events can be useful if you have a wide and varied set of events with changing times and locations - otherwise, we find that more groups prefer to use the event repeat option to add their rehearsals.
To learn about importing events, click here.
Viewing & Managing Events
Viewing your own events
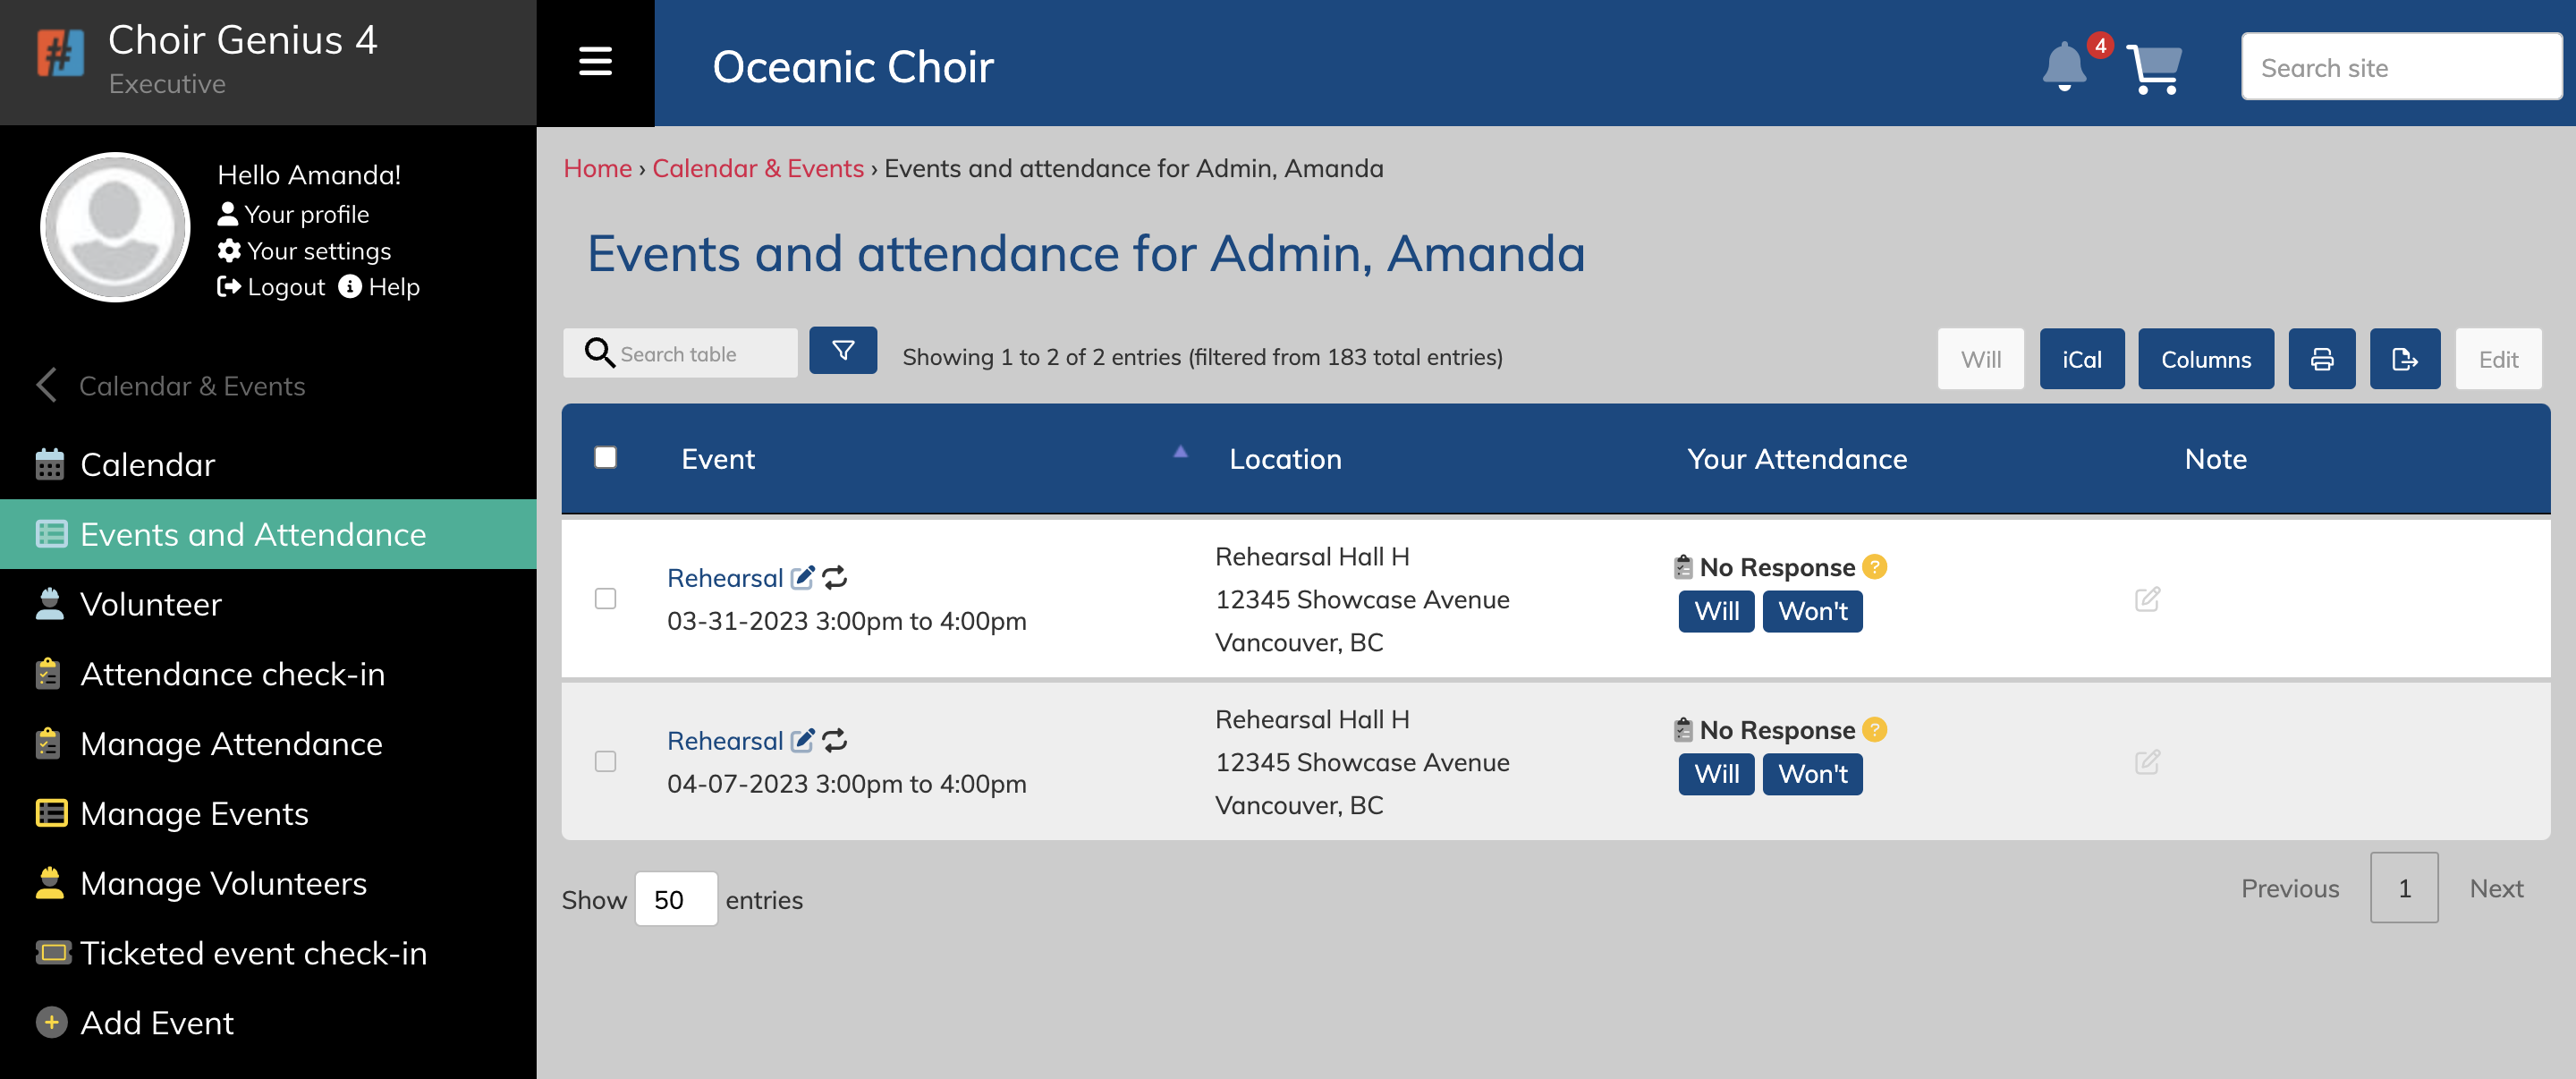
A user can view all events you are invited to attend in the menu under "Events & Attendance". There is also a monthly calendar view available under "Calendar" in the menu.
For Admins, Managers and Coordinators, these menu items appear as options under the item "Calendar & Events".
Manage all events
Admins, managers and coordinators are able to manage all events via the "Manage Events" page.
Calendar and Events > Manage Events
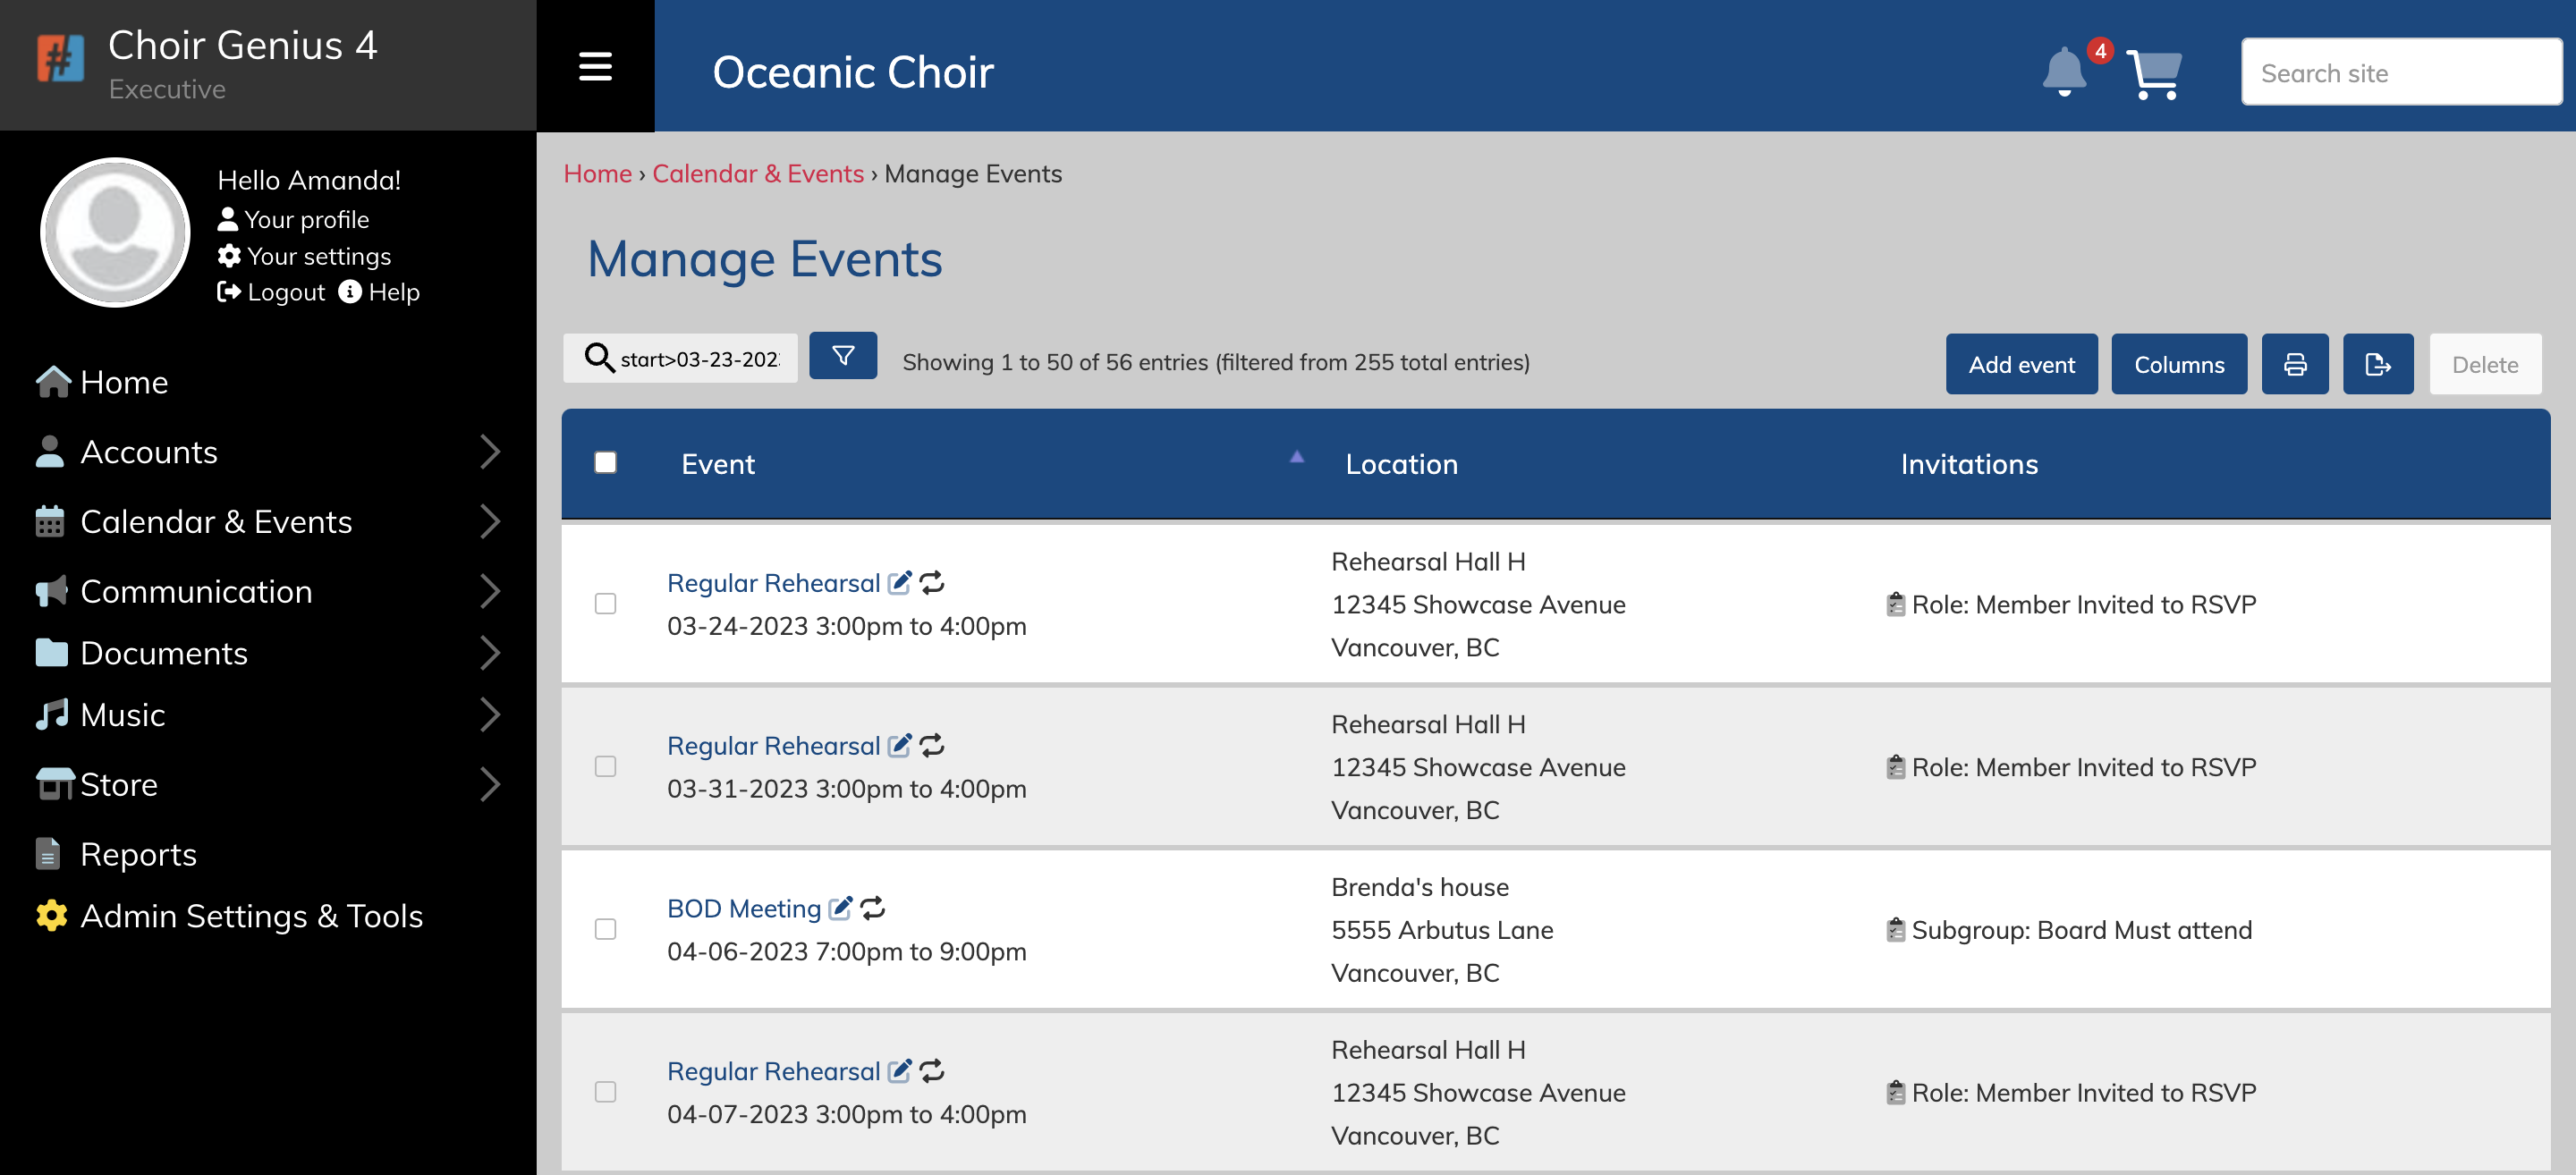
The search bar and the filter button on the top left of the table can be used to find specific events. The buttons on top right of the table can be used to add a new event, adjust the columns, print the visible table, export the visible table, or delete, respectively. The delete button will only turn blue and clickable one events are check-marked using the checkboxes down the left-hand side.
"Do I need to clear out old, stale events?"
No, there's no need to worry about clearing out old events - they will automatically roll off the calendar after the date passes.
Editing Events
Admins, Managers and coordinators can all edit events.
Single event
You can edit a single event by navigating to the event and viewing it, then clicking the 'edit" tab. If you're viewing the events on the "Manage events" page, you can also edit an event by clicking the small edit icon (a pencil) to the right of the event title.

Repeating events
Repeating events are considered to be part of a series, so any changes you make to one event in a repeating series can be made to all of them.
To update the other events in the repeating series, click the checkmark near the save/delete buttons at the top or bottom of the edit view.
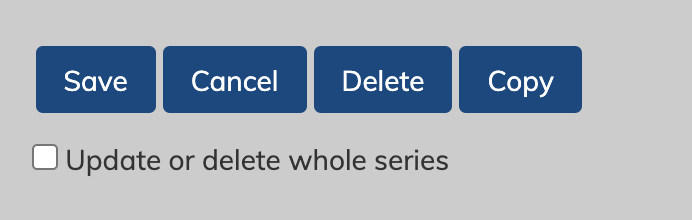
If you want to delete every event in a series, you must edit the very first event of the series - otherwise, it will only edit them from the select event and future events from that point.
Deleting Events
Admins, Managers and coordinators can all delete events.
On the event
first, edit the event, then click the "delete" button at the top or bottom of the page. If the event you are deleting is part of a repeating series, you will have a checkbox option to delete all of the events in the series just below the save and delete buttons.
It will ask you to confirm your action before deleting the event.
Please be careful - deleting events is permanent and cannot be undone.
On the "Manage events" page
You can delete multiple events at once via the "manage events" page. First, checkmark the box to the left of their title. You can multi-select rows by pressing cmd+click. When you've selected your events, click the blue "delete" button on the top right of the table. It will ask you to confirm your action before deleting the events.
Please be careful - deleting events is permanent and cannot be undone.
Event Customization Options
To view the various customization options for events, navigate to:
Admin Settings & Tools > Calendar and Event Settings
Configurable options include:
Event Colours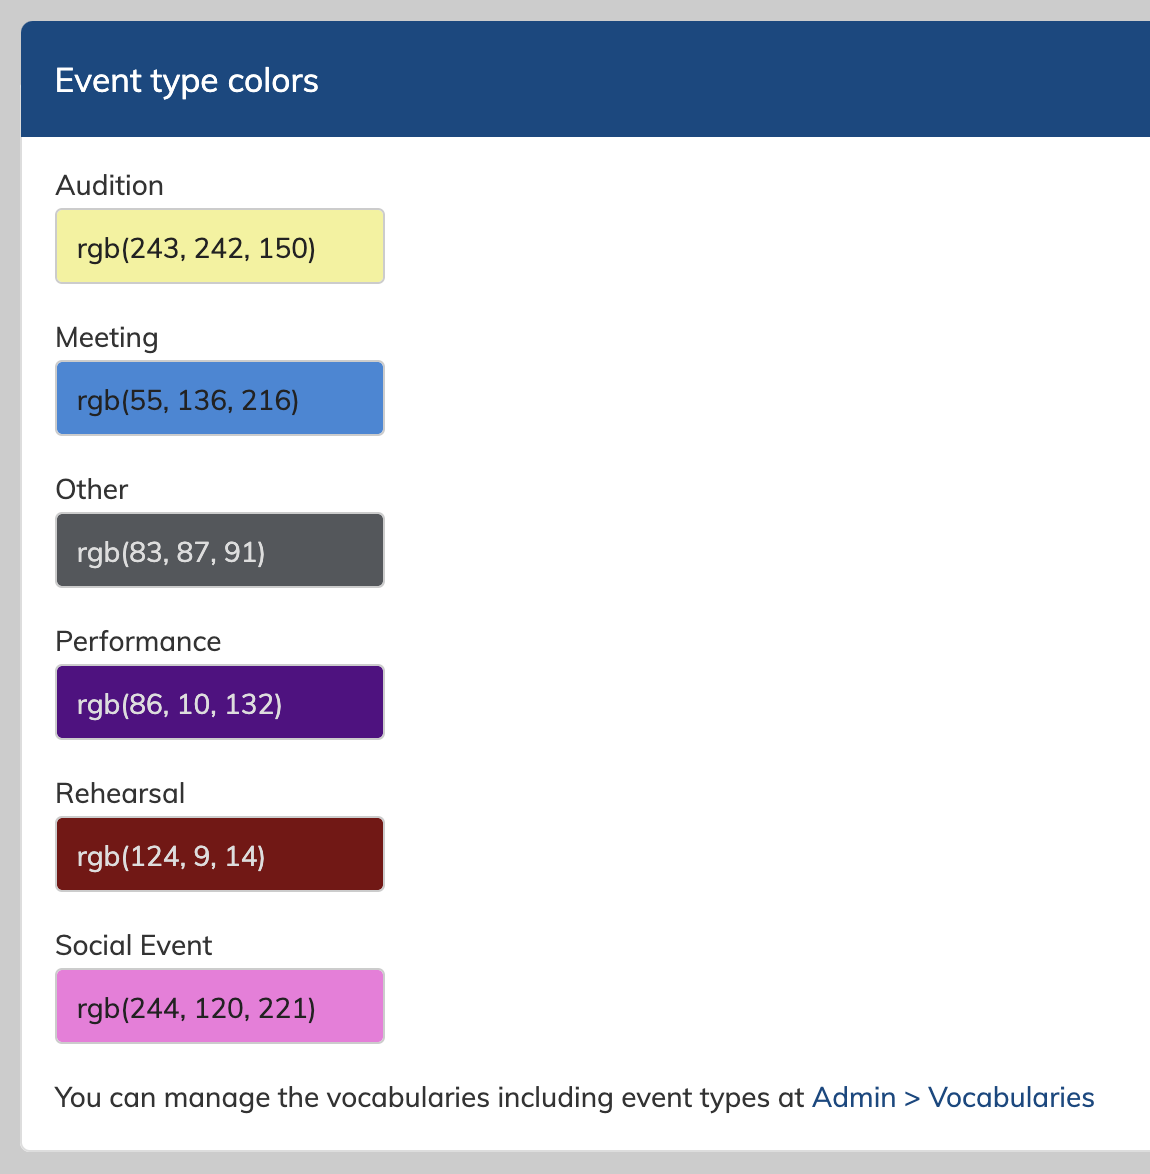 Choose the colours for your various event types. These colours appear on the calendar view. Click on the fields to select a colour using the colour-picker, or enter a RGB value.
Invitation Settings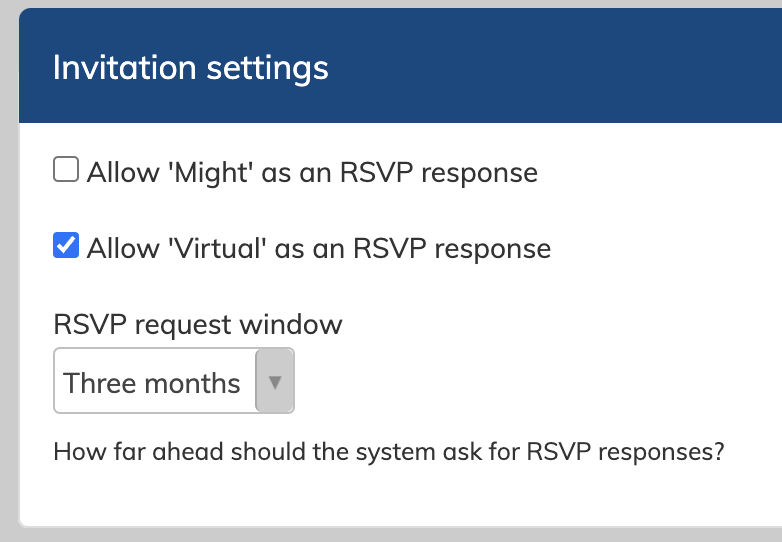 Select if users can RSVP as "might attend", or if you have a virtual attendance option for all events. Also, select either 3 or 6 months as your RSVP reminder notification window.
Covid Attestation settings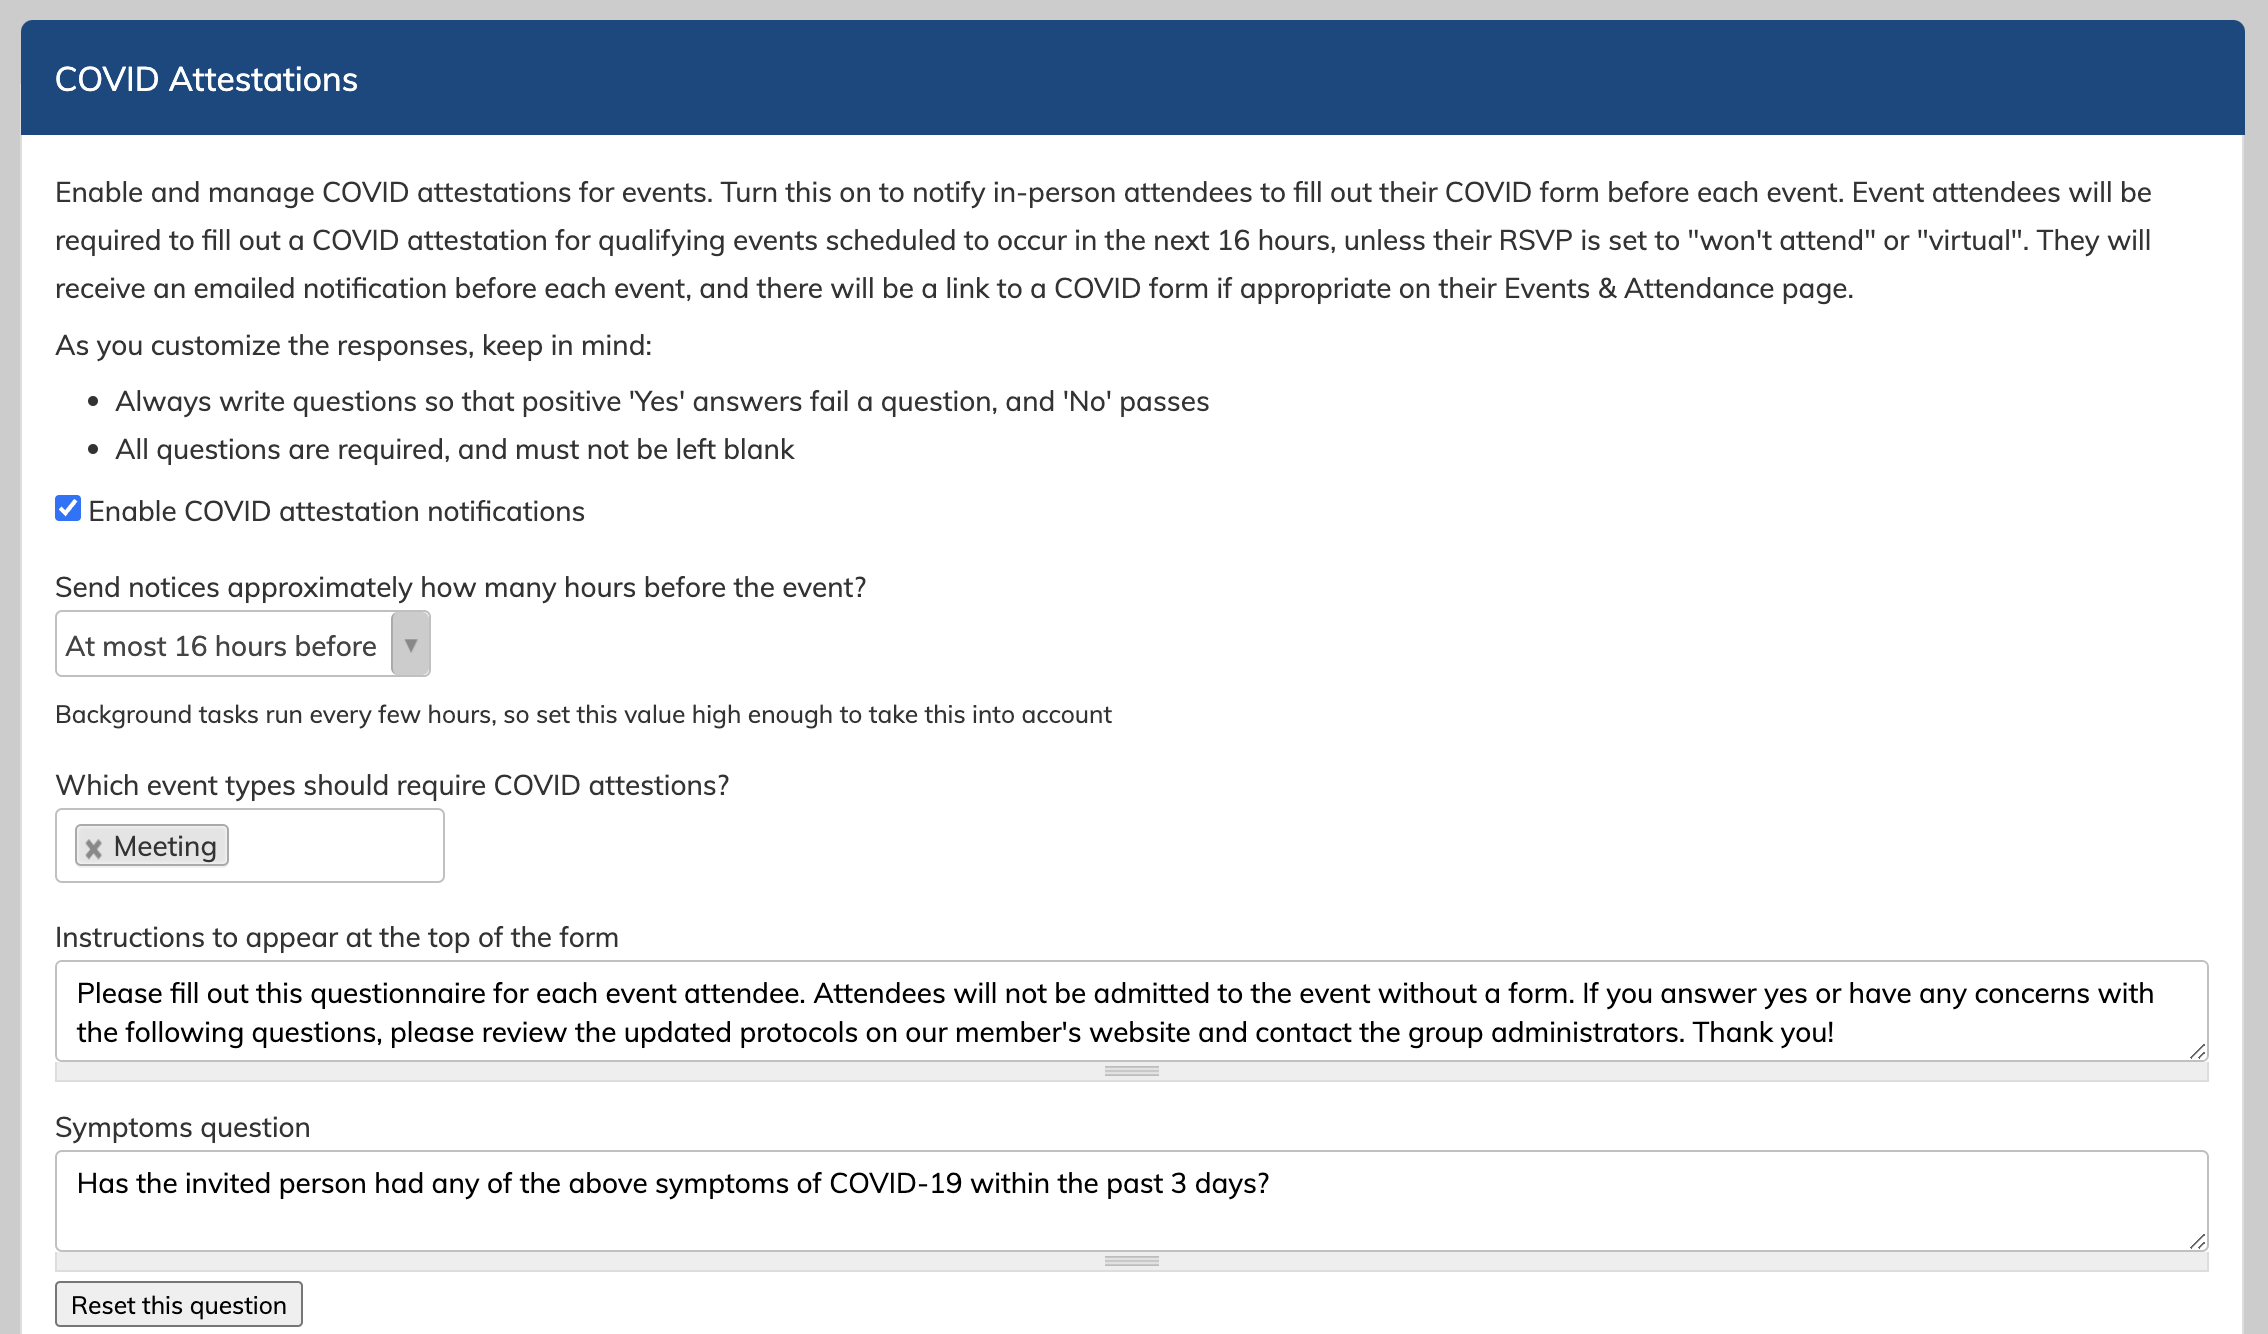 Enable or disable COVID attestation forms for events. You can also choose which events they're used for, and can alter the question wording if needed.
Notifications
Events have several notification options, which can be reviewed by admins on the notifications page:
Admin Settings & Tools > Notifications
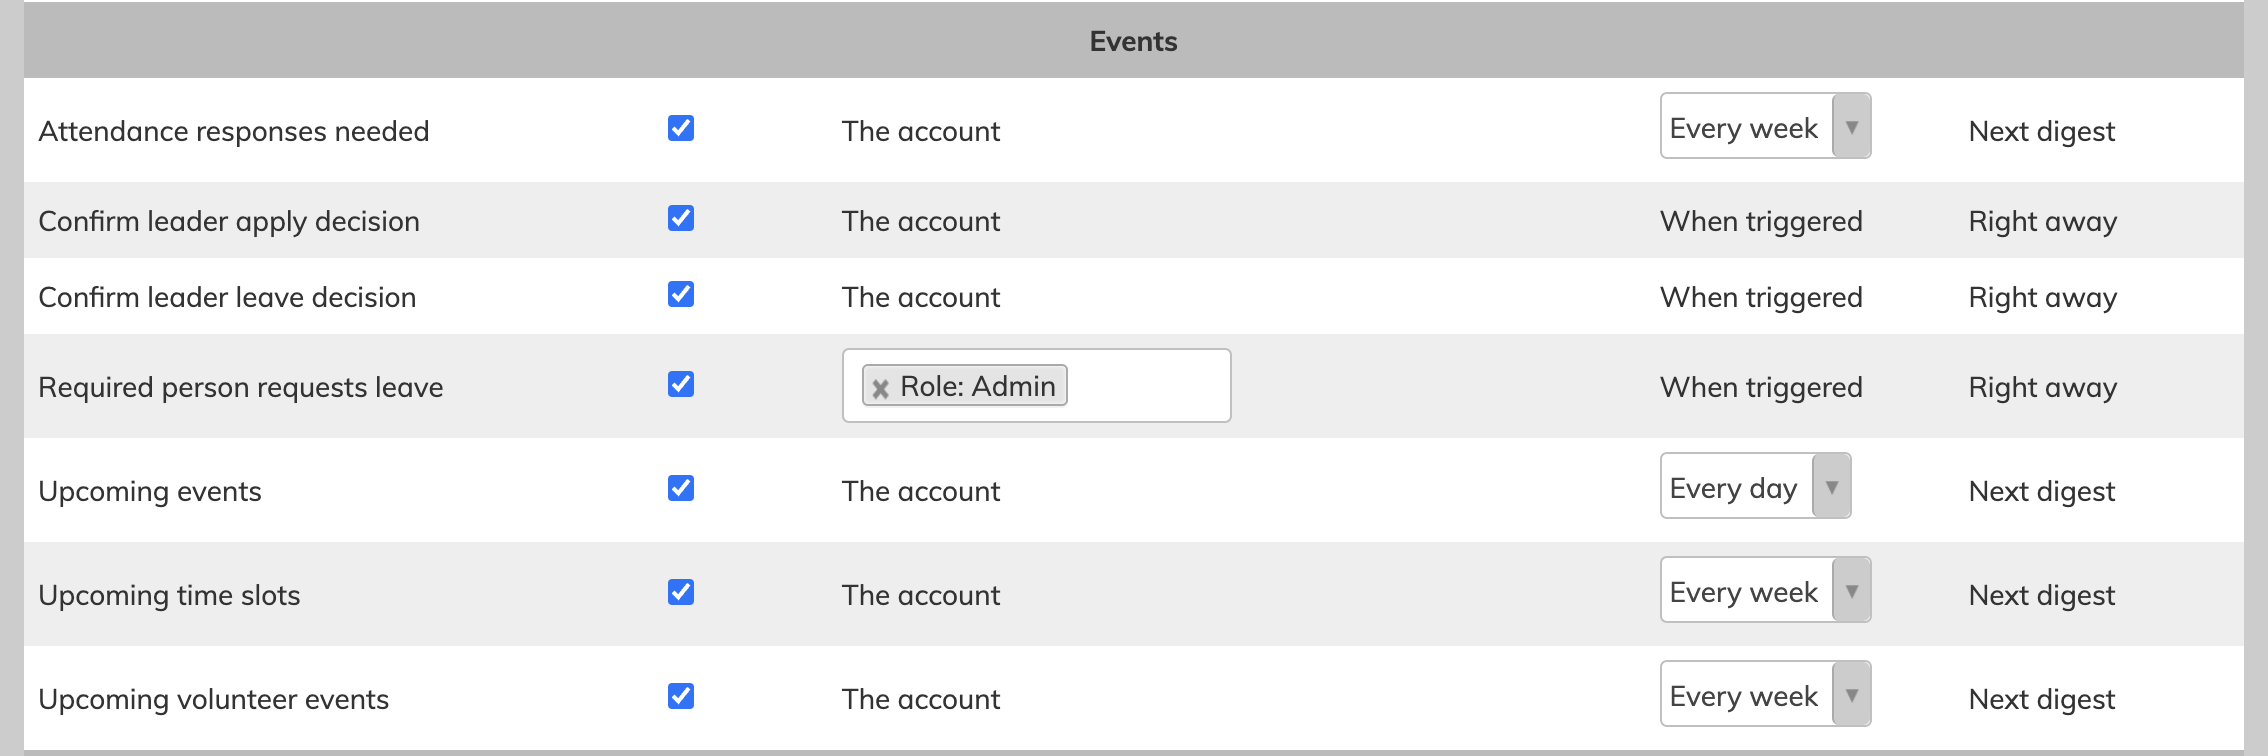
- Attendance responses needed: This notification is sent to accounts invited to attend an event, either as RSVP, Must attend, or Apply to attend. "Add to calendar" invites do not create notifications. You can set how often the system will send updates - every week, every 3 days, or every day. it will only send if attendance responses are needed. If a user has filled in all of their attendance responses for upcoming events, they will not receive this notification.
This notification has further settings (regarding how far in the future it looks) on the "Calendar and event settings" page (under Admin Settings & Tools). It can be set for 6 or 3 months. These notifications are sent as part of a digest summary - which avoids your members being sent several notices at once at you add events to the calendar at the start of each season. - Confirm leader apply decision: This notification is sent to a user who has applied to attend an event after an Admin/Manager/Coordinator has approved or denied their application. it asks them to confirm/acknowledge the decision.
- Confirm leader leave decision: This notification is sent to a user who has requested a leave for a Must Attend event invitation after an Admin/Manager/Coordinator has approved or denied their request. It asks them to confirm/acknowledge the decision.
- Required person requests leave: This notification is sent to a set of users (usually Admins, but you can add other account sets in the text area) when a "must attend" invitee has requested a leave of absence from an event. Please note: only Admins, managers and coordinators can approve/deny leaves. There is more information about that here.
- Upcoming events: this notification just send a reminder about upcoming events. It's useful if your events are mostly "add to calendar" type invitations. Many ground that use RSVP invitations shut off this more generic notification.
- Upcoming time slots: This notification reminds accounts of upcoming time slots they're signed up for.
- Upcoming volunteer events: This notification remind accounts of upcoming volunteer jobs they've signed up for.
To disable a notification type, uncheck the blue checkmark after the notification name.
Sending an email to an event attendance set
Sometimes, you may want to send an email to a specific group fo people related to an event, but a predefined account set is too broad.
Admins, coordinators and managers can choose to send an email message to an event attendance set instead.
Navigate to:
Communication > Send an email to a group
On this page, you can use the "Send this email to" dropdown to select "to an event attendance set", which will then expand to give you more options to choose an upcoming event, and a subset of invitees.
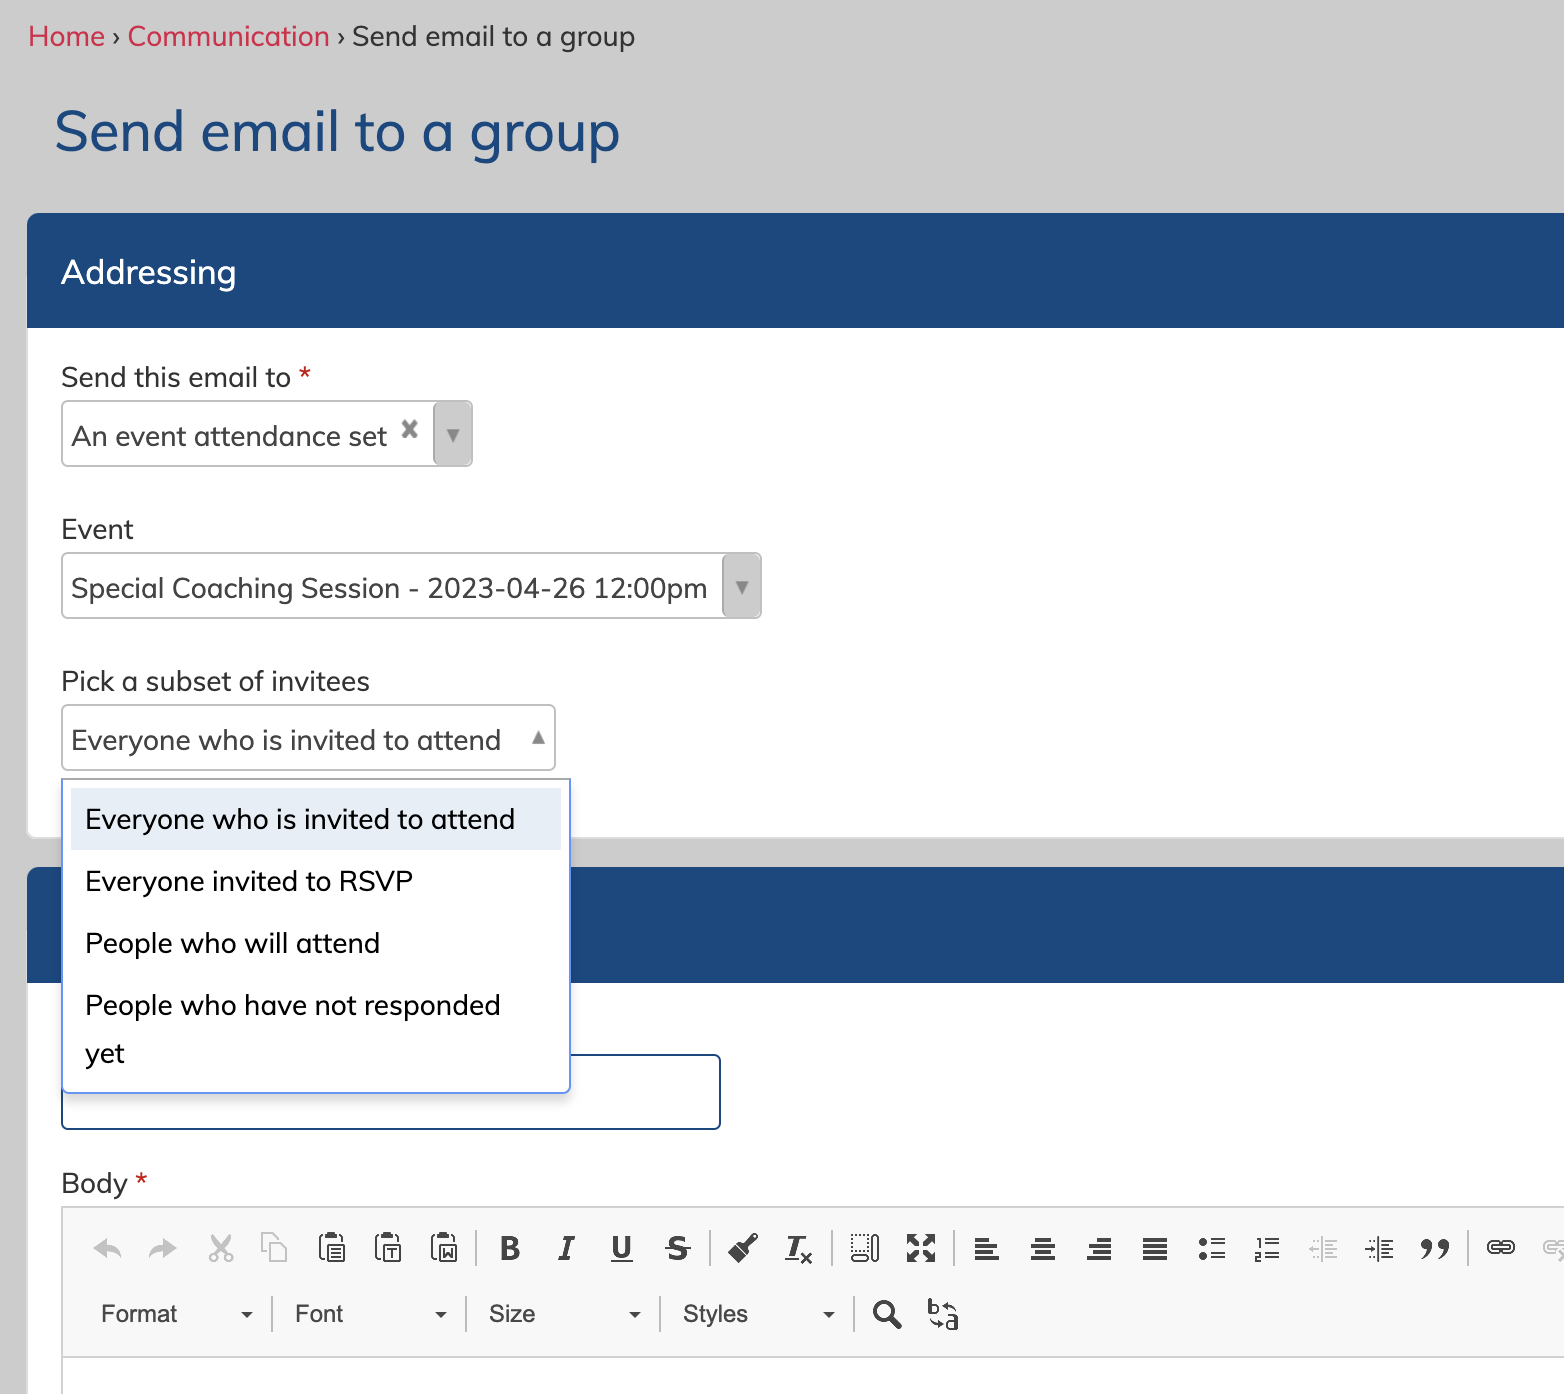
You are given the following subsets:
- Everyone who is invited to attend - These are all invitees to the event, regardless of invite type (rsvp, must attend, apply, add to calendar)
- Everyone invited to rsvp - These are all accounts invited to RSVP to the event only.
- People who will attend - These are all invitees who have said they plan to attend (rsvpd "will"), must attend (and have confirmed), and apply to attend (and have been accepted)
- People who have not responded yet - any invitees still showing "no response" on their attendance plan status for the event.
Select your subset, and write a subject line, and then write your email message in the field below. The email can contain basic html formatting and attachments.